21
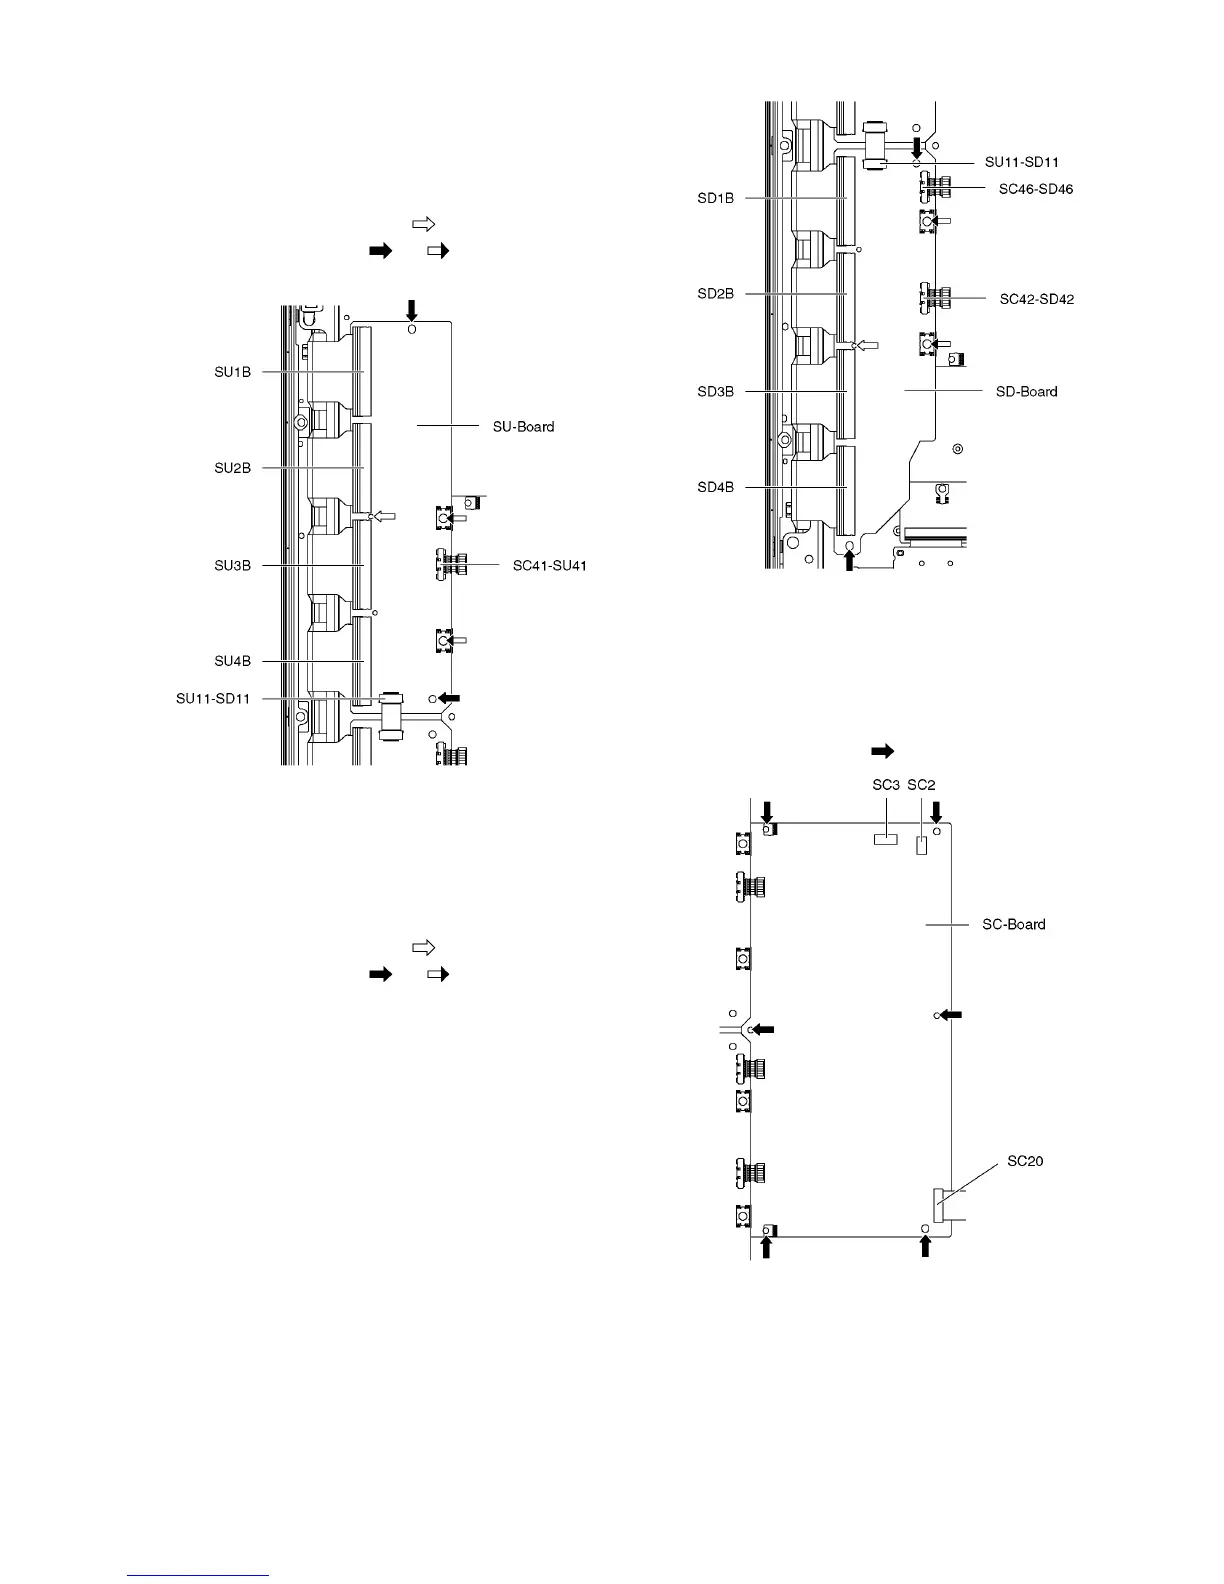
8.9. Remove the SU-Board
1. Remove the flexible cables (SU1B, SU2B, SU3B and
SU4B) connected to the SU-Board.
2. Remove the flexible cable (SU11-SD11) and the bridge
connector (SC41-SU41).
3. Remove the molding prop (×1 ).
4. Remove the screws (×2 , ×2 ) and remove the SU-
Board.
8.10. Remove the SD-Board
1. Remove the Control button unit. (See section 8.7.)
2. Remove the flexible cables (SD1B, SD2B, SD3B and
SD4B) connected to the SD-Board.
3. Remove the flexible cable (SU11-SD11) and the bridge
connectors (SC42-SD42 and SC46-SD46).
4. Remove the molding prop (×1 ).
5. Remove the screws (×2 , ×2 ) and remove the SD-
Board.
8.11. Remove the SC-Board
1. Remove the SU-Board and SD-Board. (See section 8.9.
and 8.10.)
2. Unlock the cable clampers to free the cable.
3. Disconnect the connectors (SC2 and SC3).
4. Disconnect the flexible cable (SC20).
5. Remove the screws (×6 ) and remove the SC-Board.
 Loading...