24
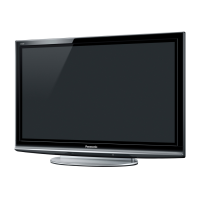
8.18. Remove the S-Board
1. Remove the Cabinet assy. (See section 8.17.)
2. Remove the S-Board shield case.
3. Remove the screws (×2 ) and remove the S-Board
unit.
4. Disconnect the connector (S1).
5. Remove the Power button.
6. Remove the screw (×1 ) and remove the S-Board.
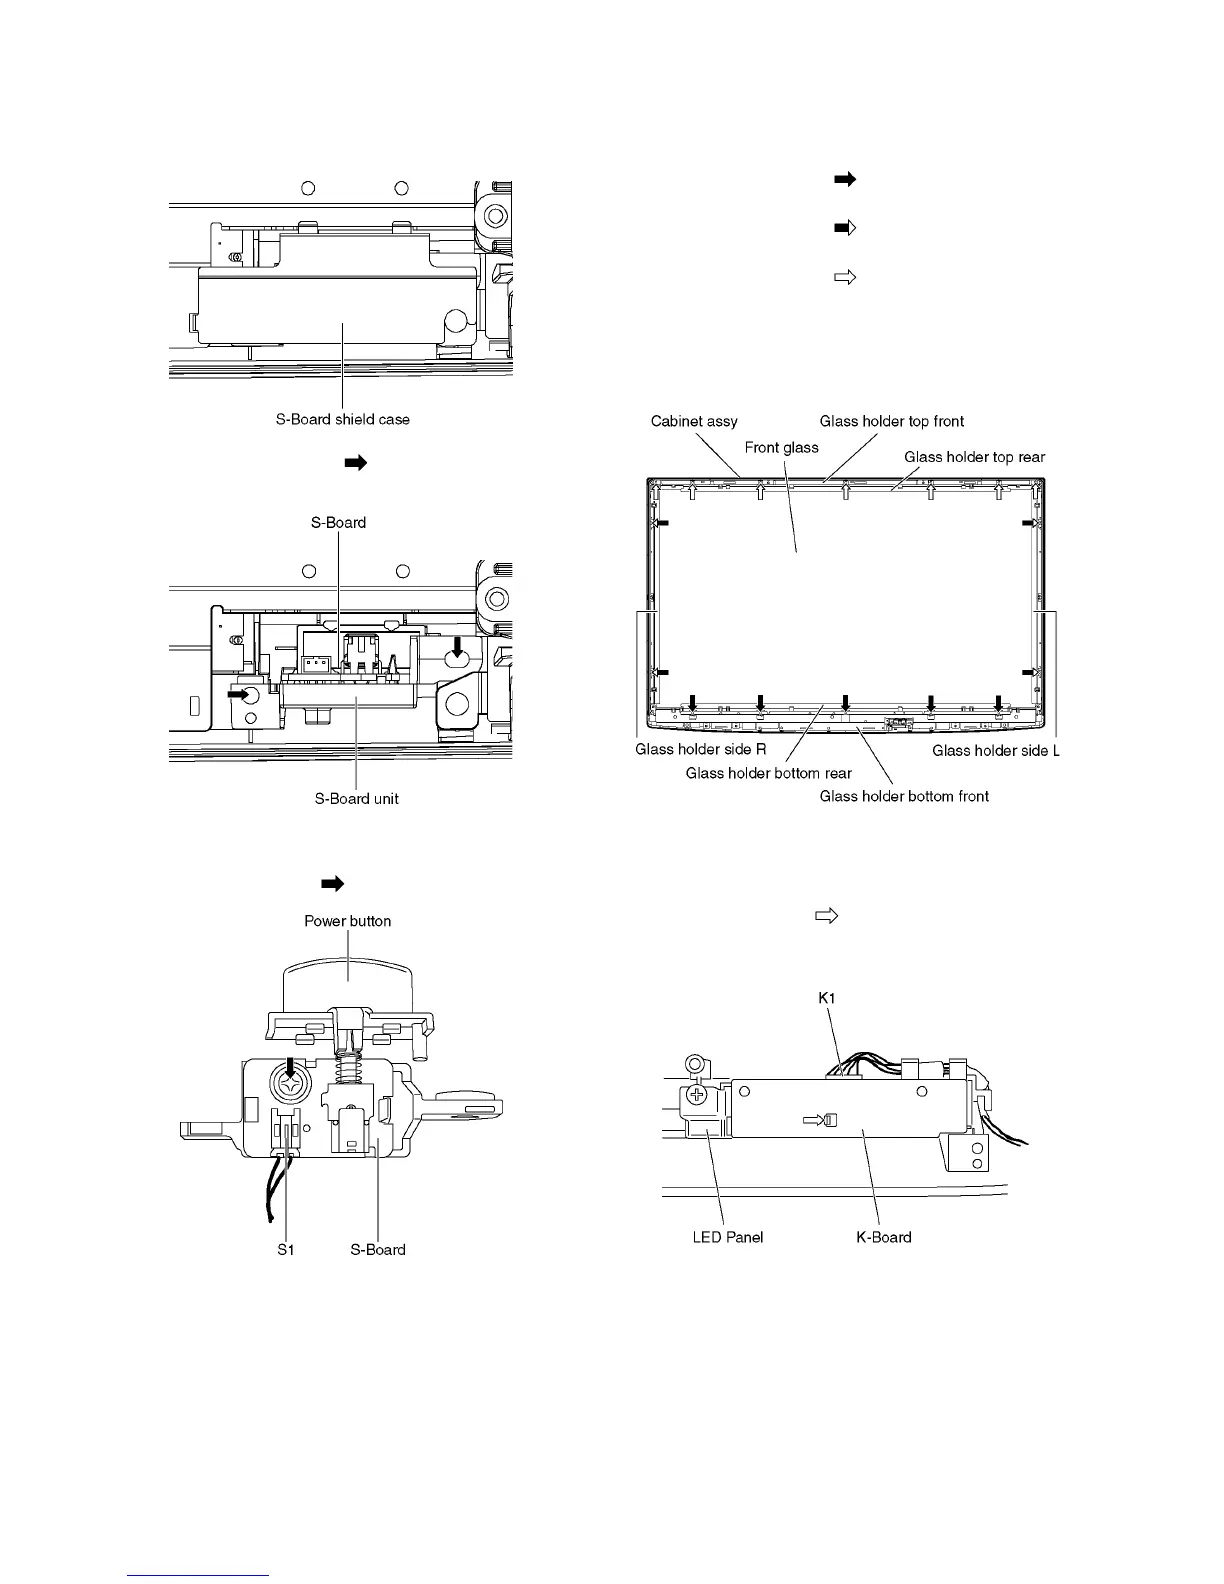
8.19. Remove the Front glass
1. Remove the Cabinet assy. (See section 8.17.)
2. Remove the S-Board. (See section 8.18.)
3. Remove the screws (×5 ).
4. Remove the Glass holder bottom rear.
5. Remove the screws (×4 ).
6. Remove the Glass holder side (L, R).
7. Remove the screws (×7 ).
8. Remove the Glass holder top rear.
9. Remove the Front glass.
10. Remove the Glass holder bottom front and Glass holder
top front.
8.20. Remove the K-Board
1. Remove the Front glass. (See section 8.19)
2. Remove the claw (×1 ).
3. Disconnect the connector (K1) and remove the K-Board
from LED Panel.