7
Installation
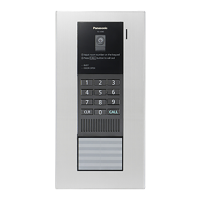
Installing the lobby station
Installing the power supply unit on the wall
A DC cable is not included. You need to prepare one. Refer to “Wire type and distance” (page 11).
Installing the ush mounted box in the wall
(Pitch of xing screw)
(Pitch of xing screw)
(Aperture dimension)
148 mm
136 mm
162 mm
280 mm
326 mm
340 mm
<Side view>
80 mm
340 mm
Drilling dimension of wall surface for the ush mounted box
Open the knockout holes of the ush mounted box, and
put the wires from each room and the door opener, and the
DC cable from the power supply unit through the holes.
Mount the box in the wall.
Knockout holes
Wall
DC cable connected to
the power supply unit
Wires connected to
rooms and the door
opener
About the installation location
LThe AC cable plug is used as the main disconnect device.
Ensure that the power outlet is installed near the product
and is easily accessible.
LA readily accessible disconnect device shall be
incorporated external to the equipment.
– External disconnect device must be certied and have a
creepage and clearance distance of 3 mm or more.
Precautions for wiring
LMake sure that the power supply unit is unplugged before
performing any wiring work.
LAlways connect AC or DC cables to the appropriate
connector or connection terminal.
LTo prevent the DC cable from disconnecting and to prevent
electric shock, secure the DC cable using the cable binder
(accessory) and attach the cable cover.
How to connect the AC cable and DC cable:
Connect the power supply unit (accessory), the AC cable
(accessory), and a DC cable (locally procured).
B
Power Supply Unit (VL-PS241) side: 1 25 mm 2 7 mm
Lobby Station (VL-V591) side: 1 52 mm or more 2 12 mm
Front view
H
*1 Make sure that there are no bare wires exposed outside
the product.
Power supply unit (with cable cover removed)
K
Bottom viewTop view
k DC cable binder hole
1 Strip the DC cables as follows:
DC cable (1, 2)
2 Remove the screws (3) and then remove the cable
cover (4).
3 Connect the AC cable (5) (accessory) to the AC IN
connector (9) on the top of the power supply unit. Next,
connect the DC cable (7) (locally procured) to the DC
OUT terminal (j) on the bottom of the power supply
unit, and then secure the wires by tightening the screws
(6).
LRecommended torque: 0.45 N·m {4.6 kgf·cm}
Insert the cables rmly all the way into the
connector and terminals. If the cables are not
inserted all the way, heat may be generated.
CAUTION
4 Use the cable binder (8) (accessory) to secure the DC
cable (7) (double-coated area) to the power supply
unit.
5 Make sure to replace the cable cover (4).
Wall mounting
Attach the power supply unit to the wall securely.
1 Screws (accessory)
x
2
VL-V591_IG_en.indd 7 2017/09/22 19:02:57
 Loading...