


D
danielle39Sep 23, 2025
Why Panasonic Network camera live indicator never lights up?
- CcbryantSep 23, 2025
Check if 'Off' is selected for 'Link/Access LED' on the 'Basic' page. If it is, select 'On' or 'On(Access)' for the indicator setting.
Why Panasonic Network camera live indicator never lights up?
Check if 'Off' is selected for 'Link/Access LED' on the 'Basic' page. If it is, select 'On' or 'On(Access)' for the indicator setting.
What to do if the Panasonic Security Camera live indicator blinks orange?
If the live indicator on your Panasonic Security Camera lights up or blinks orange when powered on, ensure the LAN cable is properly connected. Also, verify that your hub or router is functioning correctly. If the issue persists, try replacing the LAN cable with a different one.
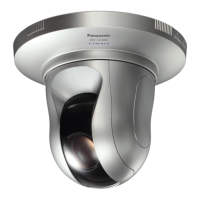
Why is the live indicator blinking orange on my Panasonic WV-SC385?
If the live indicator on your Panasonic Security Camera blinks orange approximately every 2 seconds, the router might not be powered on. Turn on the router and wait for the connections to be established. Also, perform the port forwarding setting for the router. You may need to refer to the operating instructions of the router to enable the UPnPTM function.
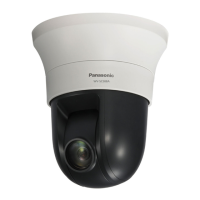
How to fix Panasonic WV-SC385 not moving to preset positions?
If your Panasonic Security Camera isn't moving to the preset positions accurately, try executing the position refresh function. If that doesn't work, reconfigure the preset positions.
Why is the live indicator red on my Panasonic WV-SC385 Security Camera?
If the live indicator on your Panasonic Security Camera is red, the write protect switch of the inserted SDHC/SD memory card may be set to "LOCK". Unlock the write protect switch. If that's not the problem, use an SDHC/SD memory card formatted on the camera or replace the card with a normal one.
Why Panasonic Network camera live indicator lights red?
Check if the write protect switch of the inserted SDHC/SD memory card is set to 'LOCK'; if so, unlock it. Also, ensure the SDHC/SD memory card has been formatted on the camera, not a PC. If the card is faulty, replace it with a normal one.
Why does Panasonic Network camera live indicator keeps on blinking orange approx. in 2 seconds intervals?
This issue may occur due to a UPnPTM error because power is not supplied to the router, so turn on the router and wait for connections to establish. An error may have occurred during the port update by the UPnP function. If your router does not support the UPnP function, perform port forwarding settings and deactivate auto port forwarding for the camera. Also, ensure the UPnP function of the router is enabled in the router settings.
What to do if Panasonic Network cameras do not move to the preset positions accurately?
If the preset positions become inaccurate during use, you can correct them by executing the position refresh function. You can also set 'Position refresh' for the created schedule to correct the camera position periodically. If these options do not work, reconfigure the preset positions.
What to do if my Panasonic WV-SC385 starts panning unpredictably?
If your Panasonic Security Camera starts panning unpredictably, check the exogenous noise level around the camera.
Why does the live indicator light or blink orange on my Panasonic Security Camera when I turn it on?
If the live indicator on your Panasonic Security Camera lights or blinks orange upon turning it on, make sure the LAN cable is properly connected. Also, verify that the hub or router you are using is functioning correctly. If the issue persists, try replacing the cable with a different one.
Steps to view live video from a single network camera on a PC using a web browser.
Explanation of the user interface elements and controls on the camera's live view page.
Guide to displaying images from multiple cameras simultaneously on a multi-screen setup.
Guide to accessing and viewing camera images on a cellular phone.
Instructions for viewing camera images on mobile terminals like smartphones and tablets.
Overview of different alarm types that can trigger camera actions and notifications.
Configuration of camera responses to triggered alarms, such as saving images or sending notifications.
Settings for automatically sending alarm images to an FTP server when an event occurs.
Configuring the camera to send images to an FTP server at scheduled intervals.
Details on the interface and controls for playing back recorded images from the SD memory card.
Procedure for downloading H.264 video data recorded on the SD card to a PC.
Overview of security features like user authentication, port restriction, and HTTPS encryption.
Steps to access the camera's configuration menu via a web browser on a PC.
Guide on navigating and using the various settings and options within the camera's setup menu.
Explanation of the main components and tabs within the camera's setup menu interface.
Essential initial configurations including camera title, time, date, and SD card settings.
Detailed settings for managing the SD memory card, including format, recording, and capacity.
Instructions for copying images from the SD card to a PC using network access.
Configuration settings for system logs, including alarm, manual/schedule, and FTP error logs.
Setting the image aspect ratio for JPEG and H.264 formats, affecting display and compatibility.
Configuration of JPEG image parameters like refresh interval, capture size, and quality for live view.
Settings for H.264 image transmission, including bit rate, quality, and refresh interval.
Configuration options for MPEG-4 image transmission, covering various quality and transmission parameters.
Settings for camera operations like home position, self-return, and auto tracking.
Management of image quality, preset positions, auto pan, patrol, and privacy zones.
Entering IP addresses or hostnames to register cameras for multi-screen display.
Setting up actions for terminal alarms, VMD, and command alarms.
Defining camera responses to specific alarm types, such as preset movement or auto track.
Settings for transmitting alarm images to an FTP server, including directory and file naming.
Configuring H.264 recording settings for alarms, including pre-alarm, post-alarm duration, and image quality.
Setting up alarm output terminals, including trigger type, output type, and pulse width.
Setting up Video Motion Detection (VMD) areas for motion detection and alarm triggering.
Setting up email notifications for alarms, diagnostics, and SD card status.
Setting up XML notifications for image recognition events like face detection or auto track.
Managing user access and authentication methods for controlling camera access.
Configuring host authentication to restrict access based on IP addresses.
Managing priority streams to ensure image quality and refresh rates during concurrent user access.
Configuring SMTP and POP server settings for sending and receiving email notifications.
Setting up FTP server details for transmitting images and alarm data.
Configuring NTP server settings for accurate time synchronization.
Basic network configuration including IP address, subnet mask, gateway, and DNS.
Comprehensive guide to configuring HTTPS settings for secure camera access.
Steps to access the camera securely using the HTTPS protocol and install the security certificate.
Setting up DDNS services like Viewnetcam.com for remote access via domain names.
Setting up SNMP for network monitoring and camera status management.
Configuring scheduled image transmissions to an FTP server.
Setting schedules for periodic image transmissions to an FTP server.
Manual steps to connect the camera to a wireless network by configuring basic settings.
Using WPS for automatic wireless connection setup between camera and router.
Configuring Wireless QoS to prioritize data transmission for H.264 RTP streams.
Checking the status of the wireless connection, including signal strength and SSID.
Assigning actions (Off, Alarm, VMD, Access, Recording, Position Refresh) to specific schedule time slots.
Viewing and analyzing system logs for troubleshooting and monitoring camera status.
Procedure for upgrading the camera's firmware to the latest version.
Options for resetting camera settings to default or rebooting the device.
Introduction to the CD launcher utility for installing software and viewing manuals.
Guide for installing the Panasonic IP Setting Software for camera network configuration.
Steps for installing the Viewer software required to display camera images on a PC.
Using the IP Setting Software for initial network configuration of the camera.
Troubleshooting SMTP errors, including authentication and server connection issues.
Troubleshooting FTP errors, including file transfer, passive mode, and login issues.
Common issues and solutions for problems accessing the camera via a web browser.
Troubleshooting remote access issues when using the Viewnetcam.com service.
Troubleshooting problems accessing the camera from mobile devices.
Diagnosing and fixing issues where no image is displayed on the PC or browser.
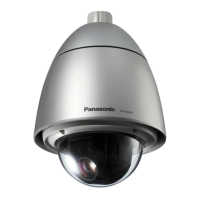
| Type | - |
|---|---|
| PTZ control | Yes |
| Certification | UL, FCC, CE, C-UL, GOST, DOC |
| Placement supported | Indoor & outdoor |
| Connectivity technology | Wired |
| Form factor | Dome |
| Mounting type | Ceiling |
| Product color | Silver |
| Total megapixels | 1.3 MP |
| Maximum resolution | 1280 x 960 pixels |
| Supported video modes | 720p |
| Video formats supported | H.264, M-JPEG, MPEG4 |
| Analog signal format system | NTSC, PAL |
| Supported graphics resolutions | 1280 x 720 (HD 720), 640 x 480 (VGA), 800 x 600 (SVGA) |
| Pan range | 0 - 350 ° |
| Pan speed | 300 °/sec |
| White balance | ATW |
| Tilt angle range | -30 - 90 ° |
| Angle of rotation | 360 ° |
| Camera shutter type | Electronic |
| Camera shutter speed | 1/10000 s |
| Minimum illumination | 0.06 lx |
| Sensor type | MOS |
| Optical sensor size | 1/3 \ |
| Digital zoom | 12 x |
| Optical zoom | 18 x |
| Focal length range | 4.7 - 84.6 mm |
| Normal focusing range | 1.5 m |
| Compatible memory cards | SD, SDHC |
| Maximum memory card size | 32 GB |
| Cabling technology | 10/100Base-T(X) |
| Supported network protocols | TCP/IP, UDP/IP, HTTP, HTTPS, RTSP, RTP, RTP/RTCP, FTP, SMTP, DHCP, DNS, DDNS, NTP, SNMP, UPnP, IPv4, Ipv6 |
| Compliance industry standards | IEEE 802.3, IEEE 802.3u |
| Interface | RJ-45 |
| Ethernet LAN (RJ-45) ports | 1 |
| Signal-to-Noise Ratio (SNR) | 52 dB |
| DC output voltage | +12V |
| Power consumption | 1000 mA |
| Power source type | PoE |
| Power consumption (typical) | 12 W |
| Operating temperature (T-T) | -10 - 50 °C |
| Operating relative humidity (H-H) | 0 - 90 % |
| Width | 115 mm |
|---|---|
| Height | 155 mm |
| Weight | 900 g |