32
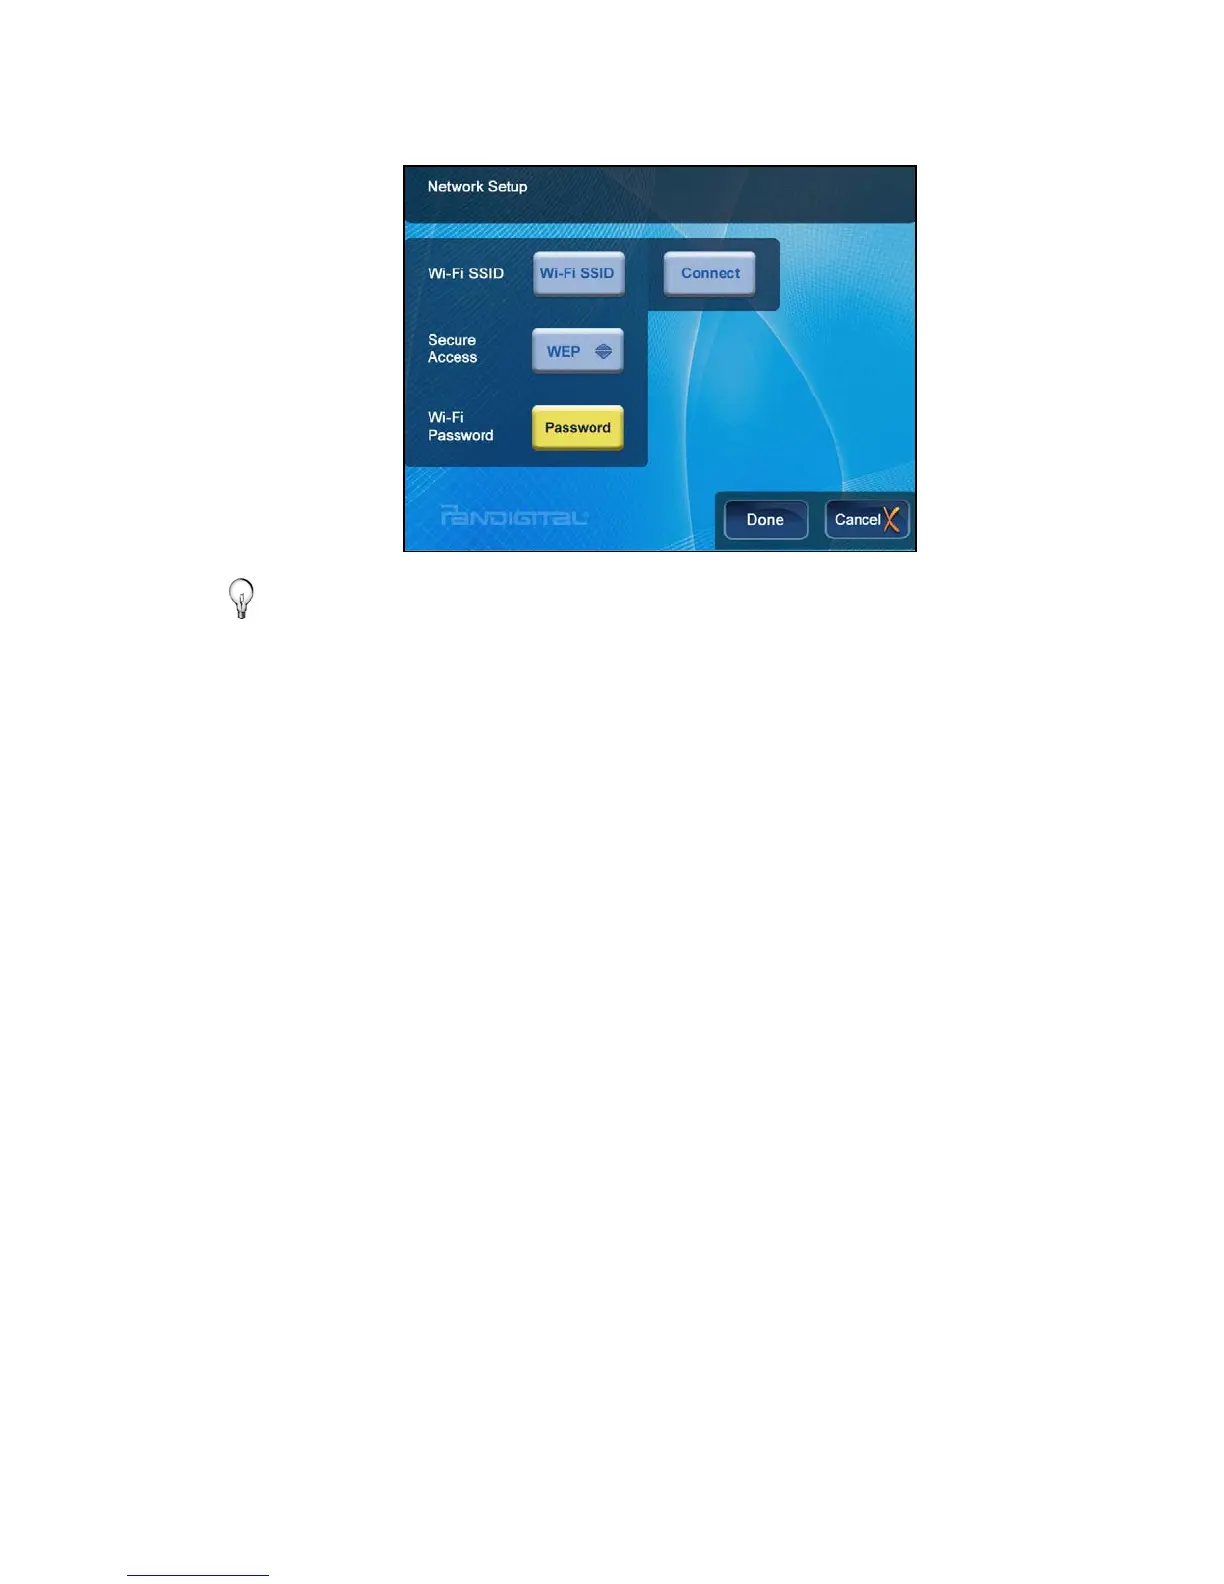
5. Select the desired Wi-Fi network to which you want to connect.
The network screen will be displayed, similar to this example:
TIP: If your wirless network is ‘hidden’, the scan will not list it as
an available network. Select one of the Network SSID
buttons to manually enter the Network ID.
6. If necessary, change the
Secure Access type by pressing
ENTER on the option button multiple times to select the
appropriate security type.
7. Select
Password, and then use the virtual keyboard to enter
your
Wi-Fi Password. (The ID and password are case sensitive;
use the ‘ABC/abc’ ‘NUM’ and ‘SYM’ keys as needed for correct
characters.)
8. Select
Done on the virtual keyboard.
9. Select
Connect. Do not press any other keys until the
connection completes (20-30 seconds).
A connection status message will be displayed, and then the
MAC and IP address of the network to which you connected will
be displayed, similar to this example:

 Loading...