Desiccant Replacement
CAUTION: Activated Alumina Desiccant dust is considered a nuisance dust. Proper precautions
should be taken. Refer to “Material Safety Data Sheet”.
1. Remove pressure and power from dryer.
2. Open drain ports on bottom of tanks.
3. Catch desiccant in suitable container. Close drain ports and open top fill ports.
4. Refill with recommended type, size and quantity of desiccant. Rap sides of the chambers while
filling so desiccant will pack tightly. Some settling may be required to fit specified amount in tank.
One tank size may be used for multiple models, do not be concerned if tank is not full.
5. Consult Material Safety Data Sheet and all applicable regulations for disposal of desiccant.
Disposal of desiccant contaminated with oil or other substance may require different procedures
than desiccant replaced strictly due to aging.
NOTE: Use only AIRTEK Desiccant which is a high capacity, high quality desiccant designed and
sized for AIRTEK dryers.
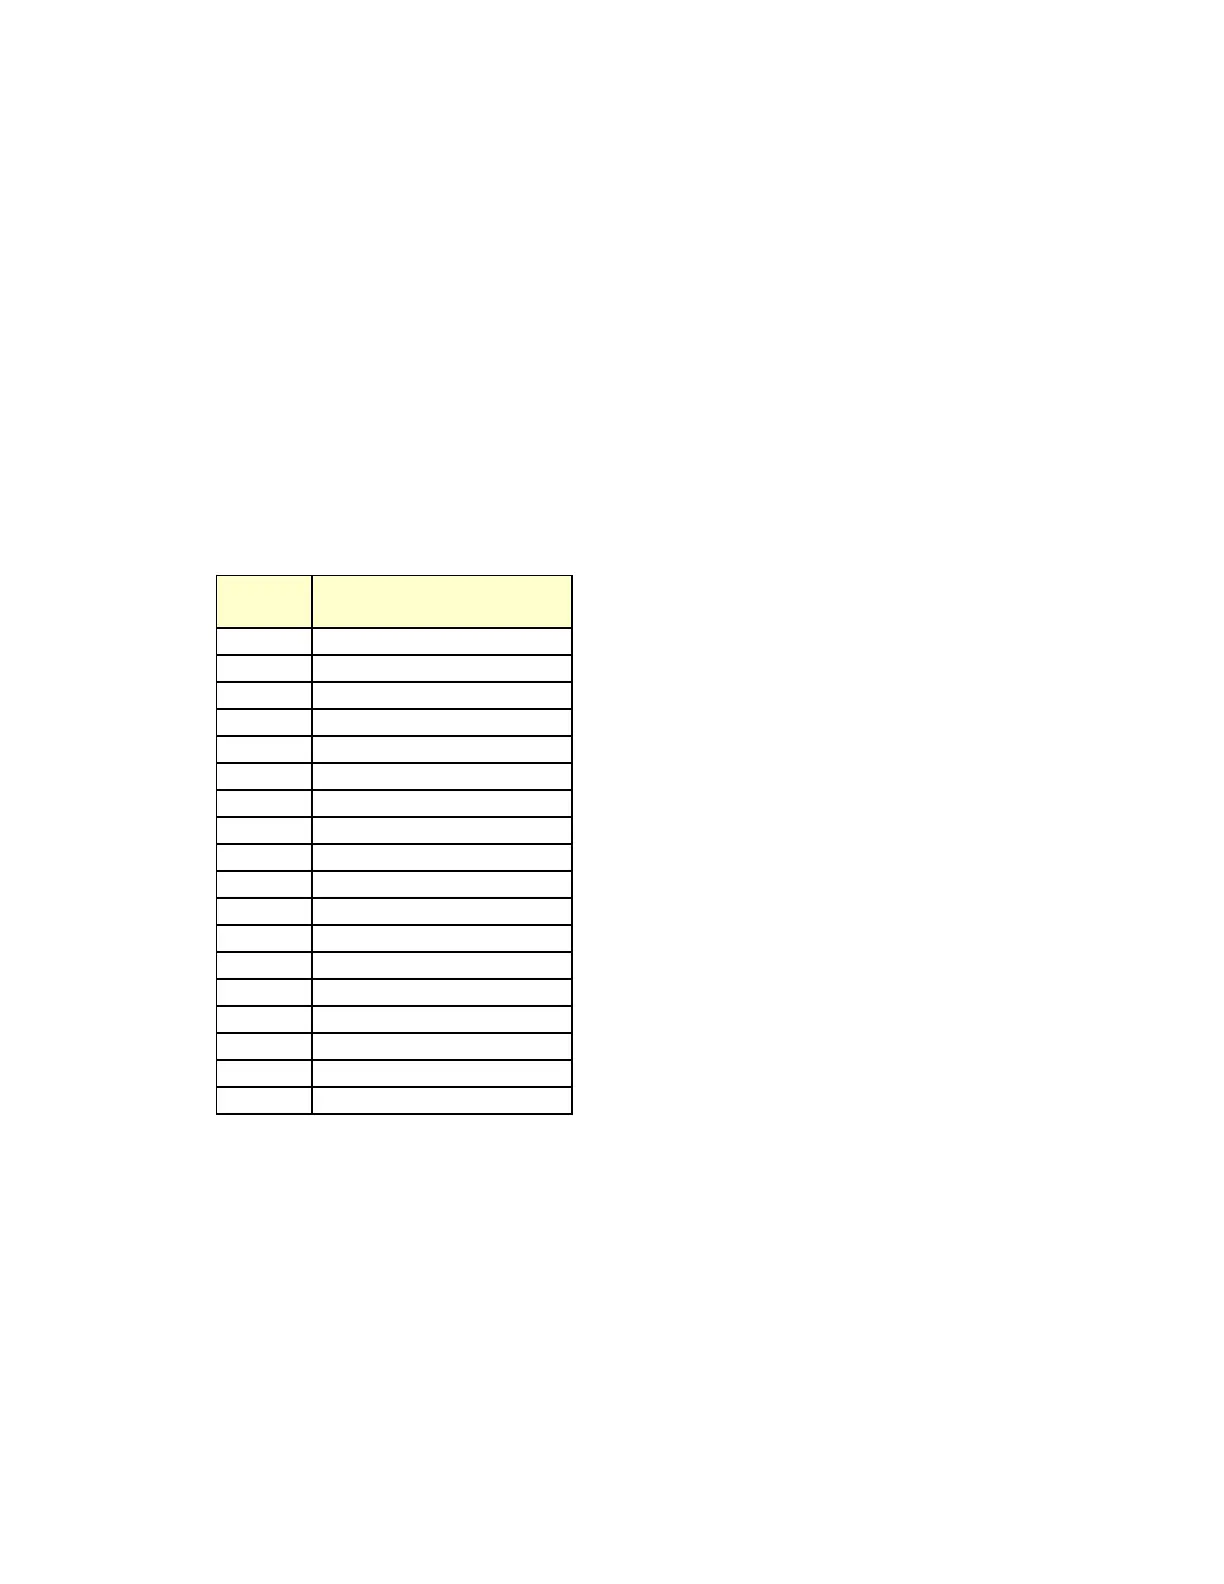
MODEL DESICCANT LBS./TOWER
TW75 44 Lbs.
TW100 60 Lbs.
TW130 75 Lbs.
TW200 120 Lbs.
TW250 150 Lbs.
TW300 175 Lbs.
TW400 230 Lbs.
TW500 300 Lbs.
TW600 350 Lbs.
TW800 475 Lbs.
TW1000 600 Lbs.
TW1200 725 Lbs.
TW1500 1030 Lbs.
TW2000 1200 Lbs.
TW2600 1550 Lbs.
TW3000 CF
TW4000 CF
TW5000 CF
Inlet and Exhaust Valve Repair
Request valve cutaway if required. These valves offer simple in-line serviceability. Special tools may
be required, consult factory if tools are desired.
1. Shutdown the dryer as described on page 7. Remove pressure from the dryer. Make certain there
are no “pockets” of pressure isolated by various valves. Open the bleed valve on the bottom of the
control air filter bowl.
2. Loosen the compression fitting attaching the control tubing to the valve body. Carefully move the
tubing aside.
3. Loosen and remove the bonnet hex head cap screws and nuts. Remove the bonnet.
 Loading...