Page 3
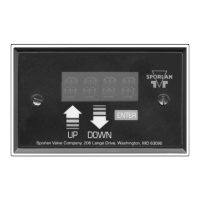
Pressing the ENTERbuttonwillchangetheflashingdigitfrom1’sdigit
tothe100’sdigit.
Press and hold UP button and ENTER button for 5 seconds will save the
setpoint.Thedigitswillstopblinking.
GAIN or DERI MODE
Press and hold UP button and ENTER button for 5 seconds to enable the
proportional gain set point to be changed. The set point is displayed and
the100’sdigitwillblink.
Pressing the UP button will increase the set point by 100 steps per degree.
Pressing the DOWN button will decrease the set point by 100 steps per
degree.
Pressing the ENTER button will change the flashing digit from 100’s
digittothe10’sdigit.
Pressing the UP button will increase the set point by 10 steps per degree.
Pressing the DOWN button will decrease the set point by 10 steps per
degree.
Pressing the ENTERbuttonwillchangetheflashingdigitfrom10’sdigit
tothe1’sdigit.
Pressing the UP button will increase the set point by 1 step per degree.
Pressing the DOWN button will decrease the set point by 1 step per
degree.
Pressing the ENTERbuttonwillchangetheflashingdigitfrom1’sdigit
tothe100’sdigit.
Press and hold UP button and ENTER button together for 5 seconds to
savethesetpoint.Thedigitswillstopblinking.
INTG MODE
Press and hold UP button and ENTER button for 5 seconds to enable the
integralsetpointtobechanged.Thesetpointisdisplayedandthe100’s
digitwillblink.
Pressing the UP button will increase the set point by 100 seconds.
Pressing the DOWN button will decrease the set point by 100 seconds.
Pressing the ENTER button will change the flashing digit from 100’s
digittothe10’sdigit.
Pressing the UP button will increase the set point by 10 seconds.
Pressing the DOWN button will decrease the set point by 10 seconds.
Pressing the ENTERbuttonwillchangetheflashingdigitfrom10’sdigit
tothe1’sdigit.
Pressing the UP button will increase the set point by 1 second.
Pressing the DOWN button will decrease the set point by 1 second.
Pressing the ENTERbuttonwillchangetheflashingdigitfrom1’sdigit
tothe100’sdigit.
Press and hold UP button and ENTER button together for 5 seconds to
savethesetpoint.Thedigitswillstopblinking.
SELECTING REFRIGERANTS
If display reads one of the refrigerants, press and hold UP button and
ENTER button simultaneously for 5 seconds to enable the controller
tochange to anothertype of refrigerant.All 4digits will startto blink.
Pressing the UP button or the DOWN button will change the display to
other refrigerants. When the display shows the desired refrigerant, press
and hold UP button and ENTER button for together 5 seconds. The con-
trollerwillsaveandusethatrefrigerant’stableforsaturatedtemperature.
Thedigitswillstopblinking.
CHANGING VALVE TYPES
If display reads LARG, SMAL, or MEDM, pressing and hold UP button
and ENTER button for 5 seconds will enable the controller to change to
theothertypeofvalves.All4digitswillstarttoblink.Pressingeitherthe
UP button or the DOWN button will change the display between the dif-
ferent valve types. Press and hold UP button and ENTER button together
for5secondstosavetheselection.Thedigitswillstopblinking.
Evaporator
DI1
1-
1S
1+
R = Red
G = Green
W = White
B = Black
TS2 - Temp. Sensor 2
TS1 - Temp. Sensor 1
PB1 PB2
8.8.
Temperature
Sensor
Temperature
Sensor
Subcooled
Liquid Outlet
ESX, SER,
SEI, SEH
TS2TS1 B W G R 1+ 1S 1- DI1
24 VAC
24 VAC
40 VA
Transformer
Pumpdown
Relay
(optional)
Pressure
Transducer
*
gray wire for ESX only
**
supplied
† ESX
R = Orange
G = Yellow
W = Red
B = Black
†
LINE
Mov**
Mov**
*
2.5”
1.98”
1.37”
8.25”
5.0”
.25” typical
.25”
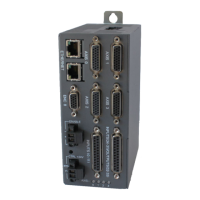
Figure 3
Board Dimensional Drawing
Figure 4
Subcooler Controller Wiring Schematic
 Loading...