21
2005 Doctor Martin Luther King Jr Street
Indianapolis, IN 46202
Rev 07-2021
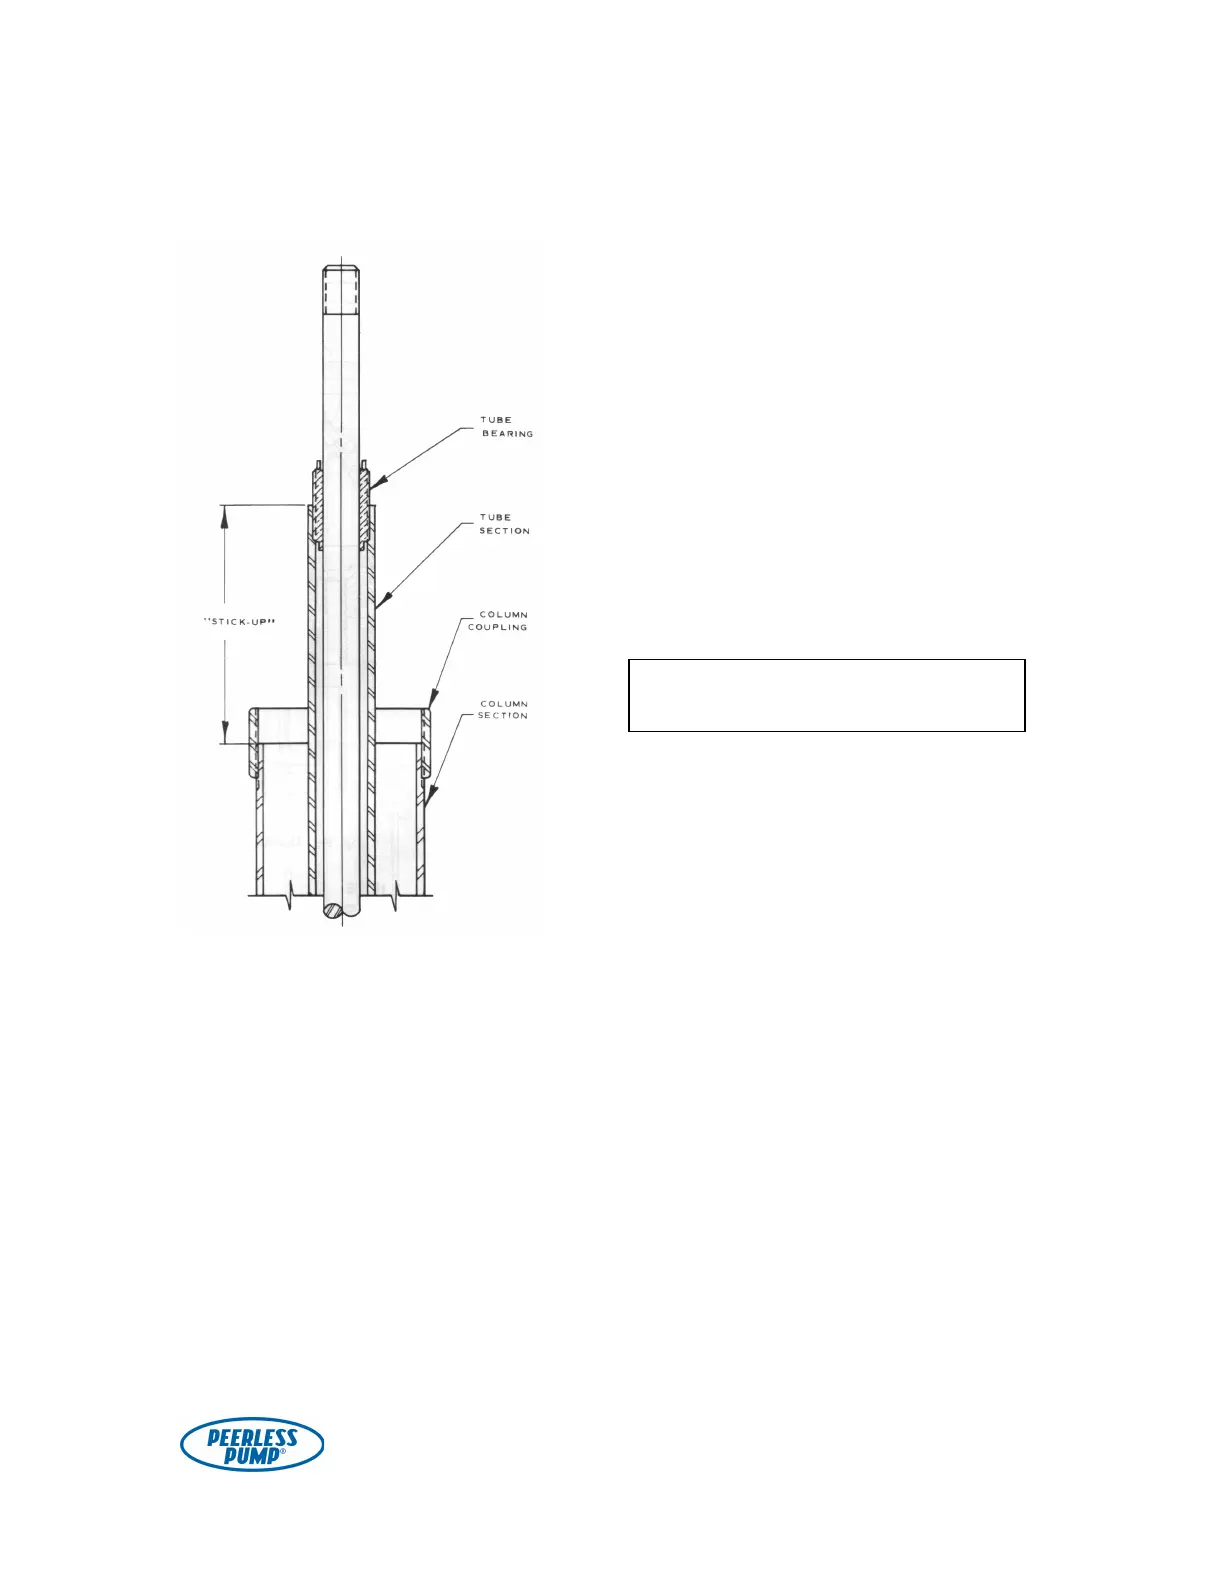
Remove the upper piece of the top
tube assembly and cut off the necessary
amount of tube. Do this on a convenient
workstand away from the pump. File the
cut smooth, and file the thread at the
new end so it will engage easily. Clean
the tube thoroughly, inside and outside,
then screw it back in place and tighten it
securely.
Install the top shaft (or head shaft)
and the top column section in the same
manner as for the standard sections. DO
NOT LOWER THE TOP COLUMN
SECTION INTO THE SUMP AT THIS
TIME.
When lowering the top column
section over the top shaft (or head
shaft), take care not to bump or
scrape the shaft. This could bend the
shaft and/or damage the shaft threads.
Install eyebolts in two of the driver
mounting holes on the top of the
discharge head. For proper balance, use
the hole over the discharge opening and
the hole diametrically opposite. Attach
the sling to the eyebolts and hoist the
discharge head over the pump (the lifting
ears are NOT used to lift the discharge
head when not attached to the pump
because the discharge head is heavier on
the discharge side and would tip).
Figure 13. Illustration of tube section
“stick-up”.