Page 18
USER MANUAL
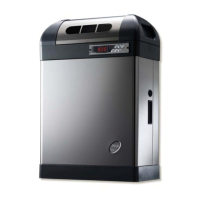
6. Connect the water drainage discharge pipe to the manifold (40 mm diameter) and fix it in place
with the supplied clip (fig. 9 e 10).
Fig. 9 Fig. 10
Only connect the discharge with pipes that are suitable for temperatures of 100 °C and
only use pipes with a diameter of at least 40 mm; do not, at any point along the line,
exceed the height of the humidifier.
NEVER USE THE HUMIDIFIER WITHOUT THE DISCHARGE LINE
CORRECTLY CONNECTED!
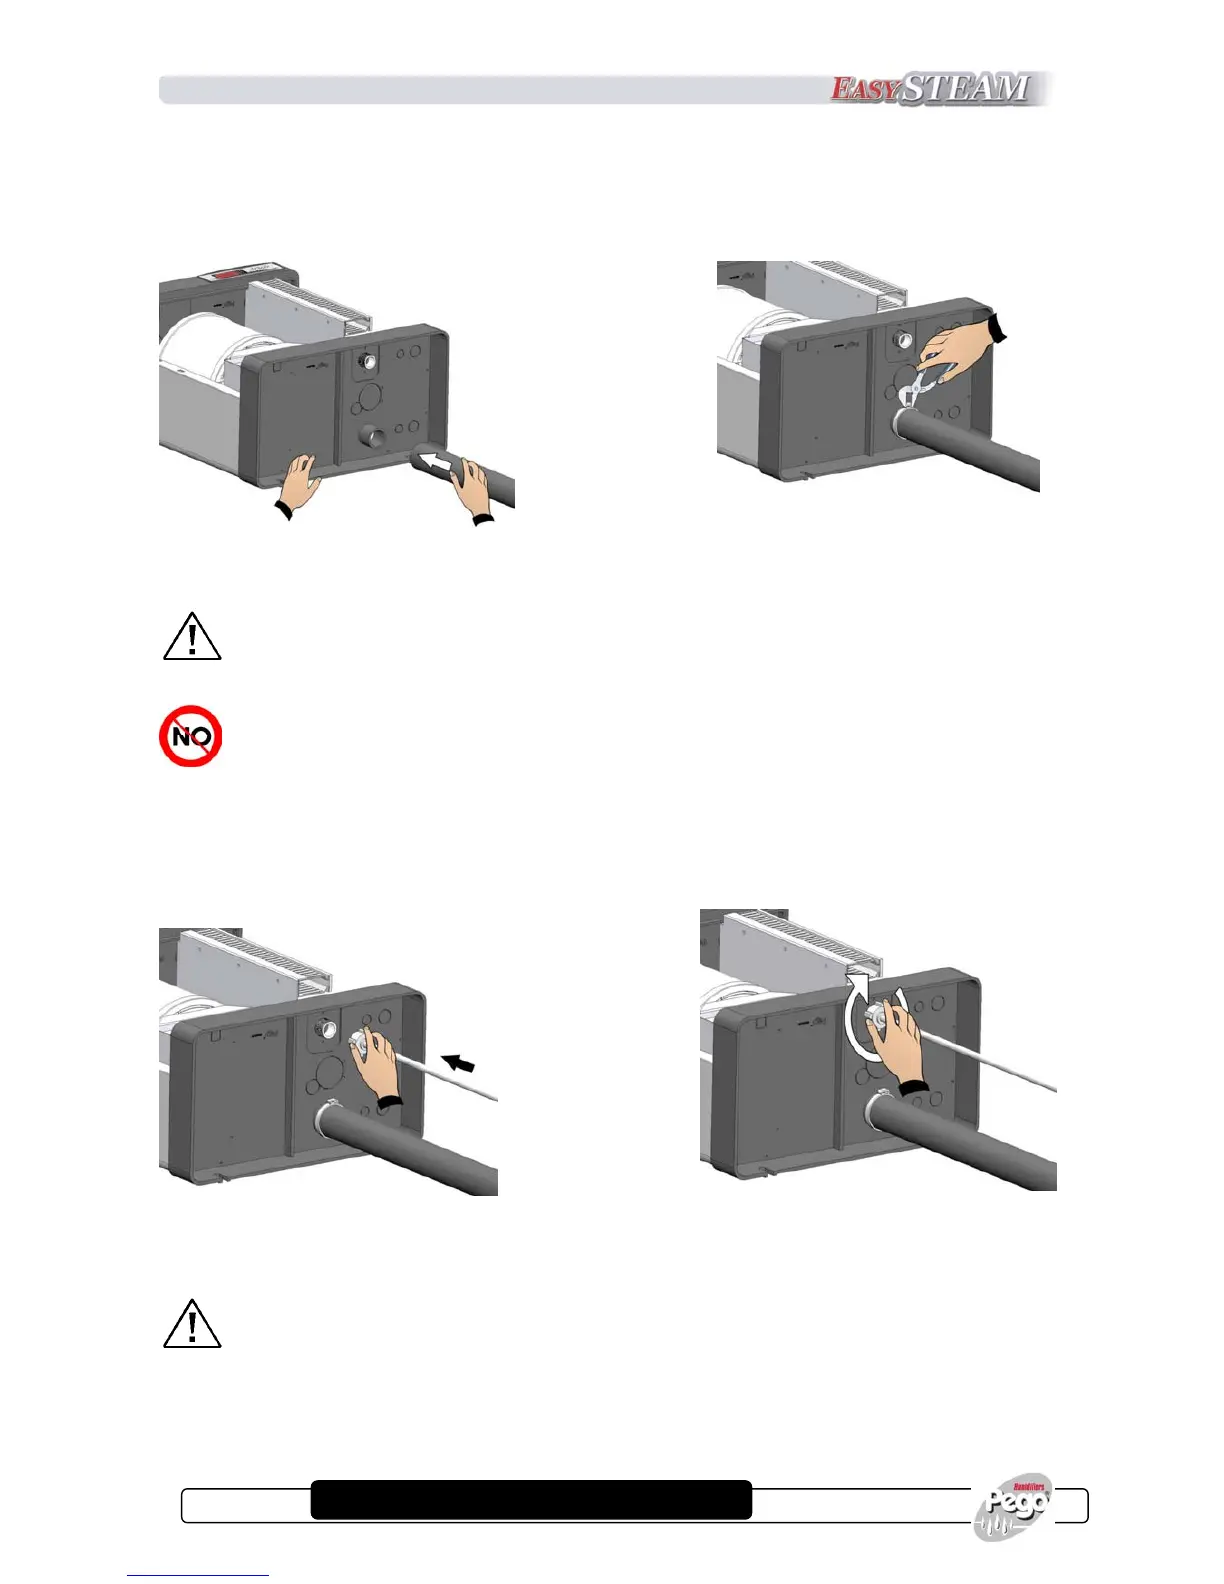
7. Connect the water inlet line to the ¾ GAS connector of the solenoid valve underneath the
humidifier (fig. 11 e 12).
Fig. 11 Fig. 12
Connect up the water inlet using a non-metal pipe (use e.g. rubber, PVC, polypropylene,
nylon etc.).
 Loading...