Page 42
USER MANUAL
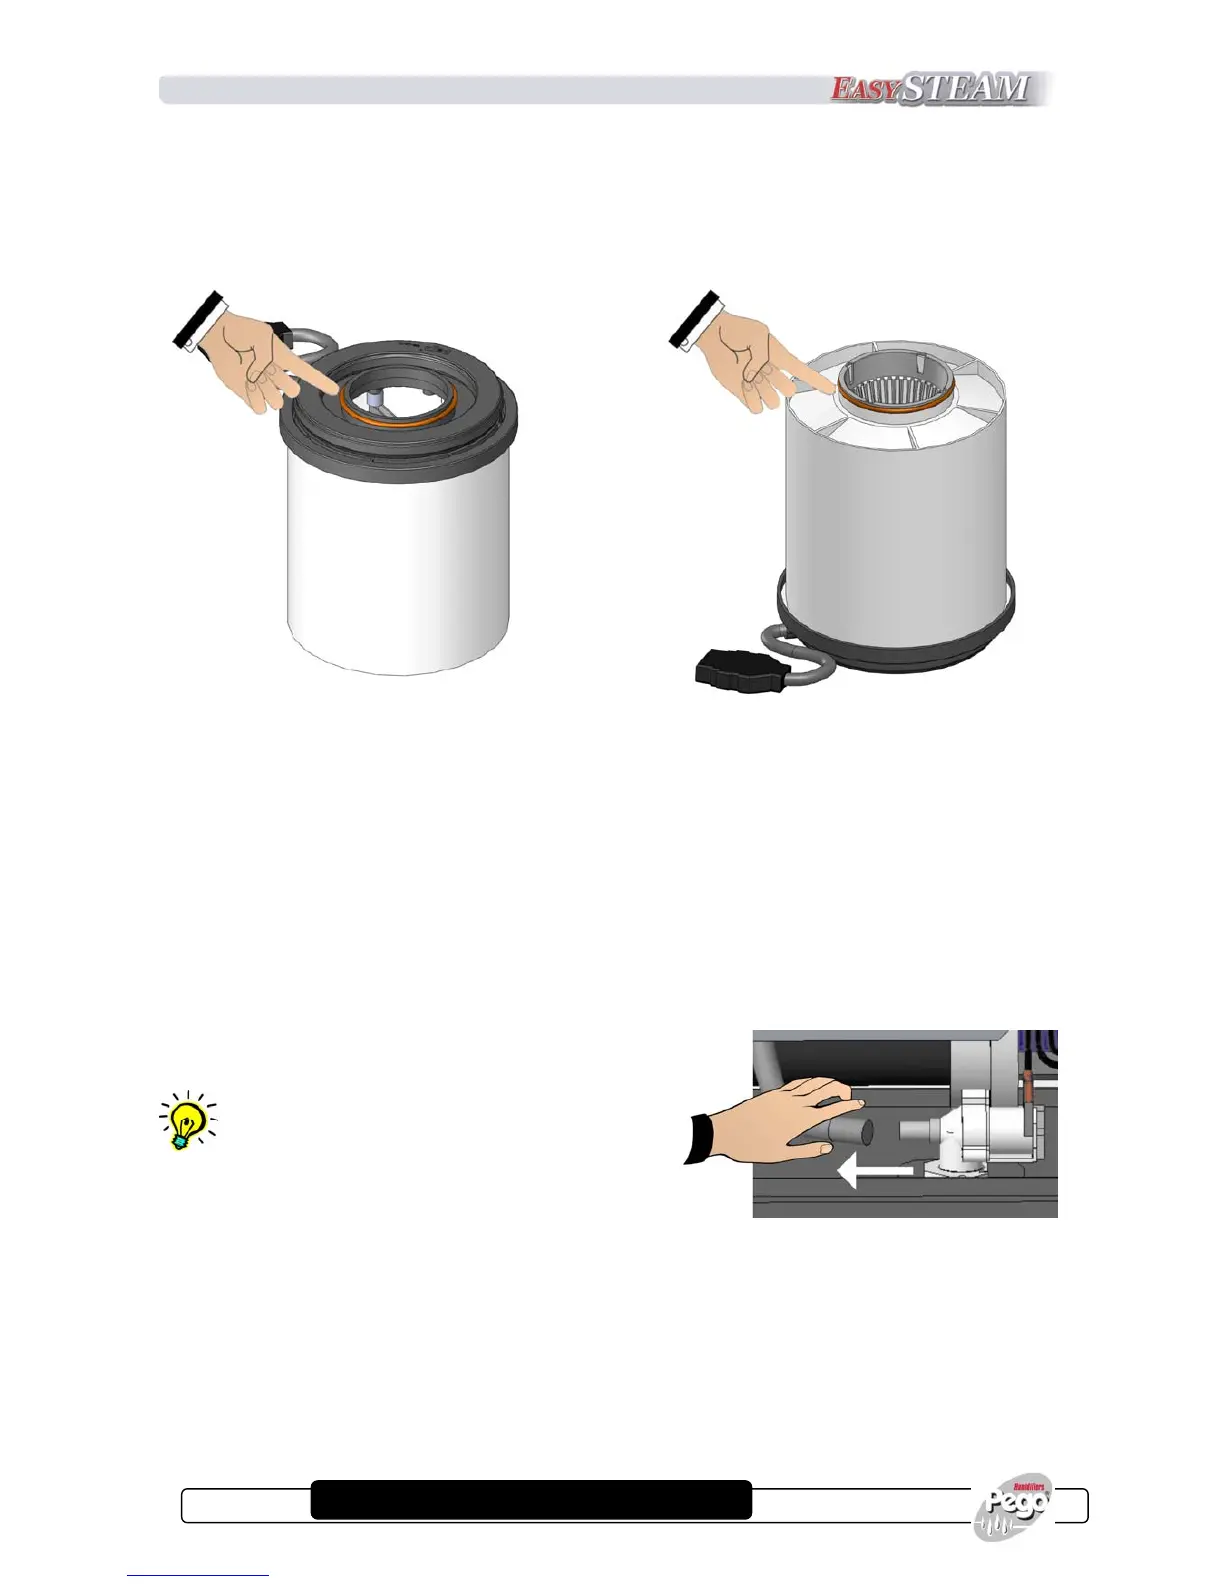
7. Insert the new cylinder by repeating the above procedure in reverse order; check that the new
cartridge has the 2 supplied O-rings and that they are positioned correctly.
If necessary to use on O-rings and flanges the lubricating issued with the humidifier for making
their insertion easier (fig. 35 and 36).
Fig. 35 Fig. 36
8. Flush the cylinder completely 2 – 3 times immediately after replacement: do this by pressing the
“manual empty” key
9. To verify there are not water losses internally the humidifier after 1 hour of working from
cylinder replacing.
If there is a power supply failure during
cylinder replacement empty the cylinder by
detaching the filling hose from the relevant
solenoid valve (fig. 37).
Fig. 37
 Loading...