Pentair UV Series Water Treatment & Microltration System User Manual Pentair UV Series Water Treatment & Microltration System User Manual
13
12
The cartridges will need changing periodically to maintain the high quality of puried
water (dependent on water quality and usage). You can obtain replacement cartridges
from your local Pentair dealer. To maintain performance and warranty, please use
genuine Pentair replacement parts.
MODEL STAGE
ORDERABLE
PART NO.
5505
Stage 1
5PP10BB
5501 DGD2501
5510 NCP10BB
5505
Stage2
PB3510
5501 DFXCBBB
5510 RFC10BB
PART NO. DESCRIPTION
BHML003 UV lamp
BHML004 Quartz sleeve
SA11205 Pressure Reducing Valve (PRV)
SA11205 Dual Check Valve (DCV)
SA11205 1” male x 3/4” female reducing bush
SA11205 3/4” nipple
150296 Filter housing wrench
3025188 Teon tape
7505
Stage 1
5PP20BB
7501 20DGD2501
7510 NCP20BB
7505
Stage2
PB5520
7501 DFXCB20BB
7510 RFC20BB
REPLACEMENT PARTS GUIDE
Replace cartridges every 6 months.
UV Lamps must be replaced annually in
order to maintain 99.9999% kill rate of
bacteria.
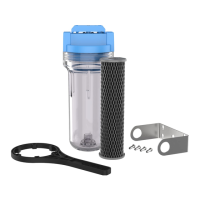
CARTRIDGE REPLACEMENT PROCEDURE
1. Turn off the power, then turn off the water supply by turning off the valve and
turning on a tap which is supplied by the lter to reduce system water pressure.
2. Open the cover and press the red pressure-relief button.
3. Using the cartridge wrench provided unscrew the lter housing, remove the large
O-ring, wipe clean, and set aside.
4. Discard the used lter cartridge. Wash the lter housing with dish soap & warm water
using a non-abrasive sponge or cloth. Rinse thoroughly. Fill 1/3 with water, add one
tablespoon of bleach and clean with non-abrasive cloth to disinfect. Rinse thoroughly.
5. Lubricate the O-ring with clean silicone grease. Do not use petroleum jelly. Insert
O-ring into the groove. This step is essential to ensure a proper lter housing seal.
Make sure the O-ring is seated level in the groove.
6. Insert the new lter cartridge. Screw the lter housing onto the cap and hand-
tighten. Do not over-tighten.
7. Turn on the water supply. Press the pressure-relief button. Check for leaks.
8. Turn on the power.
9. Lock the cover.
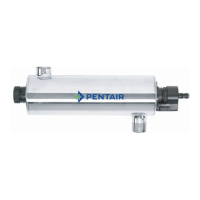
UV UNIT MAINTENANCE
SYSTEM MAINTENANCE
Check the ballast every few days to ensure the green ( or blue ) light is showing.
When the UV lamp has been working for 9000 hours ( 12 months ) it is time to replace
with a new lamp to make sure the UV system is working at its optimal performance.
To disassemble the UV lamp and quartz sleeve please see the instructions below.
CLEAN QUARTZ SLEEVE
The quartz sleeve needs to be cleaned regularly depending on water quality but as
a minimum once per year. If the sleeve appears cloudy or scaled up due poor water
quality clean the sleeve more regularly to avoid this happening. A cloudy or scaled up
sleeve will not be allowing the UV light to disinfect the water at its optimal level.
When cleaning the sleeve please use a soft non abrasive cloth and glass cleaner or for
stubborn stains vinegar or a slightly acid liquid such as a diluted citric acid cleaner.
Then clean and rinse the glass with clean water.
To disassemble the UV lamp and quartz sleeve please see the instructions below.
DISASSEMBLY OF QUARTZ SLEEVE AND UV LAMP
To disassemble the UV lamp and quartz sleeve
1. Turn off the power to the UV system and remove the plug from the power
socket.
2. Turn off the water inlet valve to the UV system and release the pressure by
pressing the red button on top of one of the lter housings.
3. Allow time for the UV lamp to cool down and ensure you are wearing disposable
gloves when working on the UV lamp and quartz sleeve.
4. Disconnect the electrical connection on top of the UV assembly
5. Unscrew the UV lamp holder from the top of the unit and place the UV lamp
carefully to one side on a clean cloth to avoid any contamination, ensuring you
do not touch the lamp with your hands.
6. Carefully remove the quartz sleeve from the UV chamber.
7. To reassemble, follow the process on page 7.
Other Common Spare Parts:Replacement Cartridges:
 Loading...