09931228D
12. Turn on the power of the Lambda 265 and the Peltier Controller.
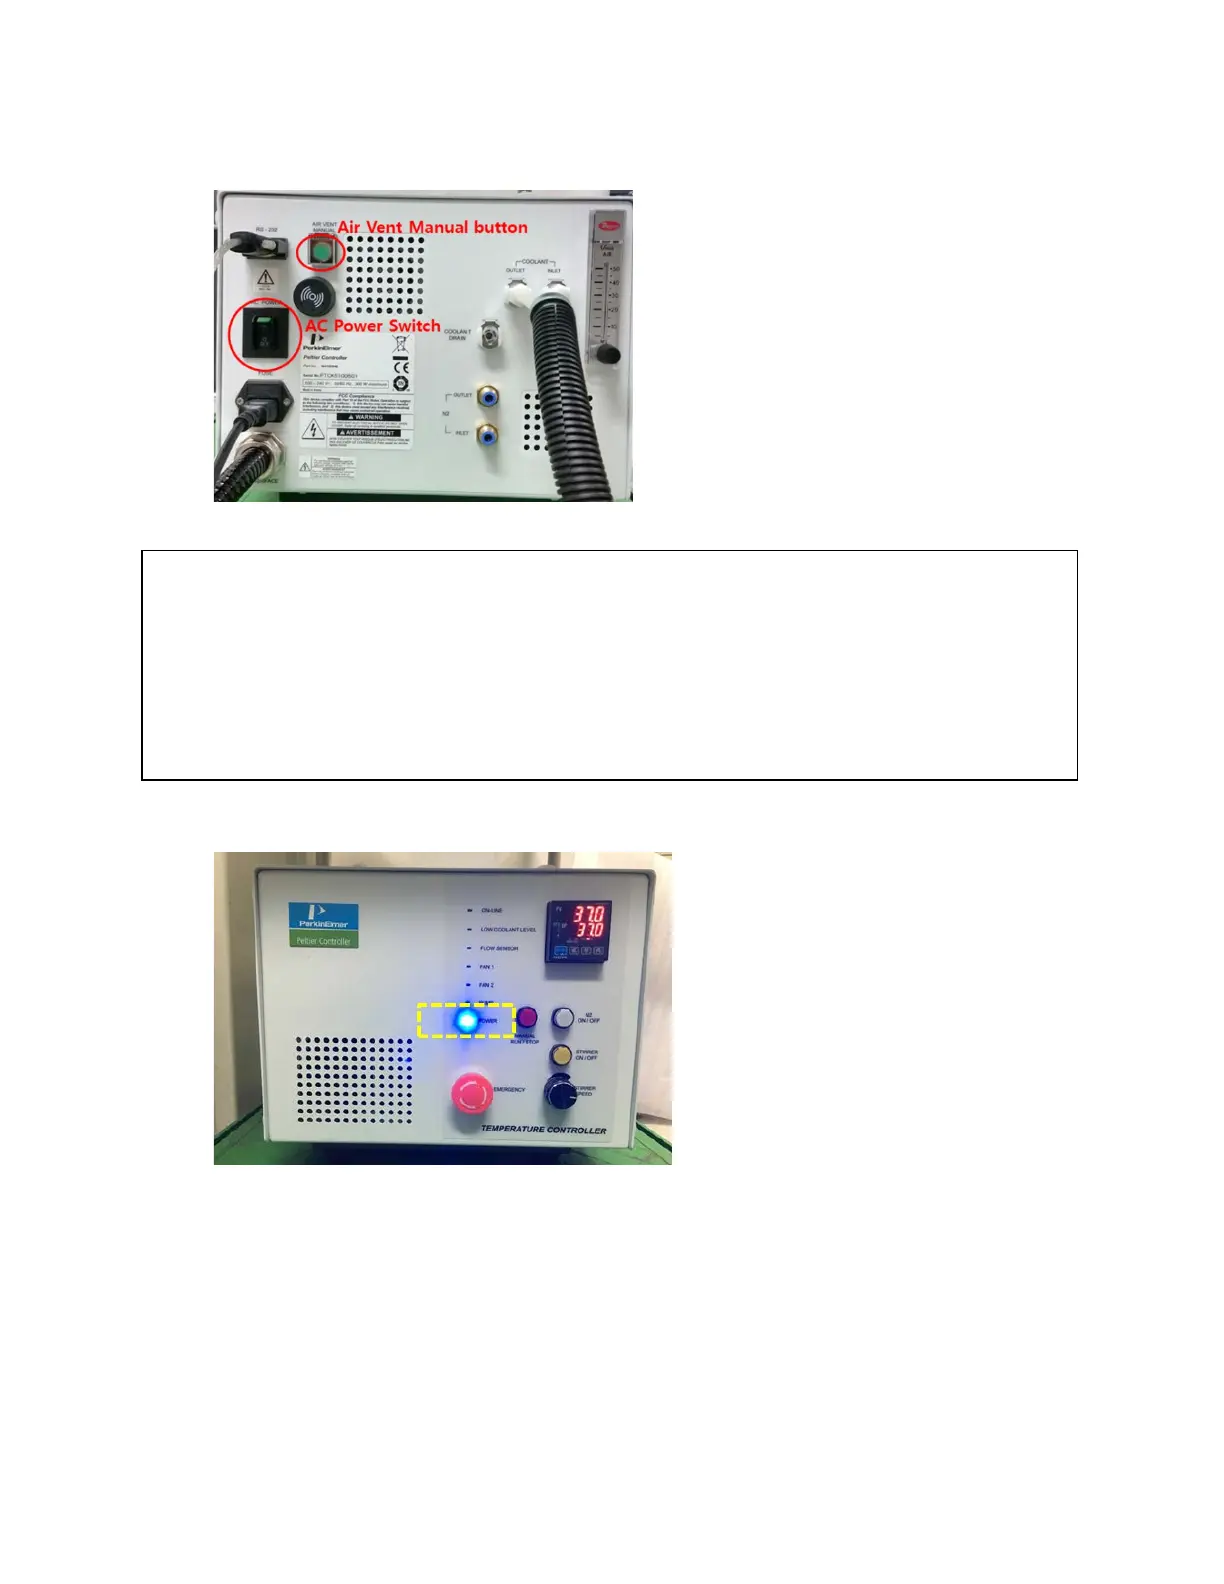
Figure 13 Back of the instrument connections
CAUTION
ATTENTION
The Air vent manual button should be off before turning on the main power of the
Peltier Controller and also during the operation since it could make a trouble for the
communication between Lambda 265 and Peltier Controller.
Le bouton d'actionnement manuel de la ventilation doit être désactivé avant que le
contrôleur Peltier ne soit mis sous tension et pendant le fonctionnement de ce
dernier afin d'éviter qu'une erreur de communication entre le Lambda 265 et le
contrôleur Peltier ne se produise.
13. Check that the Power LED is on as a blue light.
Figure 14 Power LED is on
Peltier controller auto tuning setup
Peltier controller can be compatible with various peltier cell holders (Single or Multi) so whenever you
exchange the existing peltier cell holder to the other one, you should proceed “AUTO TUNING” set up to
minimize the temperature fluctuation at the target temperature