Do you have a question about the PerkinElmer Spectrum 100 Series and is the answer not in the manual?
Explains the manual's structure, content, and purpose.
Details text formatting, symbols, and terminology used throughout the guide.
Explains special notations for important information and safety alerts.
Provides a concise overview of critical safety precautions for instrument operation.
Outlines general safety guidelines and environmental conditions for instrument use.
Covers essential electrical safety measures and connection guidelines.
Explains regulations and safety precautions related to the instrument's laser system.
Provides critical safety instructions for handling flammable materials near the instrument.
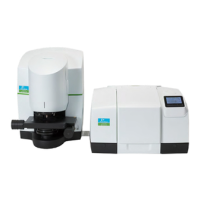
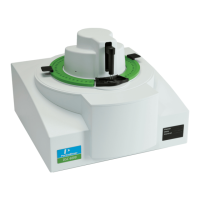
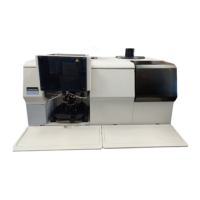
Provides a visual and descriptive walkthrough of the instrument's features.
Explains the function of the display and go button on the instrument's top panel.
Describes the instrument's sample compartment and related precautions.
Explains the instrument's optical system and its design for performance.
Outlines necessary conditions and prerequisites before installing the instrument.
Details the ideal environmental conditions for optimal instrument performance.
Provides step-by-step instructions for safely removing the instrument from its packaging.
Guides the user on establishing a connection between the spectrometer and a PC.
Instructs on how to safely connect the instrument to a power source.
Provides instructions for installing the necessary Spectrum software.
Guides the user through the automated process of installing the instrument.
Introduces fundamental concepts for controlling the instrument via software.
Details the procedure for powering on the spectrometer and starting the software.
Explains how to operate the instrument and collect data using the software.
Explains the feature for removing atmospheric interference from spectra.
Introduces features for monitoring and ensuring spectral data quality.
Provides instructions for cleaning the exterior of the spectrometer.
Explains the function and interpretation of the desiccant indicator.
Instructs on how to replace the desiccant packs to maintain instrument dryness.
Explains how to purge the instrument with gas to remove moisture and CO2.
Details the procedure for cooling the MCT detector with liquid nitrogen.
Guides on how to safely open the main cover for internal access.
Provides instructions for replacing the instrument's source.
Details the procedure for replacing the beamsplitter component.
Provides instructions for replacing the laser and its power supply unit.
Explains the underlying principles and regulatory requirements for instrument calibration.
Outlines the procedure for validating the instrument's calibration accuracy.
Details the process of generating and printing a performance validation certificate.
Advises on when recalibration of the instrument is necessary.
Provides detailed steps for swapping sampling accessories.
Explains the instrument's built-in self-check procedures.
| Type | FTIR Spectrometer |
|---|---|
| Spectral Range | 7800 to 350 cm-1 |
| Detector | DTGS |
| Beamsplitter | KBr |
| Light Source | High energy ceramic |
| Wavenumber Accuracy | 0.01 cm-1 |
| Operating Temperature Range | 15°C to 35°C |
| Data Collection | Spectrum software |
| Interface | USB |
| Resolution | 0.5 cm-1 |