SEBU8191-01 45
Maintenance Section
Belts - Inspect/Adjust/Replace
9. Install the gua
rds (not shown).
10. Restore the electrical supply to the engine.
Adjustment
1. If necessary, isolate the electrical supply to the
engine. Loosen the fasteners for the air pipes and
remove the gu
ards.
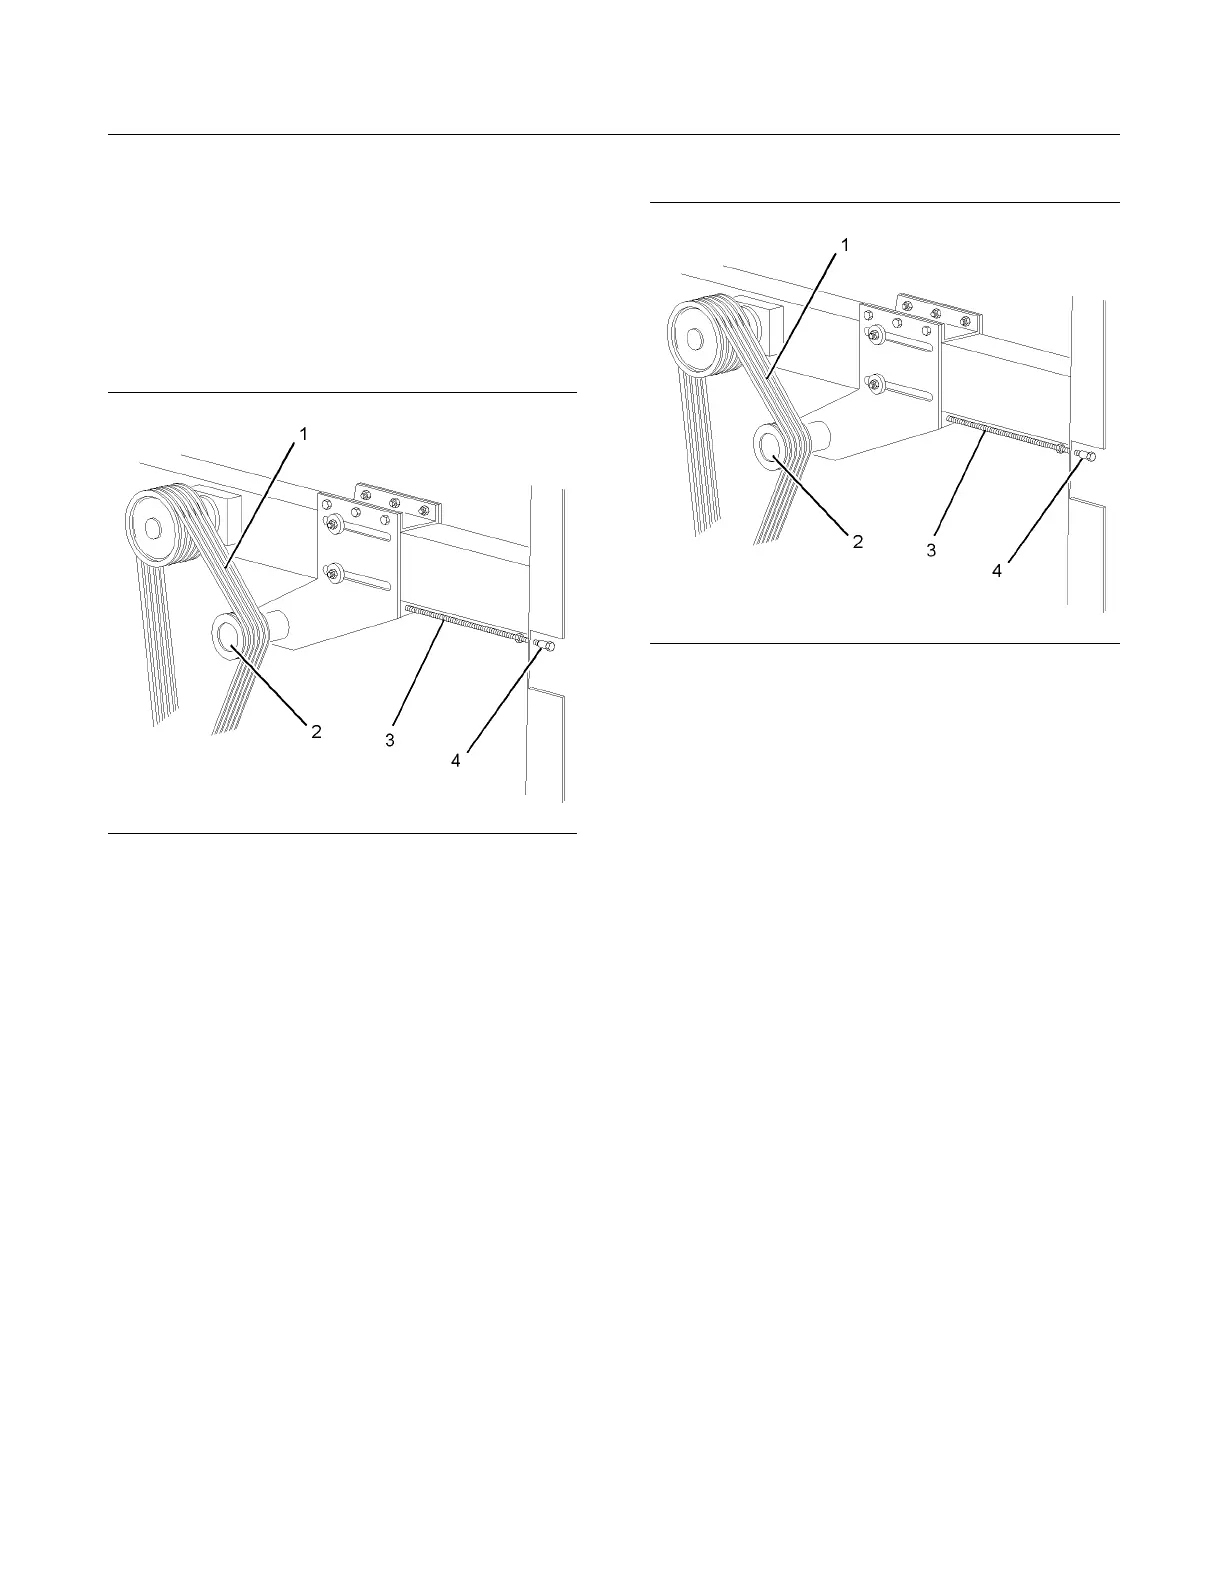
g01239588
Illustration 31
2. Loosen the locknut (4).
3. Rotate the rod (3) in order to achieve the correct
tension of belts (1). Refer to “Inspection” for the
correct specification.
4. Tighten the locknut (4) to a torque of 120 N·m
(88.5lbft).
5. If necessary, restore the electrical supply to the
engine. Tighten the fasteners for the air pipes and
install the guards.
Replacement
Note: Fan drive belts must be replaced as a set. Do
not replace individual belts.
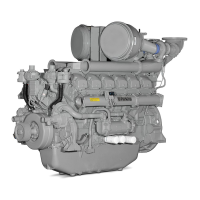
Removal of the F
an Drive B elts
g01239588
Illustration 32
Typ ical example
1. If necessary, isolate the electrical supply to the
engine. Loosen the fasteners for the air pipes and
remove the guards.
2. Loosen the locknut (4).
3. Rotate the rod (3) until the pulley (2) is toward the
center of the engine.
4. Remove the belts (1).
Installation of the Fan Drive Belts
1. Install new belts (1) over the pulleys.
2. Rotate the rod (3) in order to achieve an initial
tension of 77 N (17 lb). The total deflection should
not exceed 16 mm (0.63 inch).
3. Ti ghten the locknut (4) to a torque of 120 N·m
(88.5lbft).
4. Rotate the pulleys for the fan drive belts three to
four revolutions in order to ensure that the fan
drive belts are correctly installed. Ensure that the
tension is still 77 N (17 lb).
5. If necessary, restore the electrical supply to the
engine. Tighten the fasteners for the air pipes and
install the guards.
6. Operate the engine for 15 to 20 minutes. Refer to
Operation and Maintenance Manual, “Starting the
Engine” for the correct procedure.