56 SEBU8191-01
Maintenance Section
Engine Oil Level - Check
The changeover
valve (1) has three positions.
•
(A) The oil flow is to both oil filters.
•
(B) The oil flow is to the left-hand oil filter.
•
(C) The oil flo
w is to the right-hand oil filter.
1. Rotate the changeover valve to position B. By
usingasuit
able tool (2), remove the right-hand
oil filter.
Note: Oil flo
w direction (D and E ).
2. Ensure that the sealing face on the housing is
clean. Fil
l the new oil filter with clean engine oil.
Install the new oil filter. Rotate the changeover
valve to position A. Check for oil leaks.
3. Rotate the changeover valve to position C. By
using a suitable tool, remove the left-hand oil filter.
4. Ensure that the sealing face on the housing is
clean. Fill the new oil filter with clean engine oil.
Install t
he new oil filter. Apply hand pressure
only in order to install the oil filter. Rotate the
changeover valve to position A. Check for oil
leaks.
5. Clean any spillage of engine oil.
i02415261
Engine Oil L evel - Check
Hot oil and hot components can cause personal
injury. Do not allow hot oil or hot components to
contact the skin.
NOTICE
Per
form this maintenance with the engine stopped.
Note: After the engine has been switched OFF, wait
fo
r ten minutes in order to allow the engine oil to drain
to the oil pan before checking the oil level.
NOTICE
O
perating your engine when the oil level is above the
“Max” mark could cause your crankshaft to dip into
the oil. The air bubbles created from the crankshaft
d
ipping into the oil reduces the oil's lubricating char-
acteristics and could result in the loss of power.
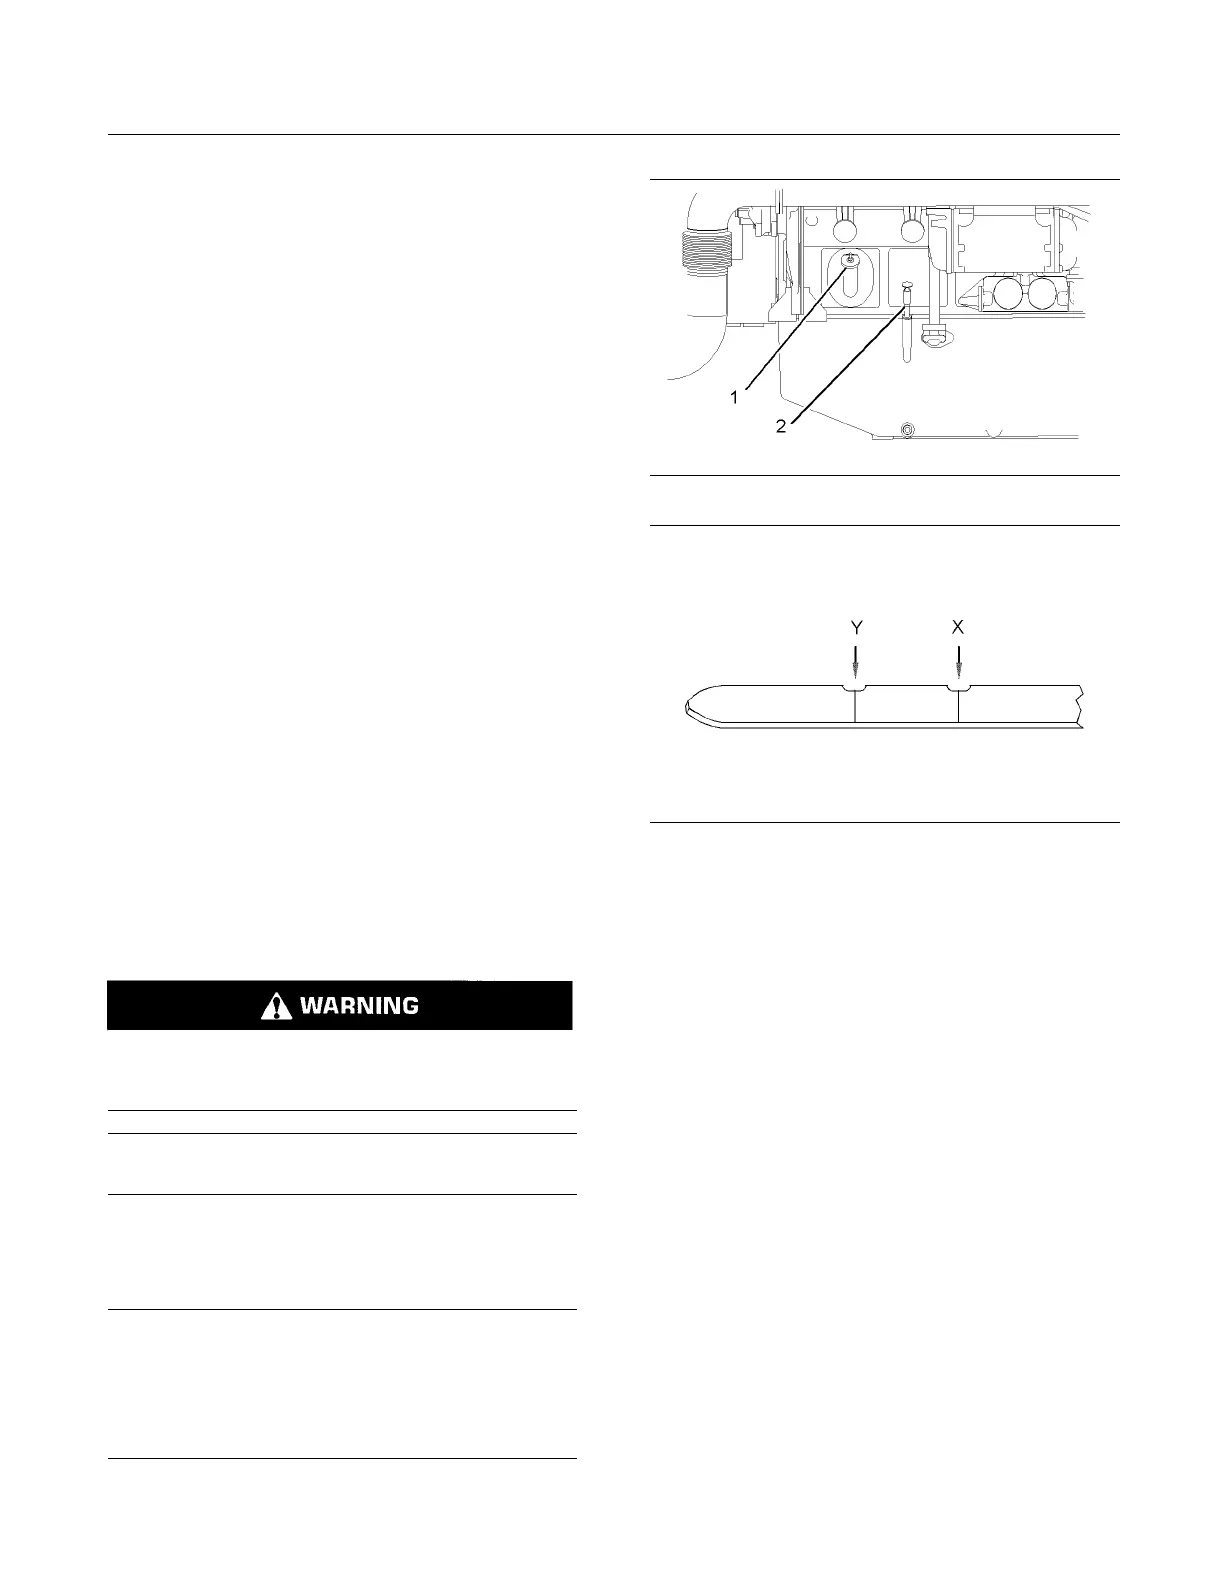
g01236968
Illustration 54
g01165836
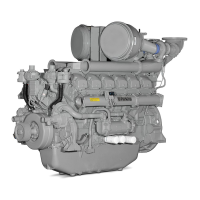
Illustration 55
(Y) “Min” mark. (X) “Ma x” mark.
1. Maintain the oil level between the “Min” mark (Y)
and the “Max” mark (X) on the engine oil level
gauge (2). Do not fill the oil pan above the “Max”
mark (X).
2. If necessary, remove the oil filler cap (1) and add
oil. Clean the oil fi ller cap. Install the oil filler cap.
i02471700
Engine Oil Pump - Inspect
A failed engine oil pump may result in a seizure of
the crankshaft.
Remove the engine oil pump and disassemble the
engine oil pump. Refer to Operation Manual TSL4165
for more information. Inspect the components of
engine oil pump for wear and for damage. Refer to
Operation Manual TSL4165 for more information.
Replace any components that are worn or damaged.
Alternatively, replace the engine oil pump.