64 SEBU8191-01
Maintenance Section
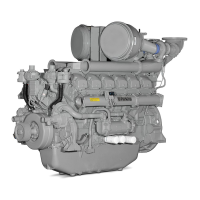
Governor Actuator - Check
6. Remove the fuel
lift pump (2).
7. Remove the joint from the lift pump (2). Discard
the joint.
Installation of the Lift Pump
1. Install a new joint to the lift pump (2).
2. Align the dr
ive for the lift pump (2). Install the lift
pump.
Note: Ensur
e that the oil seal is not damaged as the
lift pump is installed.
3. Install th
enuts(4).Tightenthenutstoatorqueof
25 N·m (18 lb ft).
4. Remove the
cap from the fuel line (3). Connect
the fuel line and the connection (1). Tighten the
fuel line and the connection to a torque of 50 N·m
(37 lb ft)
.
5. Fit the fuel priming pump (5) to the lift pump (2).
6. Restore the fuel supply to the lift pump.
7. Remove t
he air from the fuel system. Refer to
Operation and Maintenance Manual, “Fuel System
- Prime”.
i02471
680
Governor Actuator - Check
In ord
er for the governor to operate correctly, the
control box must be calibrated to the actuator. The
feedback parameters from the control box must
corre
spond to the 0% and the 100% positions on the
actuator. Carry out a periodic calibration check of
the governor system. Refer to Special Instruction,
“Pan
doras Digital Governor” for more information.
i02349879
Hoses and Clamps -
Inspect/Replace
C
ontact with high pressure fuel may cause fluid
penetration and burn hazards. High pressure fu-
el spray may cause a fire hazar d. Failure to fol-
l
ow these inspection, mai ntenance and service in-
structions may cause personal injury or death.
If you inspect t
he engine in operation, always use
the proper inspection procedure in order to avoid
a fluid penetration hazard. Refer to Operation and
Maintenance M
anual, “General hazard Information”.
Inspect all hoses for leaks that are caused by the
following co
nditions:
•
Cracking
•
Softness
•
Loose clamp
s
Replace hoses that are cracked or soft. Tighten any
loose clam
ps.
Check for the following conditions:
•
End fittings that are damaged or leaking
•
Outer cov
ering that is chafed or cut
•
Exposedwirethatisusedforreinforcement
•
Outer covering that is ballooning locally
•
Flexibl
e part of the hose that is kinked or crushed
•
Armoring that is embedded in the outer covering
A constant torque hose clamp can be used in place
of any standard hose clamp. Ensure that the constant
torque
hose clamp is the same size as the standard
clamp.
Due to
extreme temperature changes, the hose will
harden. Hardening of the hoses will cause hose
clamps to loosen. This can result in leaks. A constant
torqu
e hose clamp will help to prevent loose hose
clamps.
Each
installation application can be different. The
differences depend on the following factors:
•
Type
of hose
•
Type of fitting material
•
Anticipated expansion and contraction of the hose
•
Ant
icipated expansion and contraction of the
fittings
Replace the Hoses and the C lamps
Re
fer to the OEM information for further information
on removing and replacing fuel hoses (if equipped).