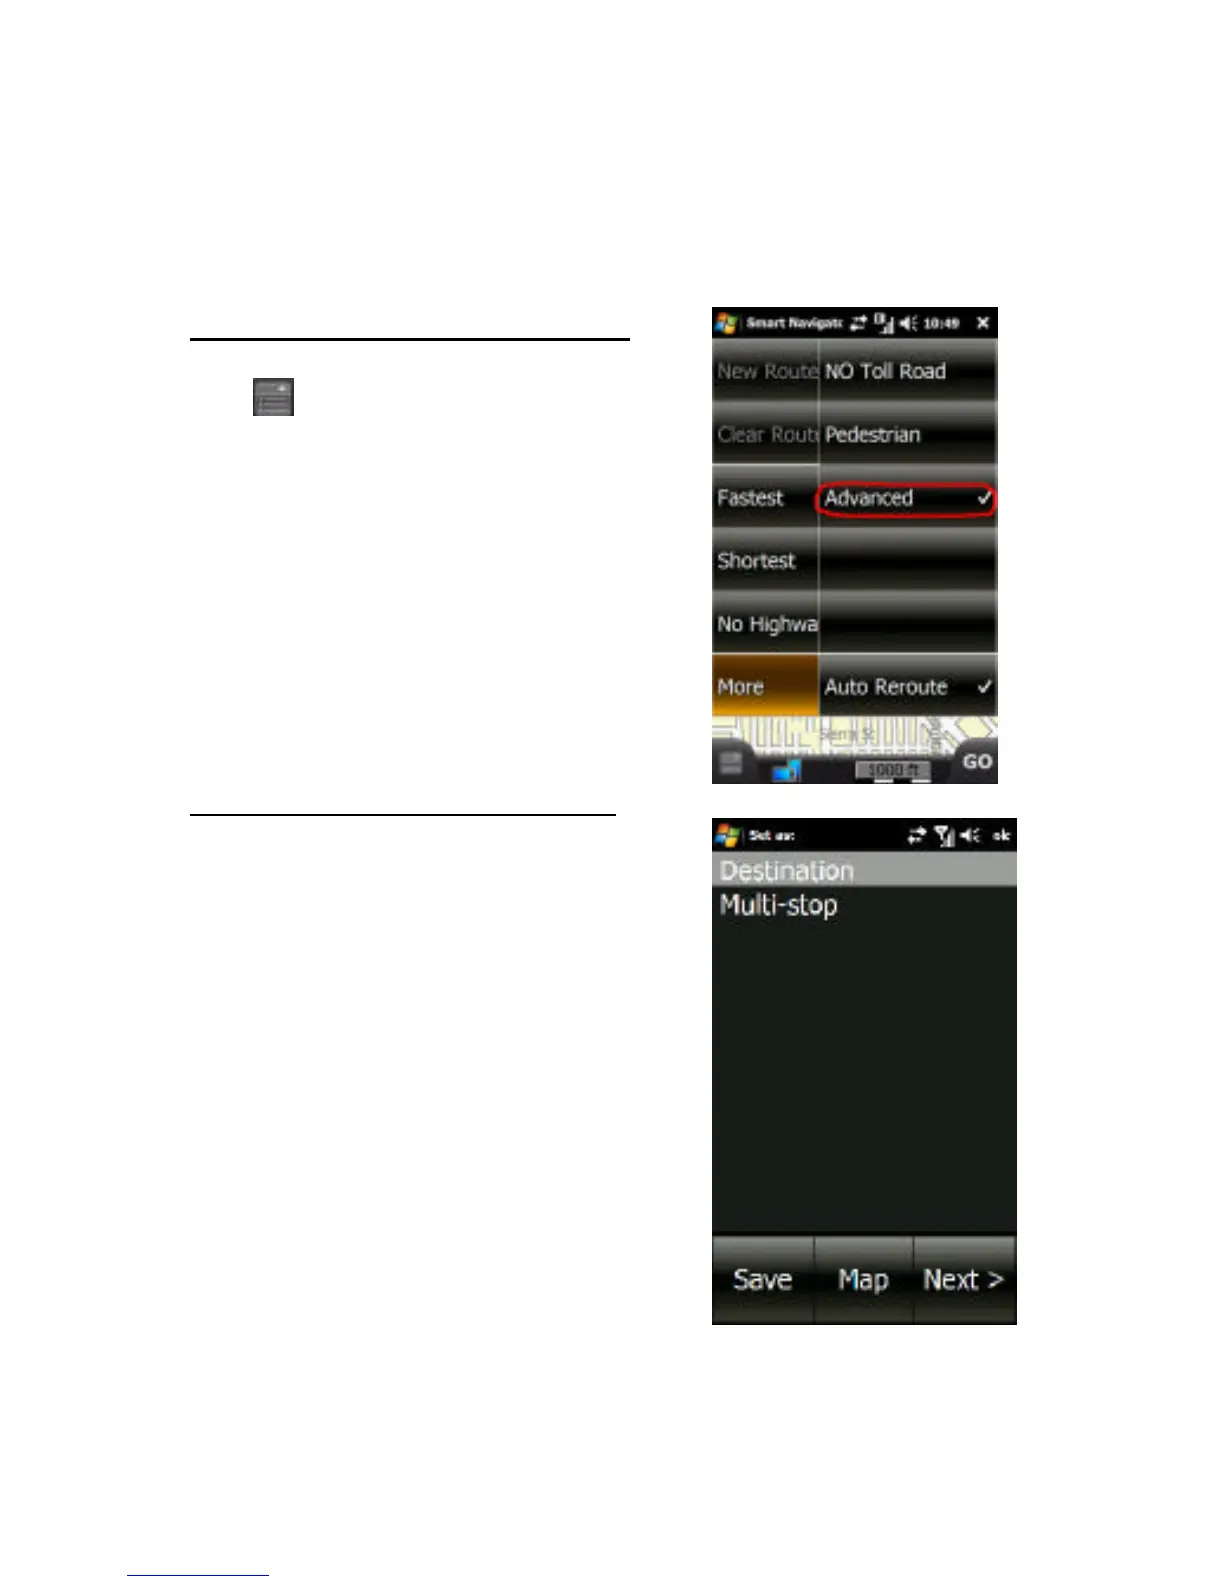
Tap à Route à More à
Advanced. Once a check has
been set next to “Advanced”, it
means Multi- Stop has been
turned ON. To turn OFF Multi-
Stop just tap on “Advanced” to
uncheck it.
In order to set a location as a
Multi-stop, double-tap the
location on the map. After a
location has been selected, a
Set As window will pop up,
allowing you to set the location
as a Destination or Multi-stop.
Choose Multi-stop.
There is also the option to Save
the location. If you would like to
save the location, first highlight
your selection between
Destination, Origin, and Multi-
stop, then tap Save. The location
can then be saved to Outlook
Contacts, Favorites, or as Home.