33
English
3139 115 20961
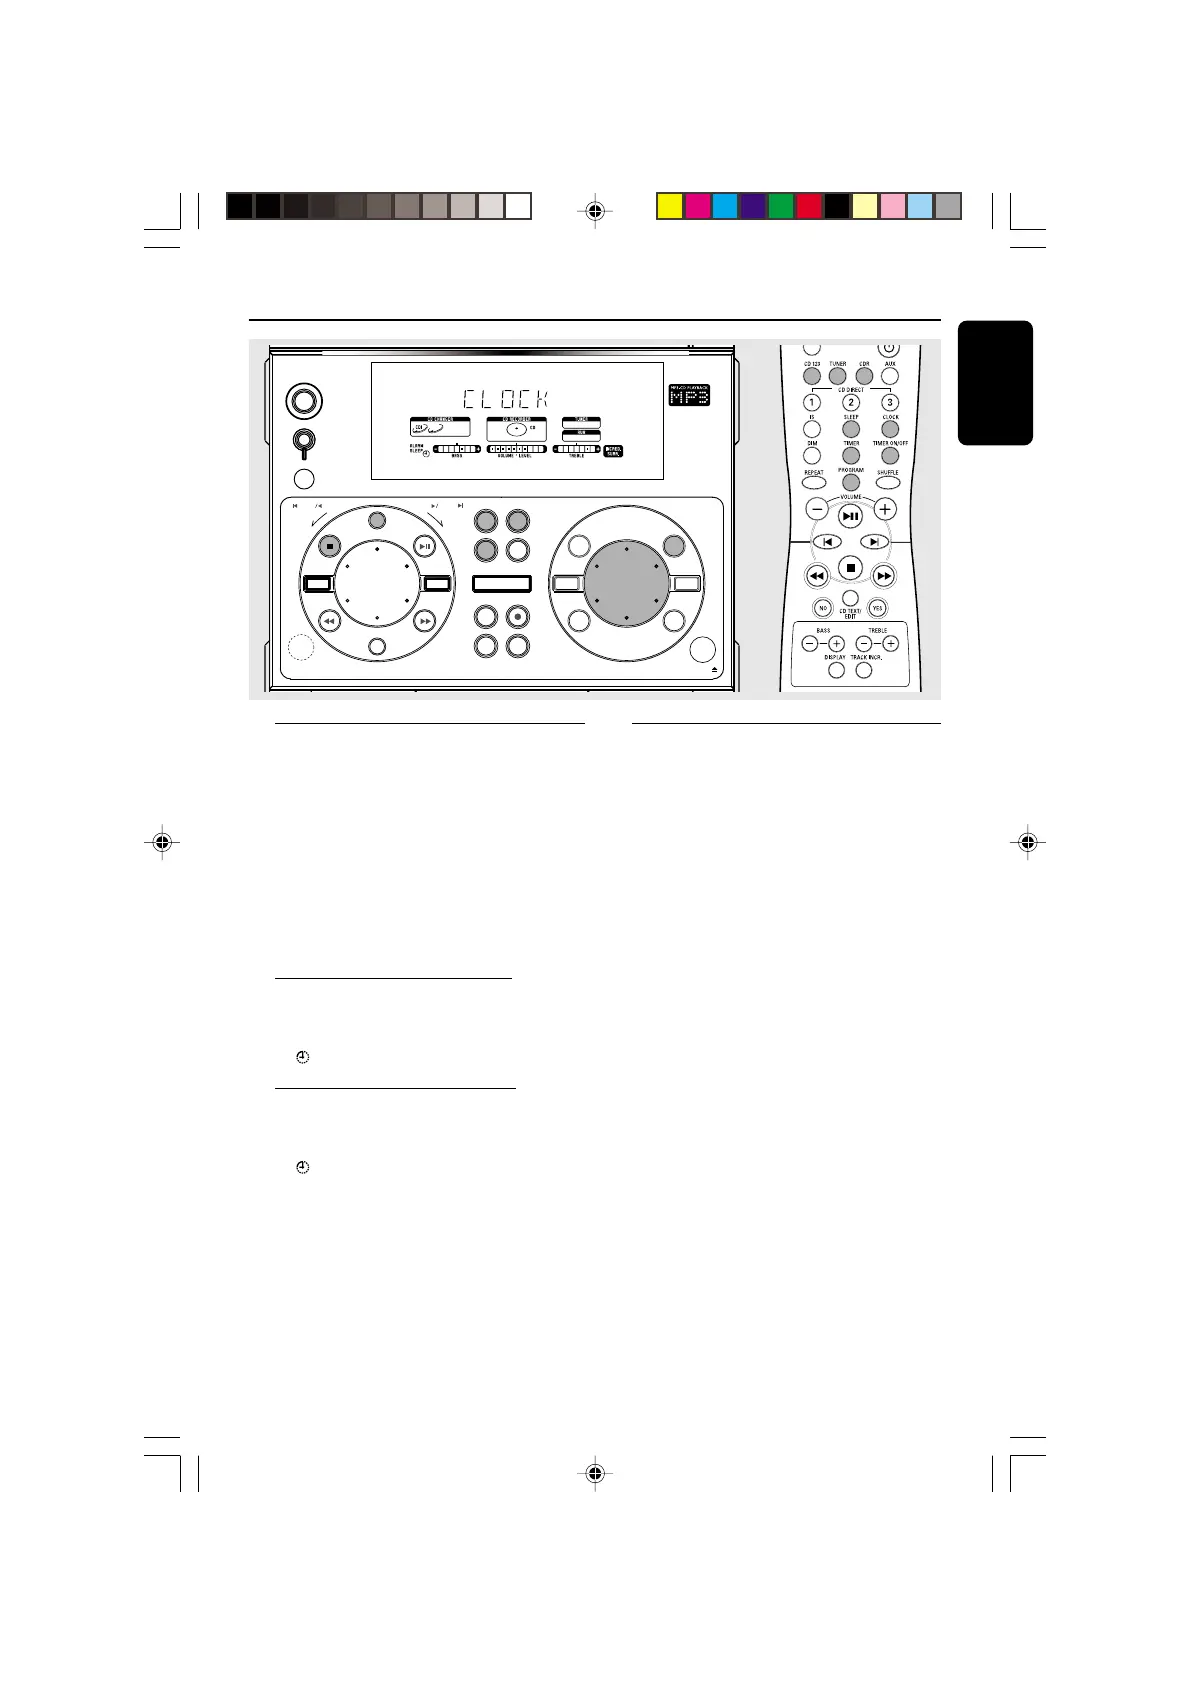
Clock/Timer
Clock/Timer setting mode
1 Press and hold CLOCK/TIMER until
"SELECT TIMER OR CLOCK" is displayed.
2 If necessary, adjust the MASTER VOLUME to
select :
➜ "TIMER" : for timer setting mode.
➜ "CLOCK" : for clock setting mode.
3 Press CLOCK/TIMER again to confirm the
selection.
OR
Entering clock setting mode
● Press and hold CLOCK on the remote control
until "CLOCK" is displayed.
➜ starts flashing.
Entering timer setting mode
● Press and hold TIMER on the remote control
until "TIMER" is displayed.
➜ and ALARM start flashing.
Clock setting
The clock can be set in either 12-hour or
24-hour mode ("AM 12:00" or "00:00" for
example)
1 Enter clock setting mode (refer to
“Clock/Timer setting mode”).
2 Press PROG repeatedly to select 12-hour or
24-hour clock mode.
➜ The clock digits for the hours start flashing.
3 Adjust MASTER VOLUME to set the hours :
clockwise for hours up; counter-clockwise for
hours down.
4 Press CLOCK/TIMER (or CLOCK on the
remote control) to confirm hours.
➜ The clock digits for the minutes start flashing.
5 Adjust MASTER VOLUME to set the
minutes.
6 Press CLOCK/TIMER (or CLOCK on the
remote control) again to store and exit the
setting.
➜ The clock will start working.
To exit without storing the setting
● Press Çon the system.
EDIT TEXT
DISPLAY
REC LEVEL
CLOCK/TIMER
SEARCH/
TUNE TUNE
SEARCH/
EnterCancel
STOP
PROG
JOG CONTROL
COPY CD
COMPILE CD
ERASE
CD
CDR
TUNER
AUX
FINALIZE
CD
PLAY/
PAUSE
RECORD
MC
-
CD RECORDABLE MICRO SYSTEM
CD 1• 2• 3
STANDBY
-
ON
PREV
PRESET
NEXT
PRESET
iR
MASTER VOLUME
CDR
OPEN•CLOSE
TREBLE
BASS
YESNO
CD TEXT
DIM
pg 001-039/MC90/37-Eng 1/30/02, 8:59 AM33