EasyManua.ls Logo

Philips NeoPix Ultra One+ - User Manual

Philips NeoPix Ultra One+
26 pages
Print Icon
To Next Page IconTo Next Page
Loading...
User Manual
Register your product and get support at
www.philips.com/support

Questions and Answers

Summary

Introduction

About this user manual

Explains the purpose and content of the user manual.

Whats in the box

Lists all items included with the projector package.

Customer service centre

Provides contact information and support resources for the product.

General safety information

Setting up the product

Instructions for safely placing and positioning the projector.

Repairs

Guidelines on product repair and service center information.

Battery safety warnings

Critical warnings about battery handling, heat, and explosion risks.

Moisture and environmental precautions

Guidance on preventing moisture buildup and operating in suitable environments.

Overview

Power supply

Information about using the correct power adapter and outlet.

Top view

Identifies and explains the controls and indicators on the top surface of the projector.

Eye safety warning

Caution regarding direct exposure to the high-power LED projector lens.

Front view

Details the components visible on the front of the projector.

Side view

Identifies the ports and connectors on the projector's side.

Rear view

Explains the connections and features on the rear of the projector.

Remote controls

Introduces the Android TV remote control and its functions.

Projector remote control

Details the buttons and functions of the projector's remote control.

Initial setup

Connecting the Android TV Dongle

Steps to connect the Android TV Dongle to the projector via HDMI and USB.

Connecting to power supply

Instructions for connecting the projector to the electrical outlet.

Prepare the remote controls

Guidance on inserting batteries into the remote controls.

Power on and set up the projector

Steps to turn on the projector and initial startup procedures.

Screen size adjustment

Explains how screen size is determined and digital zooming.

Screen height adjustment

How to adjust screen height using the angle adjustment knob.

Image focus adjustment

How to adjust image focus using the projector's knob.

Image shape adjustment

How to adjust image shape using the keystone knob.

Set up Android TV

Initial setup process for the Android TV interface.

Use Android TV

Set up with Quick Start

Guide to setting up Android TV using an Android phone.

Set up with the Android TV remote control

Steps to set up Android TV using the remote control.

Navigate Android TV

How to navigate the Android TV interface using the remote.

Configure Android TV

Accessing and changing Android TV settings like apps, privacy, and picture.

Use a wired keyboard;mouse

Instructions for connecting and using wired input devices.

Use a Bluetooth device

Steps to pair and use Bluetooth devices with the projector.

Cast content to Android TV

How to cast media from mobile devices to the projector.

Connect to playback devices

Connect to devices through HDMI

How to connect devices via HDMI for video and audio output.

Connect to devices through AV

How to connect devices via AV for video and audio output.

Connect to a computer through VGA

Steps to connect a computer using a VGA cable for display.

Connect to external speakers or headphones

How to connect audio output devices for enhanced sound.

Play videos from storage devices

Supported file formats

Lists video file formats compatible with the projector.

Playing video files

Step-by-step guide to playing videos from USB or MicroSD.

Change settings

Android TV Configuration

Manage network, accounts, language, apps, and other Android TV preferences.

Display and Sound Settings

Adjust projector display resolution, scaling, sound, and audio output.

Android TV System Management

Access Netflix code, factory reset, and other system preferences for the dongle.

Change projector settings

Picture and Sound Configuration

Adjusting picture parameters (contrast, brightness) and sound settings (treble, bass).

System and Screen Adjustments

Managing language, restoring defaults, and rotating/flipping the projection screen.

Maintenance

Cleaning

Instructions for safely cleaning the projector exterior.

Cleaning the lens

Method for cleaning the projector lens without damage.

Software Updates

How to check for and update the projector's firmware.

Update software through USB

Detailed steps for updating projector software using a USB flash drive.

Troubleshooting

Power and Basic Operation Issues

Solutions for power on/off problems and unexpected shutdowns.

Video and Audio Connectivity

Troubleshooting no image or sound from HDMI/AV devices.

External Device Display Problems

Solutions for display issues with computers and other external devices.

Storage and Remote Control Problems

Solutions for USB read errors and unresponsive remote controls.

Wireless Display and Playback Issues

Troubleshooting screen mirroring, video/audio sync, and playback.

Operational Notes and Laptop Connectivity

Explains normal heat and laptop connection behavior.

Appendixes

Technical Specifications

Detailed specifications for projector, dongle, media player, and dimensions.

Package Contents and Model Information

Lists included items, package dimensions, and product model numbers.

Regulatory Compliance

CE, FCC, and Canadian Compliance

Details on compliance with EU, US, and Canadian radio frequency regulations.

RF Exposure and Safety Guidelines

Safety distance and installation advice for RF exposure compliance.

Other Notices and Disclaimers

Environmental notices, battery disposal, trademarks, and liability disclaimers.

Overview

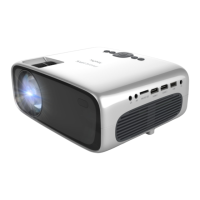
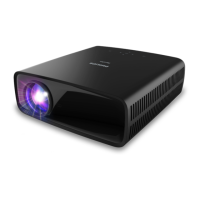
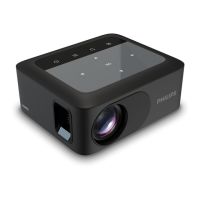
This document describes the Philips NeoPix Ultra One+ Home Projector (NPX646/INT), a device designed for indoor use to project images and videos onto a flat surface. It comes with an Android TV Dongle (NeoViu D1) for internet-based video streaming and offers various connectivity options for playback devices, computers, and external audio systems.

Function Description

The Philips NeoPix Ultra One+ is a home projector that allows users to display content from multiple sources onto a large screen. Its primary function is to project images and videos, offering features for adjusting image focus, shape (keystone correction), and screen size through digital zooming. The integrated Android TV Dongle enables smart TV functionalities, including access to streaming services like Netflix and Amazon Prime Video, Google Play Store for apps and games, and voice commands via Google Assistant. The projector also supports local media playback from USB storage devices and MicroSD cards.

Usage Features

Initial Setup and Placement:

The projector should be placed on a stable, flat surface in front of the projection surface. For optimal performance, ensure proper ventilation and avoid damp or dusty environments. It is crucial to connect the Android TV Dongle to the projector's HDMI 1 port and USB port using the provided HDMI and Micro-USB cables, respectively, to enable smart TV features. Power is supplied via an AC adapter and power cable, which should be connected to an easily accessible electrical socket.

Power On/Off and Standby:

To turn on the projector, press the power button once; the LED will turn green. To put it in standby mode, press the power button twice; the LED will turn red. For a complete shutdown, disconnect the power cable.

Image Adjustments:

  • Focus Adjustment: A focus adjustment knob on the top of the projector allows users to sharpen the image.
  • Keystone Adjustment: A keystone adjustment knob on the top helps correct the image shape, especially when the projector is not perfectly aligned with the screen.
  • Screen Height Adjustment: An angle adjustment knob at the bottom of the projector allows for minor height adjustments when placed on a flat surface.
  • Digital Zooming: The projector remote control can be used to access setup options and adjust the digital zoom, reducing the screen size without moving the projector.

Android TV Dongle Setup:

Upon first use or after a factory reset, the Android TV Dongle requires initial setup, including pairing the Android TV remote control, selecting a display language, and configuring Android TV. This setup can be done quickly using an Android phone with the Google app or manually using the Android TV remote control to connect to a Wi-Fi network and sign in to a Google account.

The dedicated Android TV remote control is used to navigate the Android TV home screen, access installed apps, and utilize voice commands or search functions (Google Assistant). The home screen provides access to streaming services, suggested videos, and personalized recommendations.

Configuring Android TV Settings:

From the Android TV home screen, users can access various settings such as Wi-Fi, Google account, language, date and time, keyboard, Bluetooth devices, and app management. Bluetooth devices like keyboards, mice, gamepads, and speakers can be paired with the Android TV Dongle.

Casting Content:

The built-in Chromecast feature allows users to cast videos, photos, and music from Android or iOS mobile devices or a Chrome browser to the Android TV. Both the casting device and the Android TV must be connected to the same Wi-Fi network.

Connecting Playback Devices:

  • HDMI: Playback devices such as Blu-ray players, gaming consoles, camcorders, digital cameras, or PCs can be connected via the HDMI 1 or HDMI 2 ports. Audio and video are played through the projector.
  • AV: DVD players, gaming consoles, camcorders, or digital cameras can be connected via the AV jack using a 3.5 mm RCA cable (not included).
  • VGA: Computers (desktops or laptops) can be connected via the VGA port. Users may need to adjust their computer's screen resolution and activate the external video output.

Connecting External Audio:

External speakers or headphones can be connected to the projector via the 3.5 mm audio output jack. When external audio devices are connected, the projector's internal speakers are automatically deactivated. It is recommended to turn down the projector volume before connecting headphones to prevent hearing damage.

Playing Videos from Storage Devices:

The projector supports playback of video files from USB storage devices (formatted as FAT16 or FAT32) or MicroSD cards. Users can navigate through folders and files using the projector remote control. During playback, options for play/pause, fast-forward, rewind, skipping tracks, and adjusting aspect ratio are available.

Projector Settings:

The projector's own settings can be accessed via the projector remote control. These include:

  • Picture Settings: Adjustments for picture mode (predefined or user-customized), contrast, brightness, color, sharpness, tint, color temperature, aspect ratio, and noise reduction.
  • Sound Settings: Adjustments for sound mode (predefined or user-customized), treble, bass, and auto volume.
  • Language Settings: Select the OSD (On-Screen Display) language.
  • Restore Default Settings: Reset the projector to its factory default settings.
  • Rotate/Flip Projection Screen: Adjust the orientation of the projected image.
  • Sleep Timer: Set a period after which the projector automatically turns off.
  • Auto Sleep: Set a period of inactivity after which the projector automatically turns off.

Maintenance Features

Cleaning:

  • Projector Surface: Use a soft, lint-free cloth for cleaning. Avoid liquid, gaseous, or flammable cleansers (sprays, abrasives, polishes, alcohol) and do not allow moisture to enter the projector's interior. Do not spray cleaning fluids directly onto the projector.
  • Lens: Use a soft brush or lens cleaning paper specifically designed for projector lenses. Never use liquid cleaning agents on the lens, as this can damage the coating film.

Software Update:

The projector's software can be updated via USB. Users should check the Philips support website (www.philips.com/support) for the latest software version, download the installation file, unzip it, and save it to the root directory of a USB flash drive. The USB drive is then connected to the projector, and the projector is turned on to initiate the update. It is critical not to turn off the projector or remove the USB flash drive during the update process. The projector will automatically turn off once the update is complete.

Troubleshooting:

The manual provides a troubleshooting section for common issues such as the projector not turning on/off, no image/sound from external devices, screen mirroring problems, and distorted video/audio. Solutions include checking cable connections, input selections, sound activation, remote control batteries, and software updates. It also notes that moderate heat during operation is normal.

Philips NeoPix Ultra One+ Specifications

General IconGeneral
Brightness200 ANSI Lumens
Projection TechnologyDLP
Light SourceLED
Contrast Ratio3000:1
Aspect Ratio16:9
Built-in Media PlayerYes
Lamp Life30, 000 hours
Weight0.86 kg
ConnectivityHDMI, USB
Built-in SpeakersYes
Keystone CorrectionManual
Input PortsHDMI, USB
Screen Size30" to 120"
Projection Size30" to 120"

Related product manuals