Operating elements
106986_en_01 PHOENIX CONTACT 27
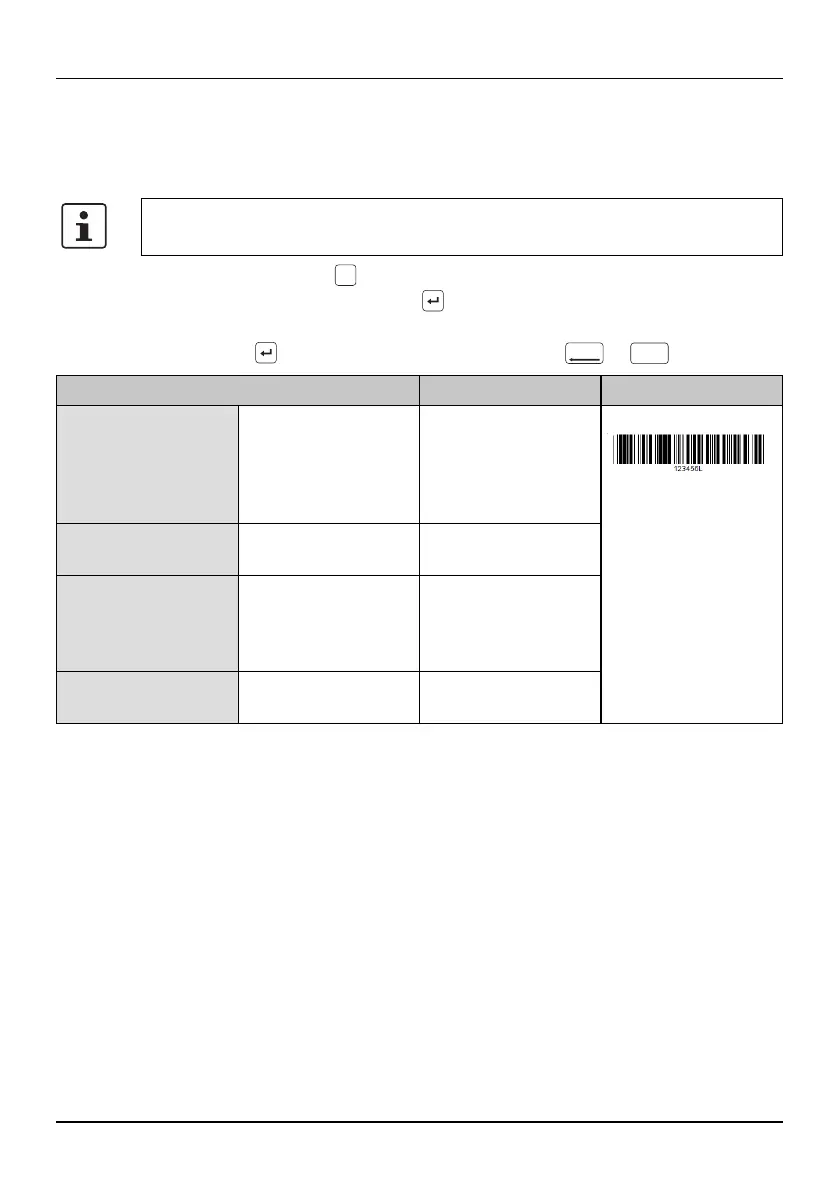
4.1.3 Inserting barcode
You can arrange for labels to be marked with a barcode. Move the cursor to the po-
sition at which the sequence is to be located.
• Press the turquoise key.
• Select “2. Barcode” . Press the key.
• Select the required settings (see below).
• Press the key to select an entry. Go back with or key.
“Bar.” is displayed on the input screen.
If you select this template, the entered marking will be deleted. First create the
template and than enter the marking.
Te m-
plate
Del./Back
Clear
Menu
Selection Possible entry Example
Barcode Type You can implement
Micro-QR-Code,
DataMatrix and
PDF417 via
CLIP PROJECT
[Code 39, Code 128,
Interleaved 2/5,
Codabar, EAN-8,
EAN-13, EAN-128,
UPC-A]
Width Barcode width [Small, Medium,
Large]
Display Text The text encrypted in
the barcode is dis-
played below the
barcode
[No, Yes]
Check Code A check digit is
added, if required
[No, Yes]
 Loading...