Once the adhesive sealing compound is applied,
proceed to fit four finishing strips (trimmings) to the
sides of the frame, at the positions previously
shown in the figure (lower side and upper side),
and four profiles until they adhere to the pane and
the frame edge.
WARNING
FIT THE 4 STRIPS WITH THE TOP EDGE FACING THE
PANE.
Then apply the band (2) on the lower trim, and the
band (3) on the upper trim, to ensure a perfect ad-
herence, in the drying phase. Once dried (needed
time at 20°C: 4- 5 hours "dust out", that is for the
initial stage; 6 hours for total hardening).
Remove the two bands and the tool, being careful
to remove with a spatula any adhesive sealing
compound that may have oozed when the trims
were pressed.
Specific tooling
19.1.20050 Lower retainer clamp for strip
19.1.20051 Upper retainer clamp for strip
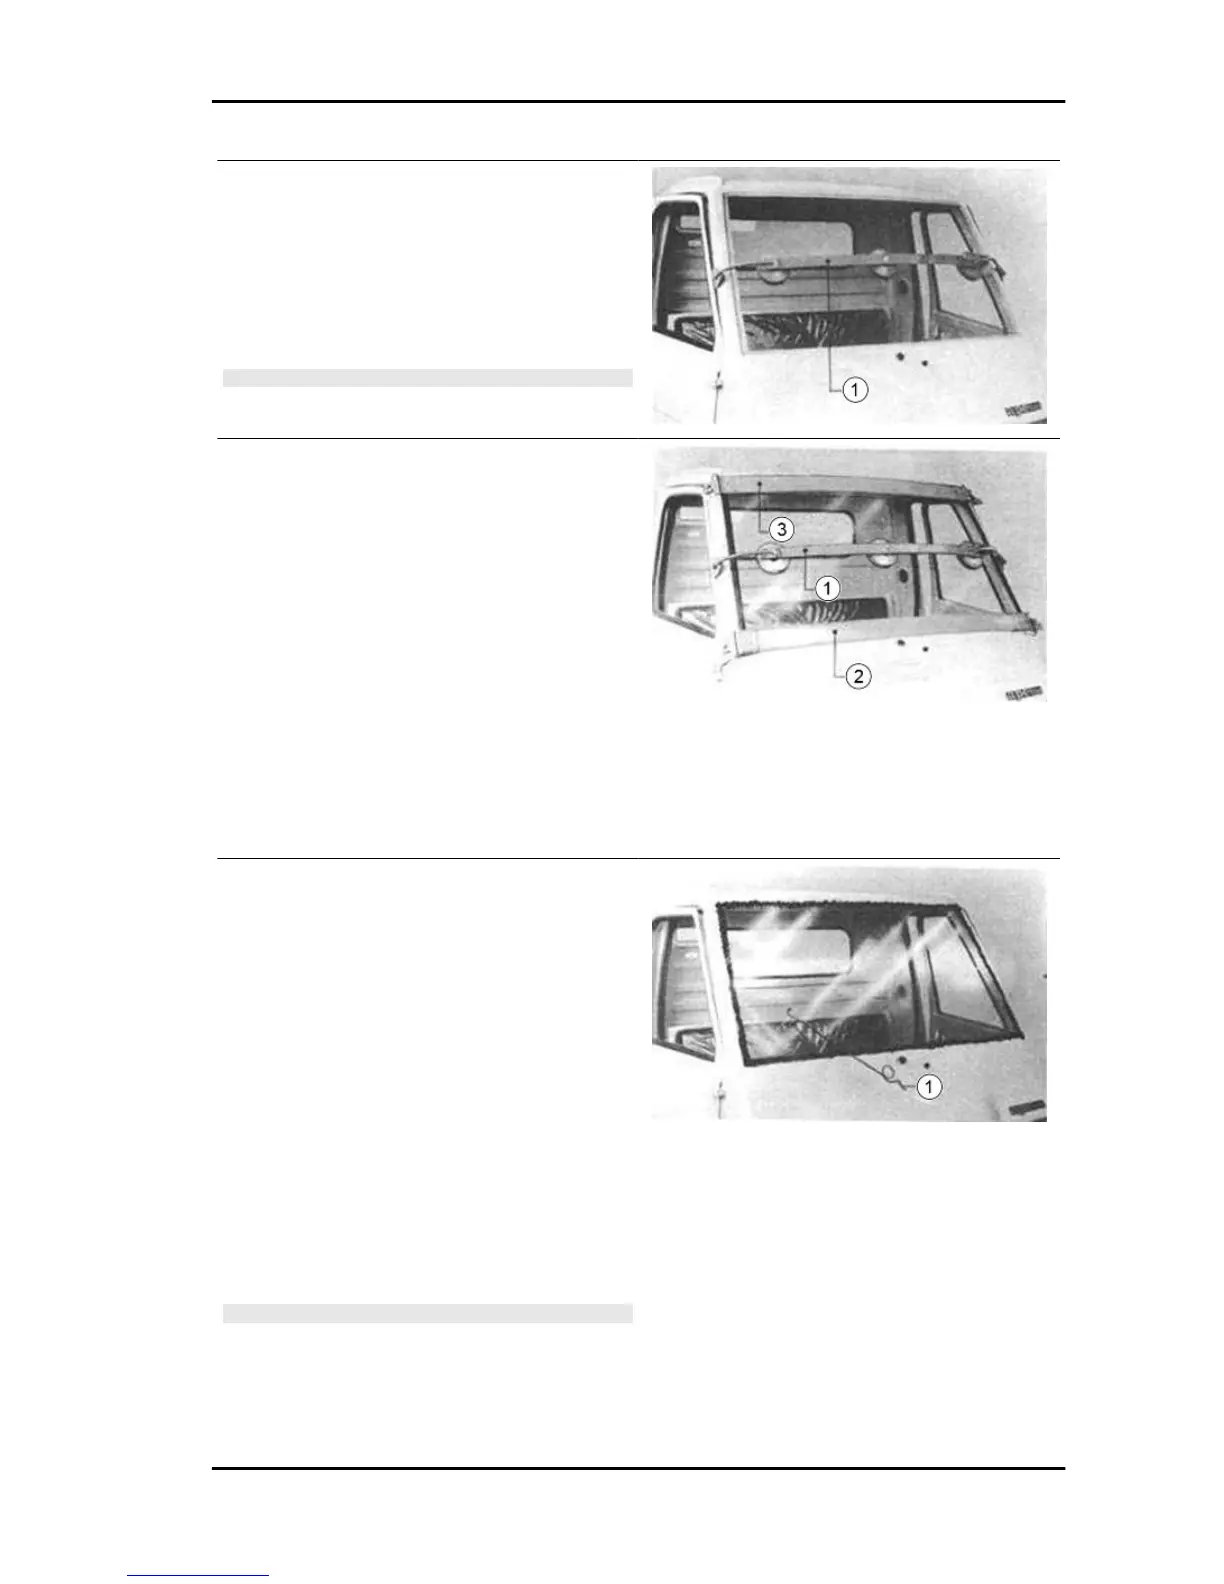
REMOVAL AND REUSE OF A WINDOW PANE
THAT IS NOT DAMAGED
- Should a repair operation in the cab require re-
moving the already fitted window pane (not dam-
aged) and afterwards refitting it, proceed as
follows:
- remove the trims and the profiles; make a hole
on the gasket made with specific sealant (between
the frame and the window pane) and thread
through a harmonic steel wire (1) (Ø 0.5 mm.), cut
the sealing gasket by sliding the wire all along the
window pane perimeter, until the window pane
gets detached from the sealing gasket.
WARNING
TWO PERSONS ARE REQUIRED TO CUT THE SEALING
GASKET WITH THE STEEL WIRE (ONE WORKING FROM
INSIDE THE CAB, AND THE OTHER, FROM OUTSIDE).
APE TM Benzina Chassis
CH - 139