?
18 /20
Use, maintenance and calibration
M0171G
10 MAINTENANCE
BATTERY
REPLACEMENT
Use 2x1.5 V alkaline batteries size AAA
WARNING K24 should be installed in a position allowing the batteries to be re-
placed without removing it from the system.
K24 features two low-battery alarm levels:
1 When the battery charge falls below the first level on the LCD, the fixed battery
symbol appears. In this condition, K24 continues to operate correctly, but the
fixed icon warns the user that it is ADVISABLE to change the batteries.
2 If K24 operation continues without changing the batteries, the second battery
alarm level will be reached which will prevent operation. In this condition the bat-
tery icon starts to flash and is the only one to remain visible on the LCD.
o change the
batteries, with
reference to
the exploded
diagram posi-
tions, proceed as
follows
1 Press RESET to update all the totals
2 Loosen the 4 fixing screws of the lower cover
3 Remove the old batteries
4 Place the new batteries in the same position as the old ones
5 close the cover again, by positioning the rubber protection as a gasket
6 K24 will switch on automatically and normal operation can be resumed
The K24 will display the same Reset Total, the same Total and the same Partial indicated before the
batteries were changed.
After changing the batteries, the meter does not need calibrating again.
CLEANING
Only one operation is necessary to clean the k24.
After removing k24 from the plant where it was built in, any residual ele-
ments can be removed by washing or mechanically-handling.
If this operation does not restore a smooth rotation of the turbine, it will
have to be replaced.
ATTENTION Do not discard the old batteries in the environment. Refer to local dis-
posal regulations.
Do not use compressed air onto the turbine in order to avoid its damage
because of an excessive rotation
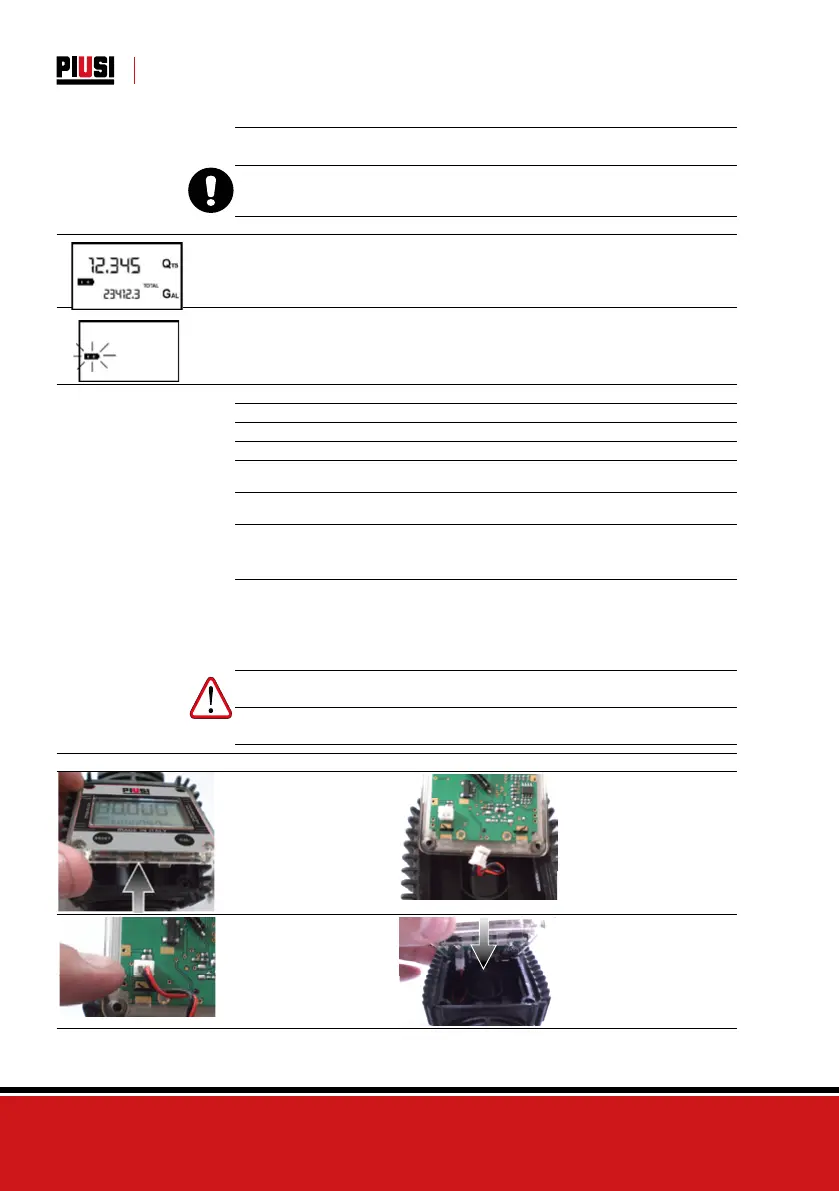
K24 FRONT FACE REPLACEMENT
1 - Carefully remove the
screws from the corners of
the front panel, and then
carefully lift the front cover
up away from the main
body of the meter.
2 - Carefully remove the
screws from the corners of
the front panel, and then
carefully lift the front cover
up away from the main
body of the meter.
3 - When the new panel is
fitted make sure the power
adapter is fitted correctly
with the location pin in the
correct way
4 - Carefully refit the dis-
play panel back onto the
main body making sure the
wire is tucked into the cor-
ner and replace the screws