User manual - PL500-PL600-PL700 - 13
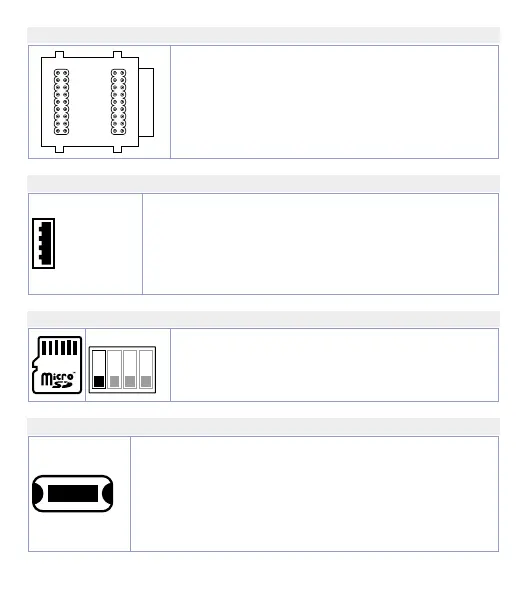
5.f PLE / DIN bus
Bus connector to be lodged in the hollow of the DIN
rail to connect any I/O module to the PL500. For the
mounting sequence see paragraph 2.2.
5.g USB
USB 2.0 port for Backup / Restore of the mass archiving
functionalities and applications (the memory must be
formatted in FAT/FAT32).
By using the converter USB-Ethernet cod. 2400.70.005 it is
possible to get a second Ethernet port (ETH1). In this way,
the first one (ETH0) is open to communication protocols
which need a total control of the port (EtherCAT).
5.h Micro SD slot (internal)
4 3 2 1
ON OFF
MicroSD slot for Backup / Restore of the mass
archiving functionalities and applications (the
memory must be formatted in FAT/FAT32). The Boot
function from MicroSD is possible by positioning the
DIP 4 of the external Dip switch on ON.
5.i S1 button for system Backup / Restore (internal)
Backup:
1 Insert a MicroSD (internal) or USB (external) memory.
2 Position the
“Stop”
DIP to ON and turn the PLC on by
pressing the button (the internal green LED turns on).
3 Wait for the completion of the Backup procedure (the
internal green LED turns off).
4 Turn the PLC off, remove the MicroSD or USB memory
and turn the device on again.