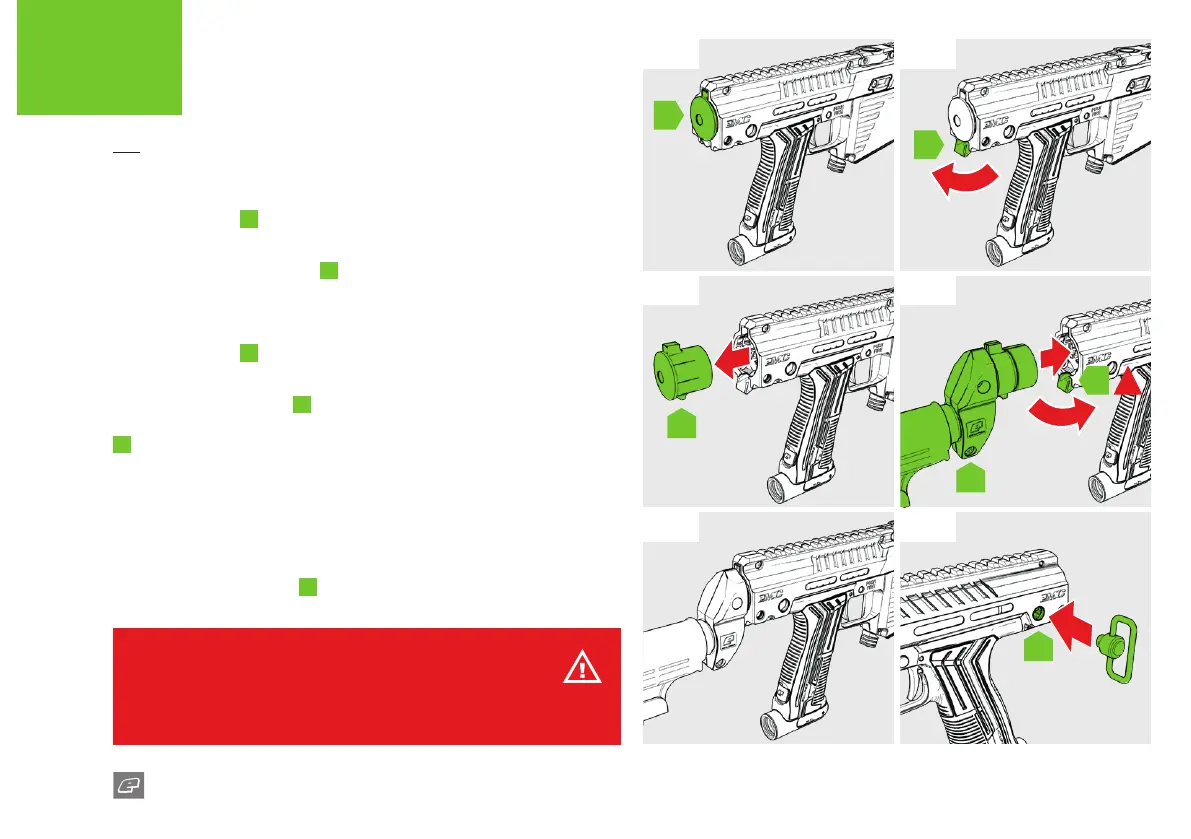
FIG-7
The blanking plug
E
needs to be removed from the MG 100.
FIG-8
Swing the blanking plug latch
F
towards the back of the marker to
release the blanking plug.
FIG-9
The blanking plug
E
will slide out from the MG 100 body with ease.
FIG-10
Insert the stock assembly
G
into the back of the MG 100 using the top
and bottom tabs to guide it. Once inserted swing the blanking plug latch
F
towards the marker to secure the stock assembly in place.
FIG-11
The installed stock assembly should be secure and solid. If it feels loose
then remove and try to ret correctly.
FIG-12
Short (6mm stub) third party QD sling mounts may be installed in the
mounting rings highlighted
H
.
FIG-7
FIG-9
FIG-11
FIG-8
FIG-10
FIG-12
F
E
H
E
G
F
!
WARNING!
Always ensure the blanking plug latch is in the forwards position to guarantee
the secure installation of the stock assembly.
23
MG 100
QUICK START
ATTACHING A STOCK