Before proceeding, please take a minute to review the safety guidelines
described in the Safety Instruction above and the following additional
precautions.
●Do not place the product in a damp or wet location.
●Always avoid dust and dirt.
●Do not install the product in an area exposed to direct sunlight.
●Allow some space between the product and the surroundings to facilitate
dissipation of heat generated inside the hub.
Directly attach the Centronics port of the print server to the parallel port of
your printer. Next, fix the print server with the metal fittings (wiring)
provided by the parallel port of the printer.
Note :
The print server may not attach directly to some printers due to their
exterior shape and/or location of the parallel port. If this is the case, use an
optional cable (Model Number: PS-CB) to connect the print server to your
printer.
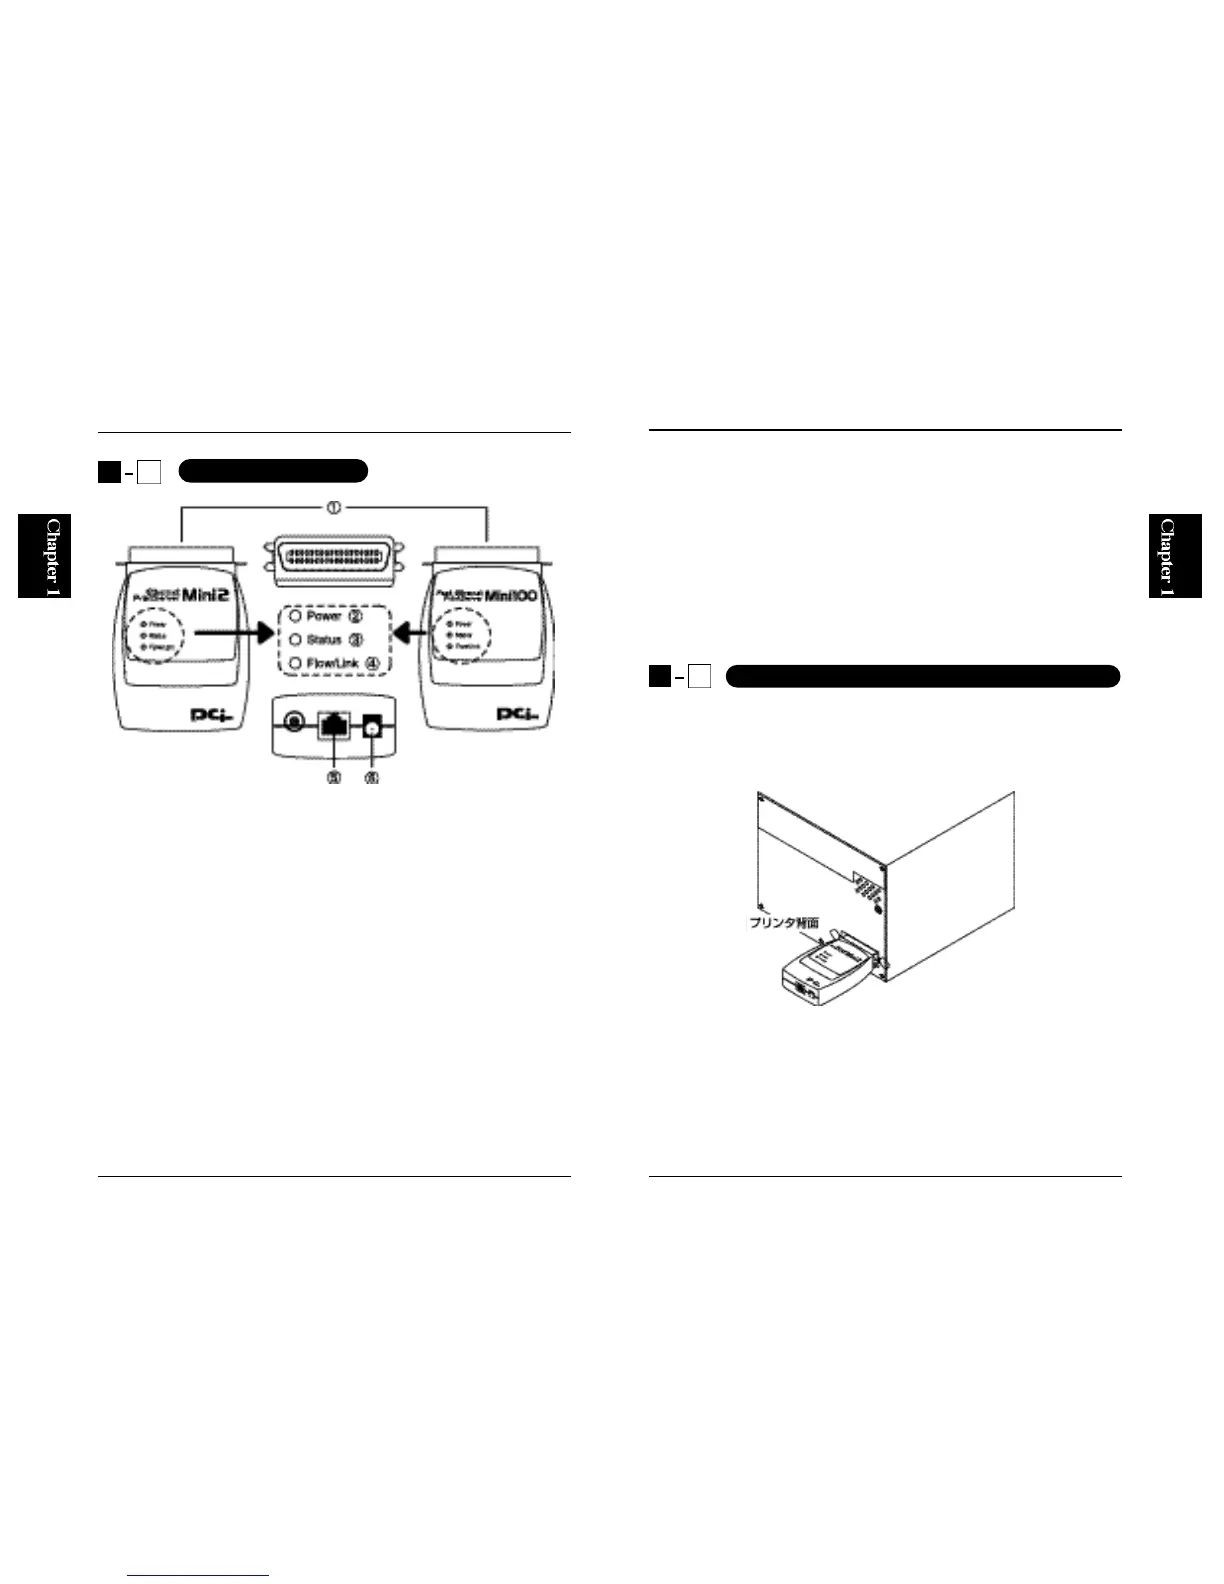
1. Parallel Port : The Centronics parallel port directly connects to a printer.
2. Power LED : The LED illuminates when the power of the print server is
turned on.
3. Status LED : Indicates the status of the print server. The LED flashes
during data transfer and/or while the print server is printing.
4. Flow/Link LED : The LED is turned on when there is a link on the RJ-45
port.
5. RJ-45 Port : Provides an interface to a network via a twisted-pair cable.
6. Power Jack : Connects to the supplied AC power adapter.
43
Mini100/Mini2
1
4
Parts Terminology
Chapter 2
Hardware Installation
2
1
Connecting the Print Server to Your Printer
Figure 1-2