14
To achieve a sound performance that is correctly aligned to your room, make sure all of the leads carrying
signals for the RIGHT channel loudspeaker are connected to the RIGHT input/outputs on your power
amplifier/preamplifier/CD player etc. Signals for the LEFT channel should be wired in a similar fashion.
CONNECTING THE MAINS SUPPLY
Now that your Plinius M16 Preamplifier is configured to your system correctly, the mains cable can be
plugged into the IEC socket on the back of the preamplifier. Re-check all interconnection cables are fitted
correctly. Flick the power switch on the back panel to the right. The standby LED will flash for about five
seconds before closing the mute circuit and setting the active input to Phono.
ENABLING THE INPUTS/OUTPUTS
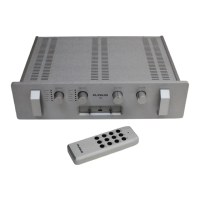
Use either the Standby switch on the rear panel, or the Standby button on the remote to bring the Plinius
M16 out of standby. Press the Mute button, then alter the volume to achieve the sound level you require.
The Phase button can be used to select absolute or inverted 180° phase. Note that either the remote or
the switches/volume knob on the front panel can be used to perform these functions. You can now enjoy
your new Plinius M16 Preamplifier.
WARM-UP PERIOD
You will find that the Plinius M16 will become noticeably ‘warmer’ in sound after being on for a period of
time. We usually recommend waiting at least 72 hours before expecting the best quality of sound
reproduction from your preamplifier. Also, as the Plinius M16 uses very little power while on, we suggest
leaving the unit turned on (but in standby mode while not being used) so that it will always be at it’s sonic
best.