Attention
If you have more than one scanner or other
imaging devices installed on your computer, you
need to set this scanner as the default scanning
source before you acquire the TWAIN program.
1. In Readiris Pro 10 Corporate Edition, click
the
Scanner button located on
the left side.
2. Click Scanner Model. In the Scanner
model window that opens, select Show
TWAIN User Interface and then click the
OK button.
3. In the next window that pops up, click the
Configure button.
4. In the Select Source window that opens,
choose this scanner and then click the
Select button to set this scanner as the
default scanning source.
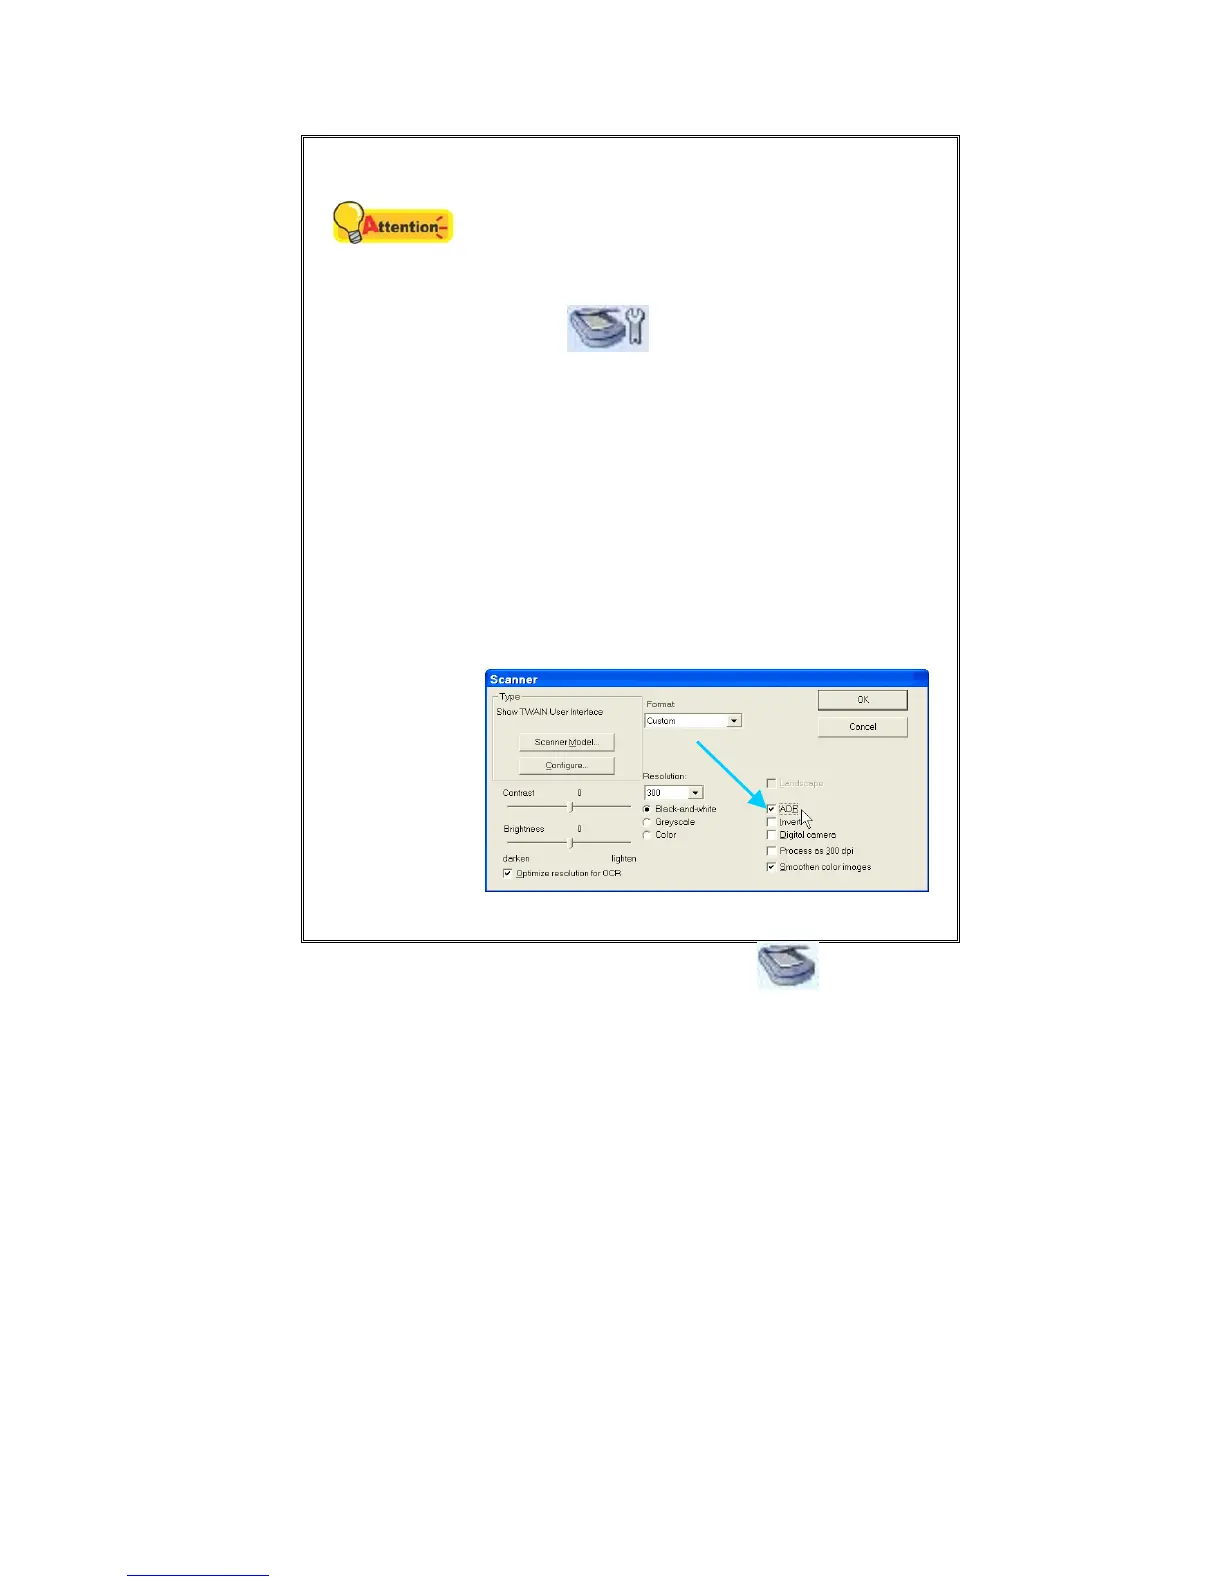
5. If you want to scan from ADF, tick the box
of ADF on the right of the following window.
6. Click the OK button to return to Readiris
workspace.
2. Within Readiris Pro 10 Corporate Edition, click the Scan button located
on the left side.
3. In the TWAIN window that opens, select ADF (Front Side) as the Scan Type if
you want to scan single-sided documents, or select ADF (Duplex) to scan
double-sided documents.
4. Adjust the scanning settings. For ADF (Duplex) scan, you can tailor settings
individually for front and rear sides of the documents. Click Front Side button
to adjust the scanning settings of document front side and then click Rear Side
button to adjust the scanning settings of document rear side.
You can enable the function of Merge Pages only when you select ADF
(Duplex) as Scan type and Automatic Size as Page Size to output the scan
images of both front and rear sides in one image. After the function of Merge
Pages is enabled, you can make the selection of Horizontally to generate both
front and rear image data horizontally in a joined image (the rear image will be
placed at the right side next to the front image), or make the selection of
Vertically to generate both front and rear image data vertically in a joined
image (the rear image will be placed below the front image).
24