Pá gina 67
Esp a ñ o l
2
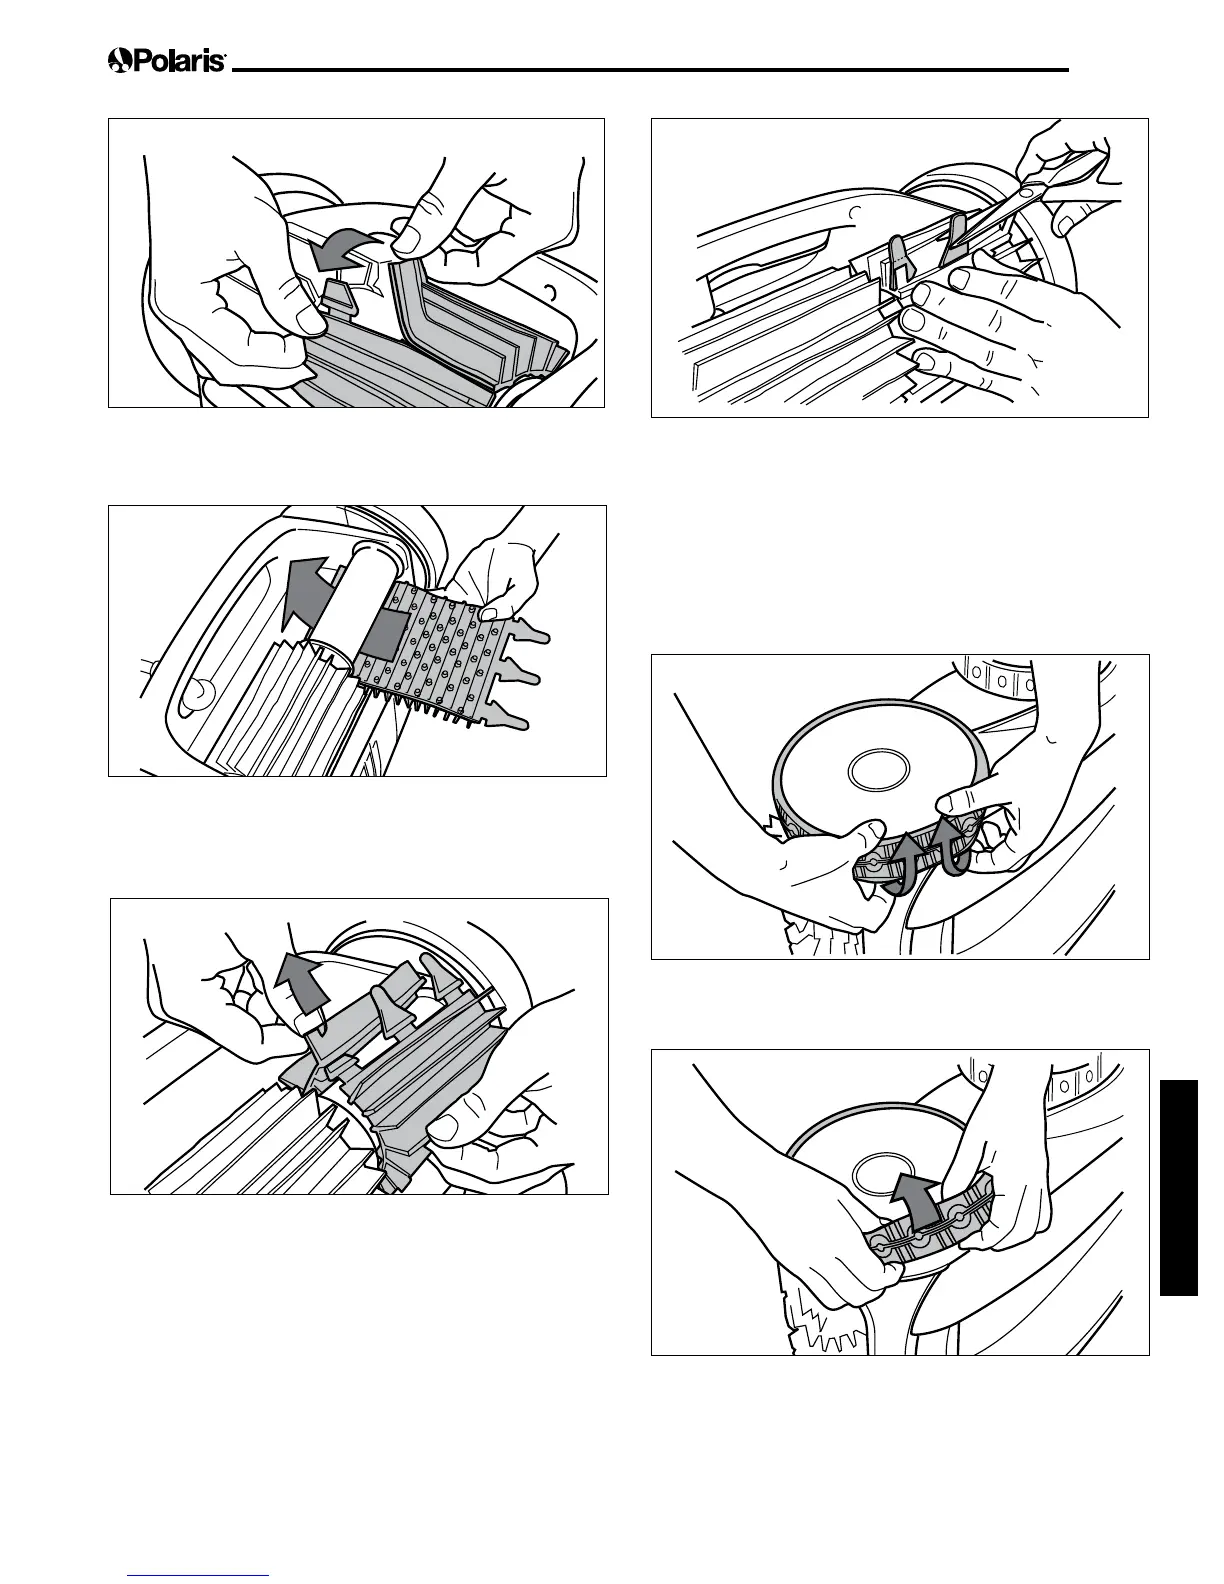
F igu r a 3 1 . A b r a la s t r a b illa s d e l c e p illo
3. Para instalar un cepillo nuevo, colóque lo en el
rodillo con las espigas hacia abaj o (Figura 32).
3
F igu r a 3 2 . I nst a le e l c e p illo nu e v o
4. Enganche cada trabilla en la ranura provista e
insé rtela suavemente hasta que la base salga del
otro lado de la ranura (Figura 33).
4
F igu r a 3 3 . T ir e d e la s t r a b illa s a t r a v é s d e c a d a r a nu r a
5. Utilicetierasparacortarlastrabillasa3/4de
pulgada de la base para que no queden má s
grandes que las espigas (Figura 34).
F igu r a 3 4 . C o r t e la s t r a b illa s
6. Repita este procedimiento para instalar el
segundo cepillo.
6 . 4 R e e m p la zo d e lo s ne u m á t ic o s
1. Con los dedos, separe el interior del neumá tico
viej o para retirar el borde del neumá tico de la rueda.
(Figura35).
1
F igu r a 3 5 . T ir e d e l ne u m á t ic o v ie j o p o r e nc im a d e
la r u e d a
2. Saque el neumá tico viej o (Figura 36).
2
F igu r a 3 6 . S a q u e e l ne u m á t ic o v ie j o
3. Para reemplazar el neumá tico, ubique el neumá tico
en la rueda, asegurá ndose de orientarlo de modo
uelapalabraSDE(adentro)uedehaciael
cuerpo del limpiador (Figura 37).
 Loading...