the
topsidl' scn:w
(Fi(Ulr~
5-47) until thl: hor-
izontallincs in thl' (arget meet.
t:.
Swin1!
{he Climera
::ITOund
to
the
four~fool
tOl~1.
While looking through
the
focal
plane
pIall: loupe. move the focus bar
toward
CLOSE·UP.
Stop
focllSing when
the
image
is sharpest. Now. look
at
tbe
Jarger
cross--
n::llr
target through the
RF
NF
eye
window:
IF
11IE IMAGES OF 11IE VERTICAL
LINE ARE NOT MERGED: Using special
too!
~169443,
adju.t the range screw (Fig-
ll~
547)
untiJ
the
images
of
the
vertka1
Hnt:'
merge.
IF 11IE IMAGES
OF
11IE
HORIZONT
At
UNE
ARE
NOT
MERGED: Using special
tooJ
#169443, adjust
the
topside screw (Fig-
ure
547)
until
the
images
of
the
horizontal
line merge.
d.
Go
back
to
the
infmity target and repeat
the
Infinity check:
(step
b).
e. Wben an
adjustments
are complete.
sea)
the
adjusting screws
with
shellac.
f. Take the camera
off
the
collimator
and
re-
place
the rear window
p1ate.
3.
RlUIge
Adjustment
for
Image
Siler
IF
11IE MOVABLE AND
RXED
LINES
DID NOT MEET:
As
shown in Figure 5-48
there
is
j)
very small slot
above
the
lens.
This provides
3Cl.'eSS
to
;.10
Oldjusting spring
which controls the alignment
of
the
lines.
Set thl: focus bur
to
INFINITY,
Using::l
very
nne
pointed tooJ such
as::I
fine bl::lded
tweezer, move the adjusting; sprin& while
looking through
the
eYI:
lens, Stop OIdjustins
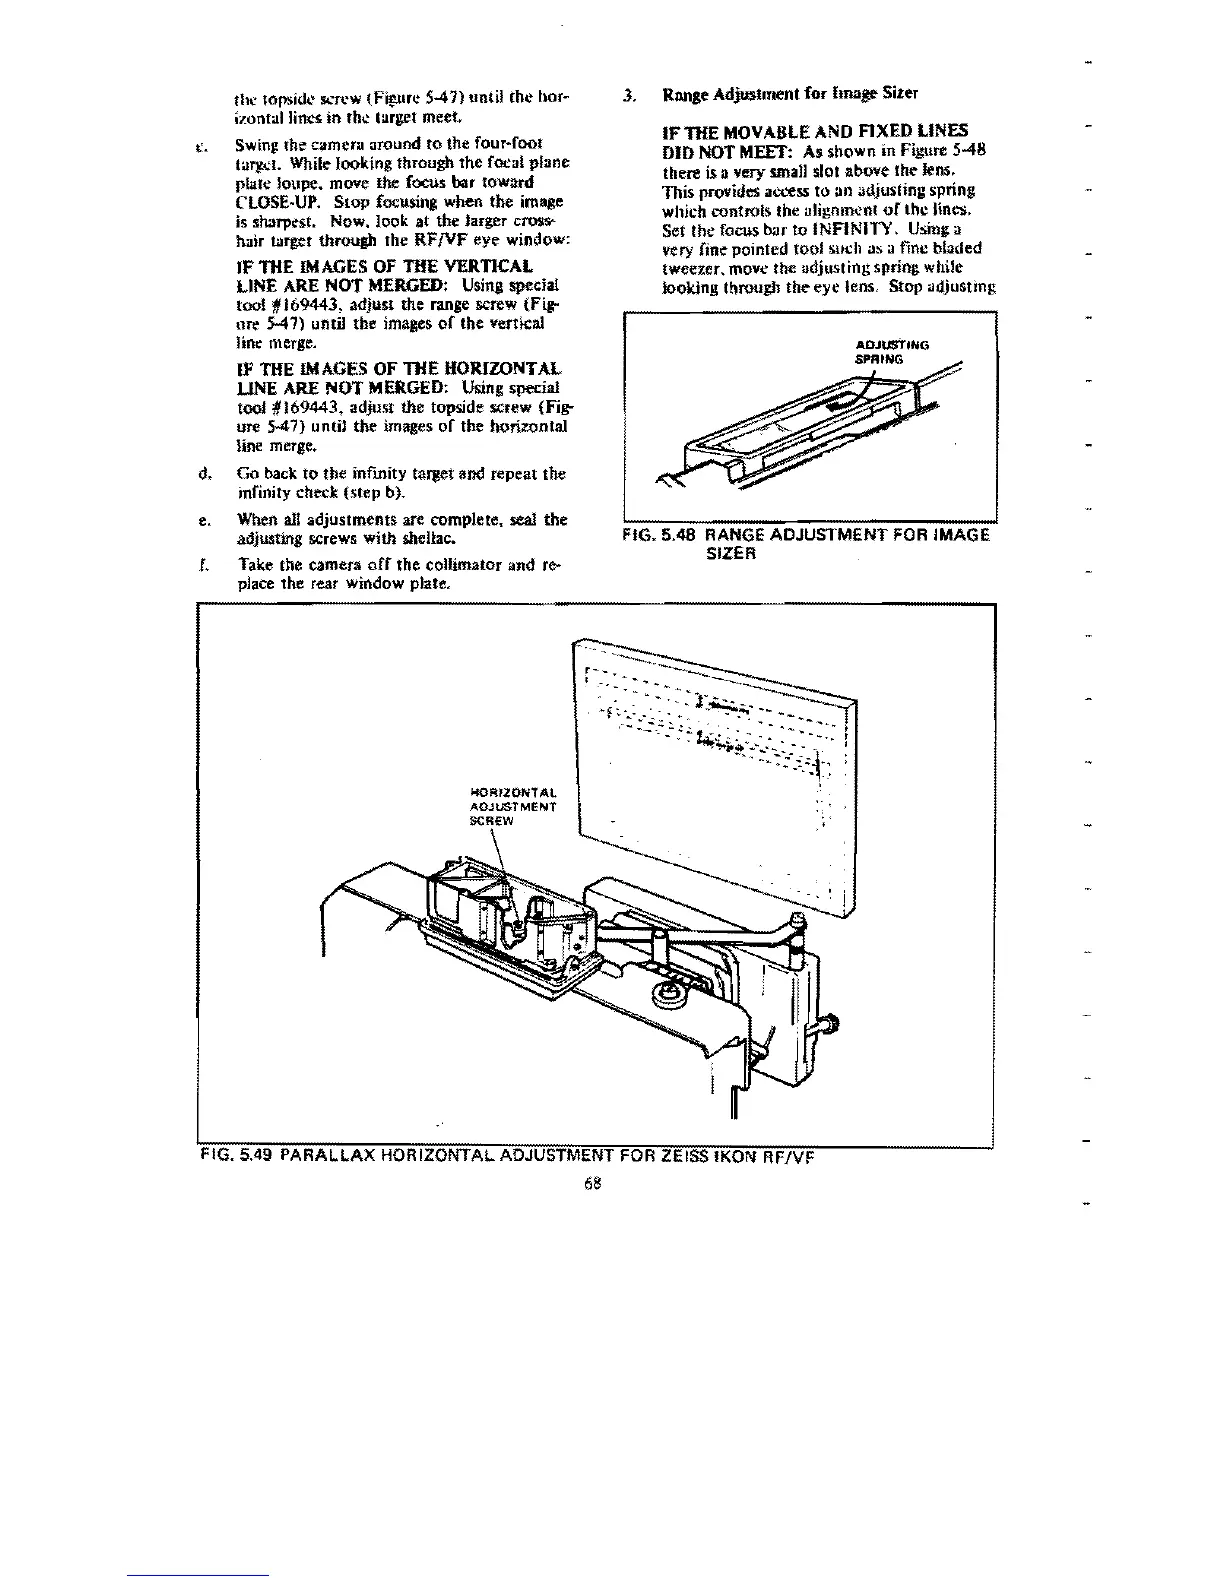
FIG, 5,48 RANGE ADJUSTMENT
FOR
IMAGE
SIZER
HORPZONTAL
ADJUSTMENT
FIG, 5.49
PARALLAX
HORIZONTAL ADJUSTMENT
fOR
ZEISS IKON RFIVF
68

 Loading...