Do you have a question about the Polycom EagleEye Director II and is the answer not in the manual?
Administrator guide for the Polycom EagleEye Director II camera system.
Information on how to get assistance and support for Polycom products.
Access to developer and support information, forums, and online accounts.
Links to additional documentation and resources for Polycom endpoints.
How to provide feedback for improving Polycom documentation.
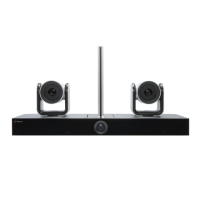
Introduction to the Polycom EagleEye Director II camera and its capabilities.
Guidelines for optimal camera placement on a wall for best performance.
Information on various cable connections and their usage scenarios.
Explanation of the LED indicator light status meanings.
Information on using the EagleEye IV camera with the Director II.
How to use the camera with Skype for Business.
Steps to select the camera as a video device in Skype for Business.
Procedure to install the EagleEye Director II App for device management.
Accessing IP addresses and status information for connected cameras.
Creating a connection to a device using the EagleEye Director II App.
Adding additional EagleEye Director II cameras to the available devices list.
Configuring connection mode, tracking, and camera controls via the app.
Steps to connect to the camera's web interface for configuration.
How to change the display language in the camera's web interface.
Assigning a name to the EagleEye Director II camera.
Configuring network settings for 802.1x authentication.
Enabling WiFi for web interface access, especially for cascading.
Selecting the operating mode for the camera (Automatic, Group Series, BYOD).
Settings to adjust camera tracking, speed, and frame size for optimal performance.
Configuring Picture-in-Picture (PIP) display for group or room views.
Adjusting backlight compensation for better video in challenging lighting.
Setting white balance for accurate color reproduction in various lighting conditions.
Adjusting the camera's brightness level.
Adjusting color saturation for optimal hue transmission.
Changing the position of the Picture-in-Picture window in video calls.
Details about the analytics camera's role in participant counting and PIP video.
Adjusting the tilt of the analytics camera for better framing.
Recommended camera placement scenarios for cascading in different room types.
Information on generating and importing security certificates for secure connections.
Steps to generate a security certificate in the camera's web interface.
Steps to import an existing security certificate.
Procedure for changing the camera's administrator password.
Steps to update camera software using its web interface.
Instructions for updating camera software via Windows.
Method for updating camera software using a USB drive.
Tools and procedures for system diagnostics to aid troubleshooting.
How to test the camera's internal microphones and audio inputs.
Procedure to download system log files for troubleshooting assistance.
| Brand | Polycom |
|---|---|
| Model | EagleEye Director II |
| Category | Digital Camera |
| Language | English |