LED Light Color Description
Fast Blinking Blue Adjust analytics camera status
Amber Standby/asleep
Alternate Amber and Blue Software update and factory restore
Blinking Amber USB disk is plugged in
Green In a call
Related Links
Troubleshooting on page 28
Perform a Factory Restore on page 29
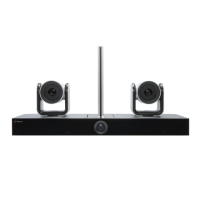
Using a Polycom EagleEye IV Camera
Two Polycom EagleEye IV cameras are used with the EagleEye Director II camera. For available
accessories, refer to the
Polycom EagleEye Director II Release Notes. For more information on the
EagleEye Digital Extender and Digital Breakout Adapter accessories, refer to the RealPresence Group
Series Integrator Reference Guide.
Replace the EagleEye IV Camera
On the EagleEye Director II camera, you can replace an EagleEye IV camera with another EagleEye IV
camera.
Procedure
1. Power off the EagleEye Director II camera.
2. Disconnect and remove the existing EagleEye IV camera.
3. Connect the desired EagleEye IV camera.
4. Power on the EagleEye Director II camera.
Skype for Business
To use the EagleEye Director II camera as a USB camera for Skype for Business calls, the client
computer requires some configuration.
Enable the Camera in Skype for Business Client
Before you can use the EagleEye Director II camera with Skype for Business, you must select it as a
video device in the client computer.
Setting Up Your Camera
Polycom, Inc. 9