Configure Cascading
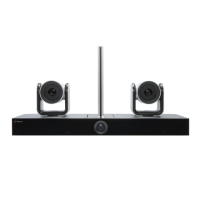
Cascading involves using two EagleEye Director II cameras in the same room. In this documentation, the
original camera is called primary, while the additional camera is called secondary.
To connect the primary EagleEye Director II camera to a RealPresence Group Series system or to a
computer, you must select a mode in the web interface.
Note: The primary camera synchronizes these settings to the secondary camera: Tracking Mode,
Tracking Speed, Framing Size, and PIP Position.
Procedure
1. Select General Settings > Mode and choose one of the following options.
2. In the primary camera web interface, select Camera Settings > Cascading.
3. Select a camera from the list and select Connect.
Only standalone EagleEye Director II cameras appear in the list.
Secondary Camera Connection Status
Connection Status Description
Red icon Disconnected. The camera might be powered off,
or the network cable might have been unplugged
for more than one minute.
Green icon Connected.
Gray icon Ready for connection. If you manually disconnect
the camera, the icon status becomes gray.
Related Links
Configure Camera Tracking on page 17
Configure the PIP Window Position on page 19
Disconnect a Cascaded Camera
You can disconnect an EagleEye Director II camera from the existing device network.
Procedure
1. Select Camera Settings > Cascading.
2. To remove a camera from the network, select the device name and then Disconnect.
The Status displays a red icon, indicating that the primary camera is disconnected. After the
primary camera is disconnected, the secondary device is automatically disconnected from the
network.
Cascading Two Cameras
Polycom, Inc. 23