www.powerbox-systems.com
29
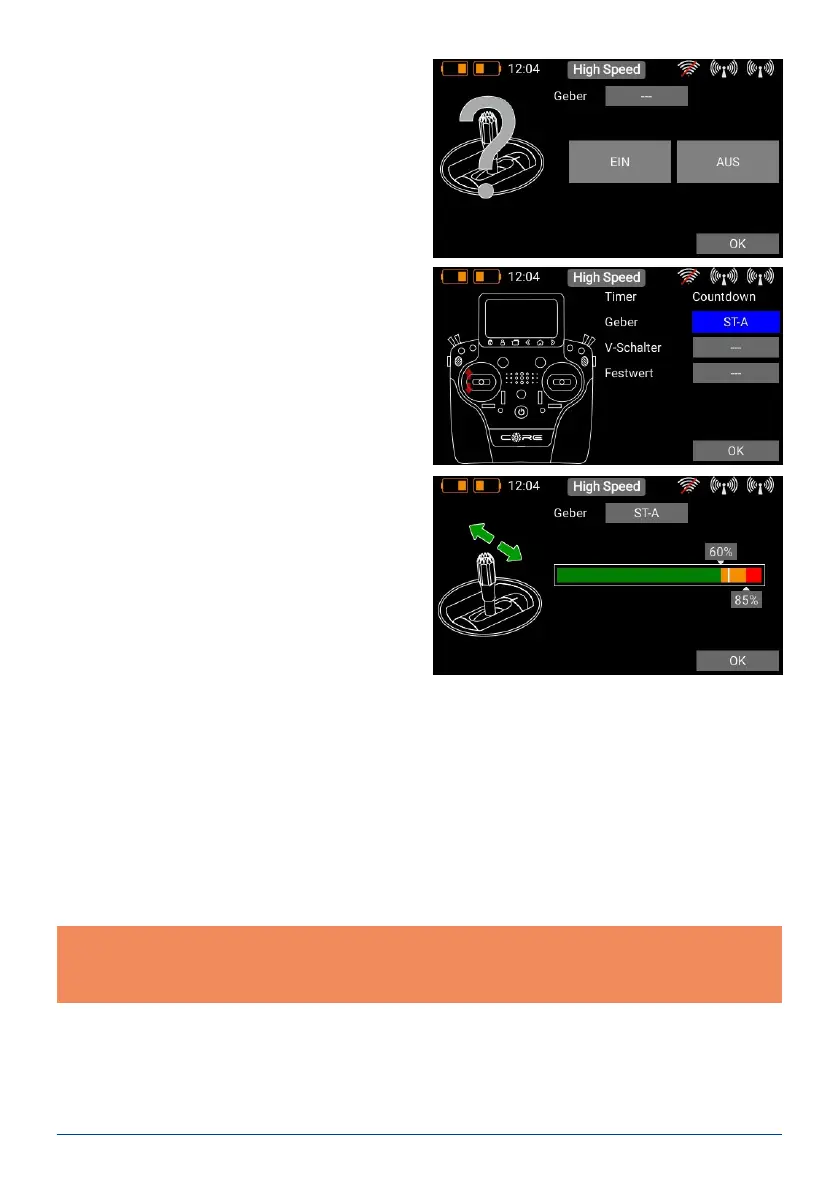
The two switching points can now be placed in any position you like by moving them with your nger. The red
area indicates the “Off state”, the green area the “On state”. The orange area indicates “hysteresis”, i.e. the area
in which no switching takes place. You can very easily reverse the “Off state” and the “On state” by moving one
of the two switching point sliders in front of or behind the other.
This adaptability provides maximum exibility and simplicity, and you can immediately check the effect of your
settings by moving the switch or linear control. The transmitter control symbol on the left changes colour to
indicate the switched state.
Press OK when you have completed the settings.
The procedure for the Stop and Reset control is identical.
Note: if you wish the timer to start once, and continue running until it is reset, then you do not need to assign
a Stop control. If you wish the same transmitter control to start and stop the timer alternately, simply assign
the same control to Stop as for Start, and reverse the switching points.
Locate Input at the top, and again press the eld
with the three dashes.
c) Servo values, Quick-Select menu and notes
Widgets for individual servo outputs, quick-select for menu entries and also simple notes can be created in the
same way as telemetry values. The procedure is the same as for telemetry or timer widgets: keep your nger
on a free space on the main screen display, and make your selection as you wish.
Now you can select a transmitter control by ope-
rating it; this can be a switch or a linear control.
Your chosen transmitter control now appears on
the left, together with a bar display containing two
switching points.
In the Control eld you can select the transmitter
control which is to start, stop or reset the timer. For
Start press the button with the three dashes, and
you will see the following screen: