EasyManua.ls Logo

PowerMaster SG - Attaching Drive Chain

Default Icon
30 pages
Print Icon
To Next Page IconTo Next Page
To Previous Page IconTo Previous Page
Loading...
17
FIGURE 5
PowerMaster
Gate Leading Edge
Gate
Bracket
Gate
Bracket
3/4 Internal Tooth
Lock Washer
Washer
Nut
Nut
Spring
Washer
1/2-13 Elastic
Stop Nut
Chain
Tensioning
Spring
Bolt
3/8”
U-Bolts
Spring
Fitting
Gate
Bracket
Cement
Pad
Chain Support
Bracket
Install chain support
bracket as required.
#50 Connecting Link
Chain Take-up Bolt
3/4-10 Jamb Nut
Chain Support
Backup Plate
Chain Sup-
port Bracket
Drive Chain
Gate Extension
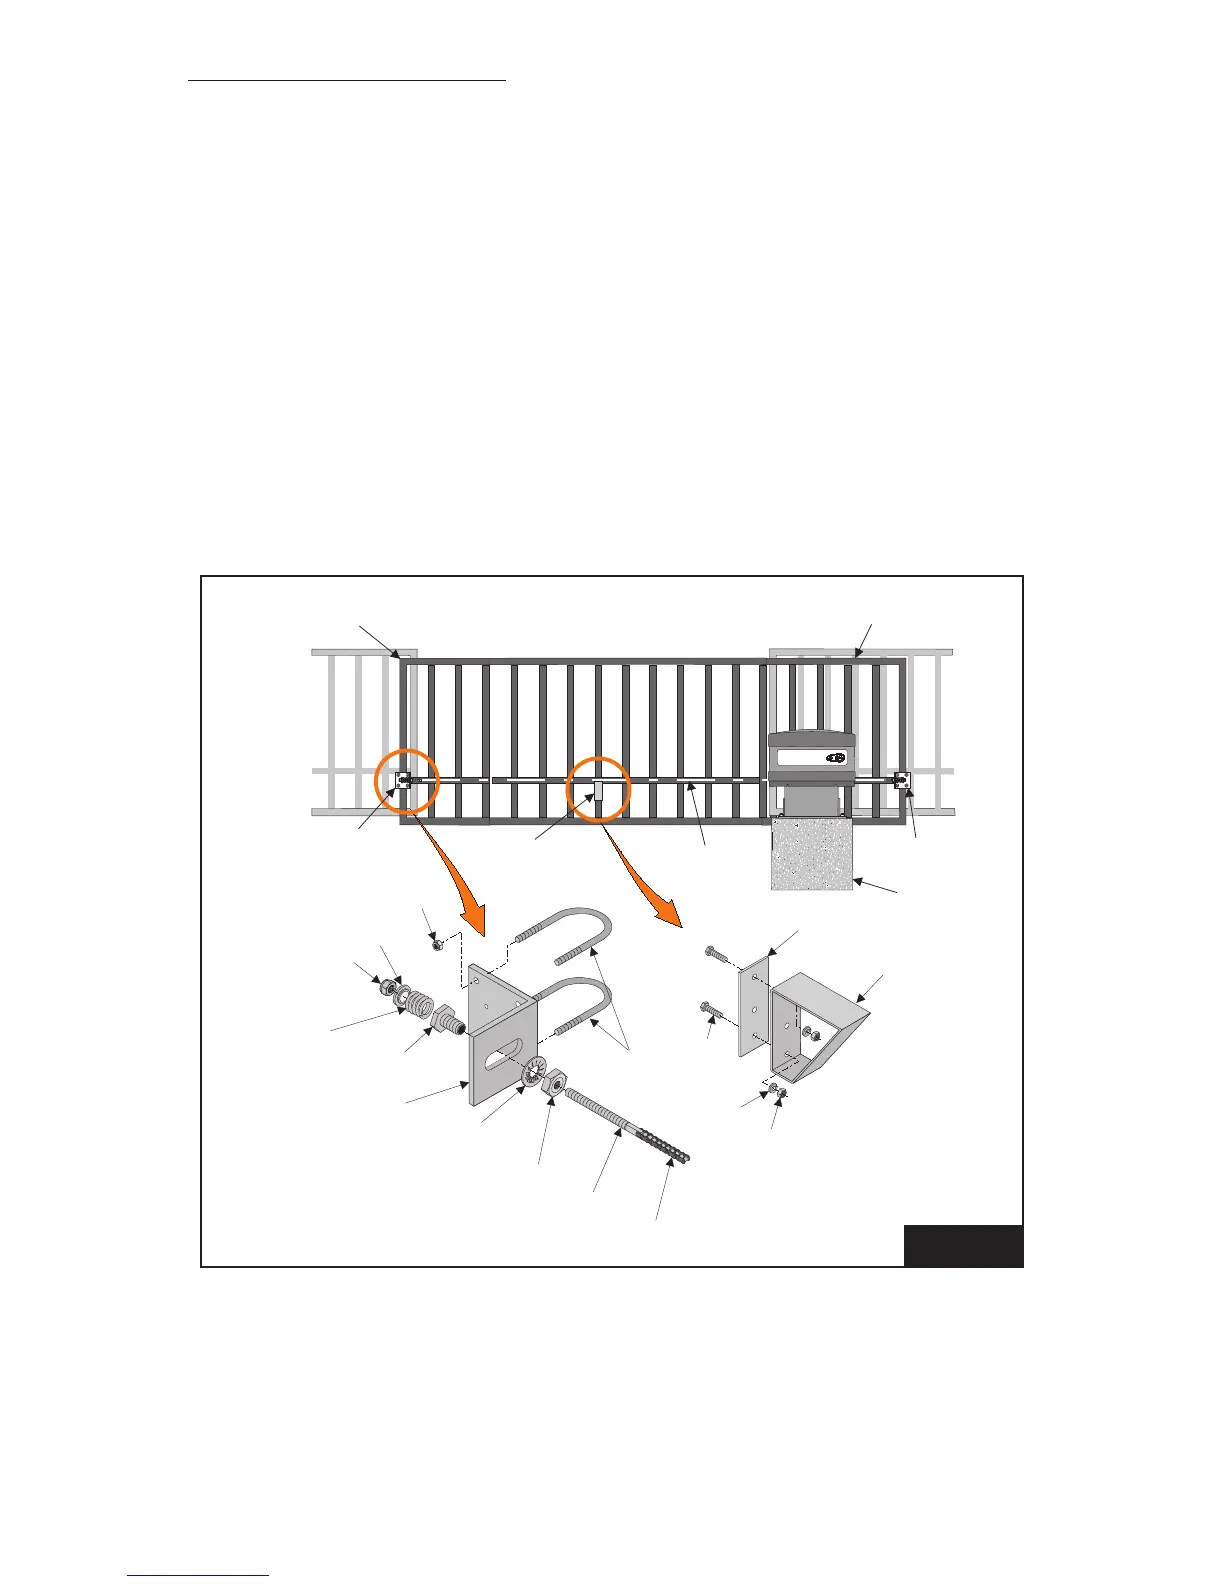
ATTACHING DRIVE CHAIN
1. Install gate brackets at each end of the gate with U-bolts provided. Do not fully tighten at
this time.
2. Attach a chain take-up bolt to one end of the drive chain using a #50 connecting link.
3. Install spring ttings into gate brackets using 3/4” nuts and lock washers. DO NOT
TIGHTEN.
4. Install chain take-up bolt (previously attached to the chain) into spring tting in furthest
gate bracket. Secure it in position with spring, spring washer, and 1/2” elastic stop nut.

Related product manuals