Page 12 of 19
PowerMate
®
L1/L2 Series Model
Repair Manual
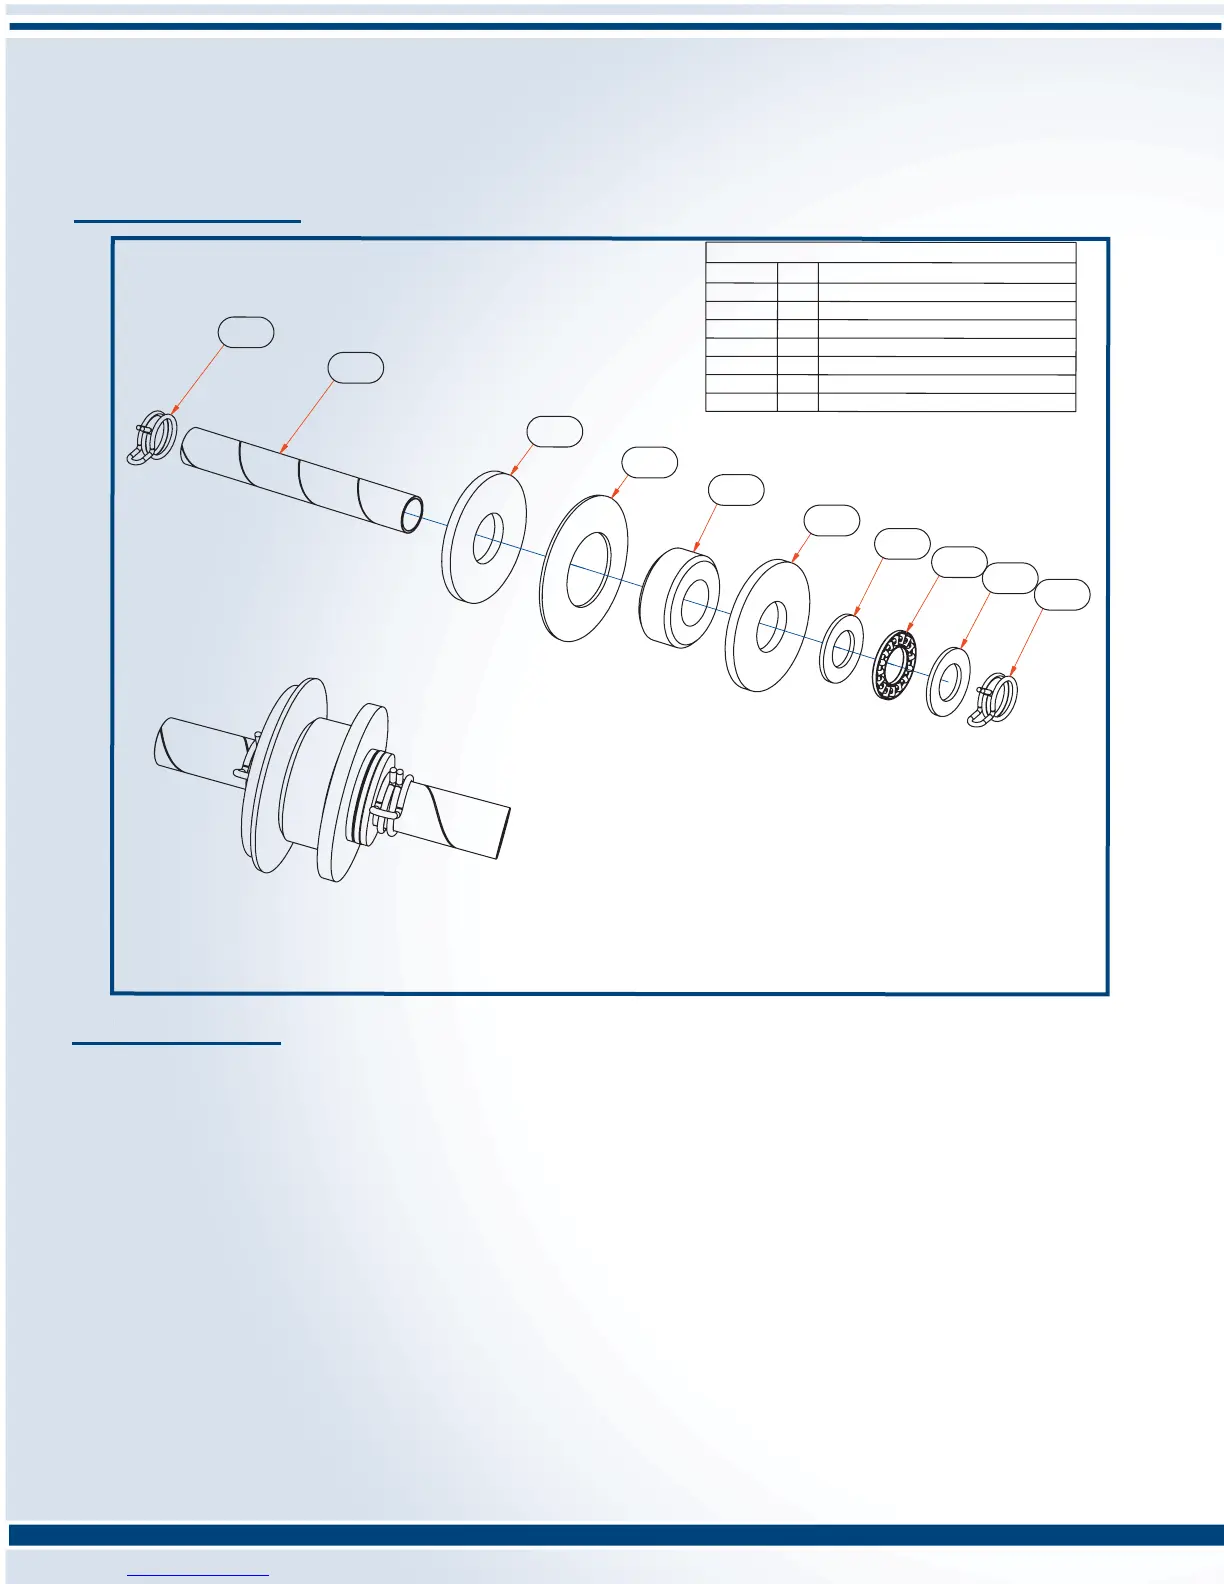
050040 2 WASHER 5/8"PLATE ZINC
050120 1
BEARING THRUST STEEL
050830 1 WASHER DISC SPRING 5/8"
050920 2
WASHER THRUST STEEL 1/2"x .060
100700 1
URETHANE BUMPER 1/2"L x 5/8"ID
050174 1
CARDBOARD ARBOR
050175 2
SPRING CLIP - ARBOR
PARTS LIST
PART No.
QTY DESCRIPTION
050175
050174
050
120
050175
050040
050830
100700
050040
050920
050
920
BEARING OVERRIDE KIT
PN 400160
Section H: Override Bearing Replacement - (con’t)
Section I: Motor Brush Replacement
PROCEDURE:
1. Place the PowerMate on a suitable work bench with the machine resting on it’s wheels and rear handles (toeplate
up). Activate the unit until it is extended approximately half-way. Remove the fuse. (See Pic I - A on pg 13)
2. Remove four nuts retaining the toeplate to the Outer Frame. (See Pic I - B on pg 13) Remove the two bolts and
nuts fastening the Bearing Retainer (See Pic I - C on pg13) and the Inner Frame. (See Pic I - D on pg13) The
Outer Frame can now be slid off the Inner Frame in the direction of the handles.
3. Apply duct tape to the top of the motor to stop the motor from pulling apart. (See Pic I - E on pg 13)
4. Undo the bolts at the bottom of the motor. (See Pic I - F on pg 13)
5. Gently grasp the top and middle of the motor and gently wiggle the motor from the bottom that is attached to the
PowerMate and pull off. (See Pic I - G on pg 14)
6. Loosen up the bolt on the casing that is still attached to the frame and remove the nut and washers.
(See Pic I - H on pg 14)
7. Remove the motor brush by pushing the bolt end into the hole off the base.
8. Place the new motor brush into the casing. Hold the black spacer tight into the hole and while keeping constant
pressure on the black spacer re-install the washers, wire and nut back on to the bolt on the motor brush.
(See Pic I - I on pg 14)
 Loading...