Page 8 of 19
PowerMate
®
L1/L2 Series Model
Repair Manual
Section E: Solenoid Replacement
PROCEDURE:
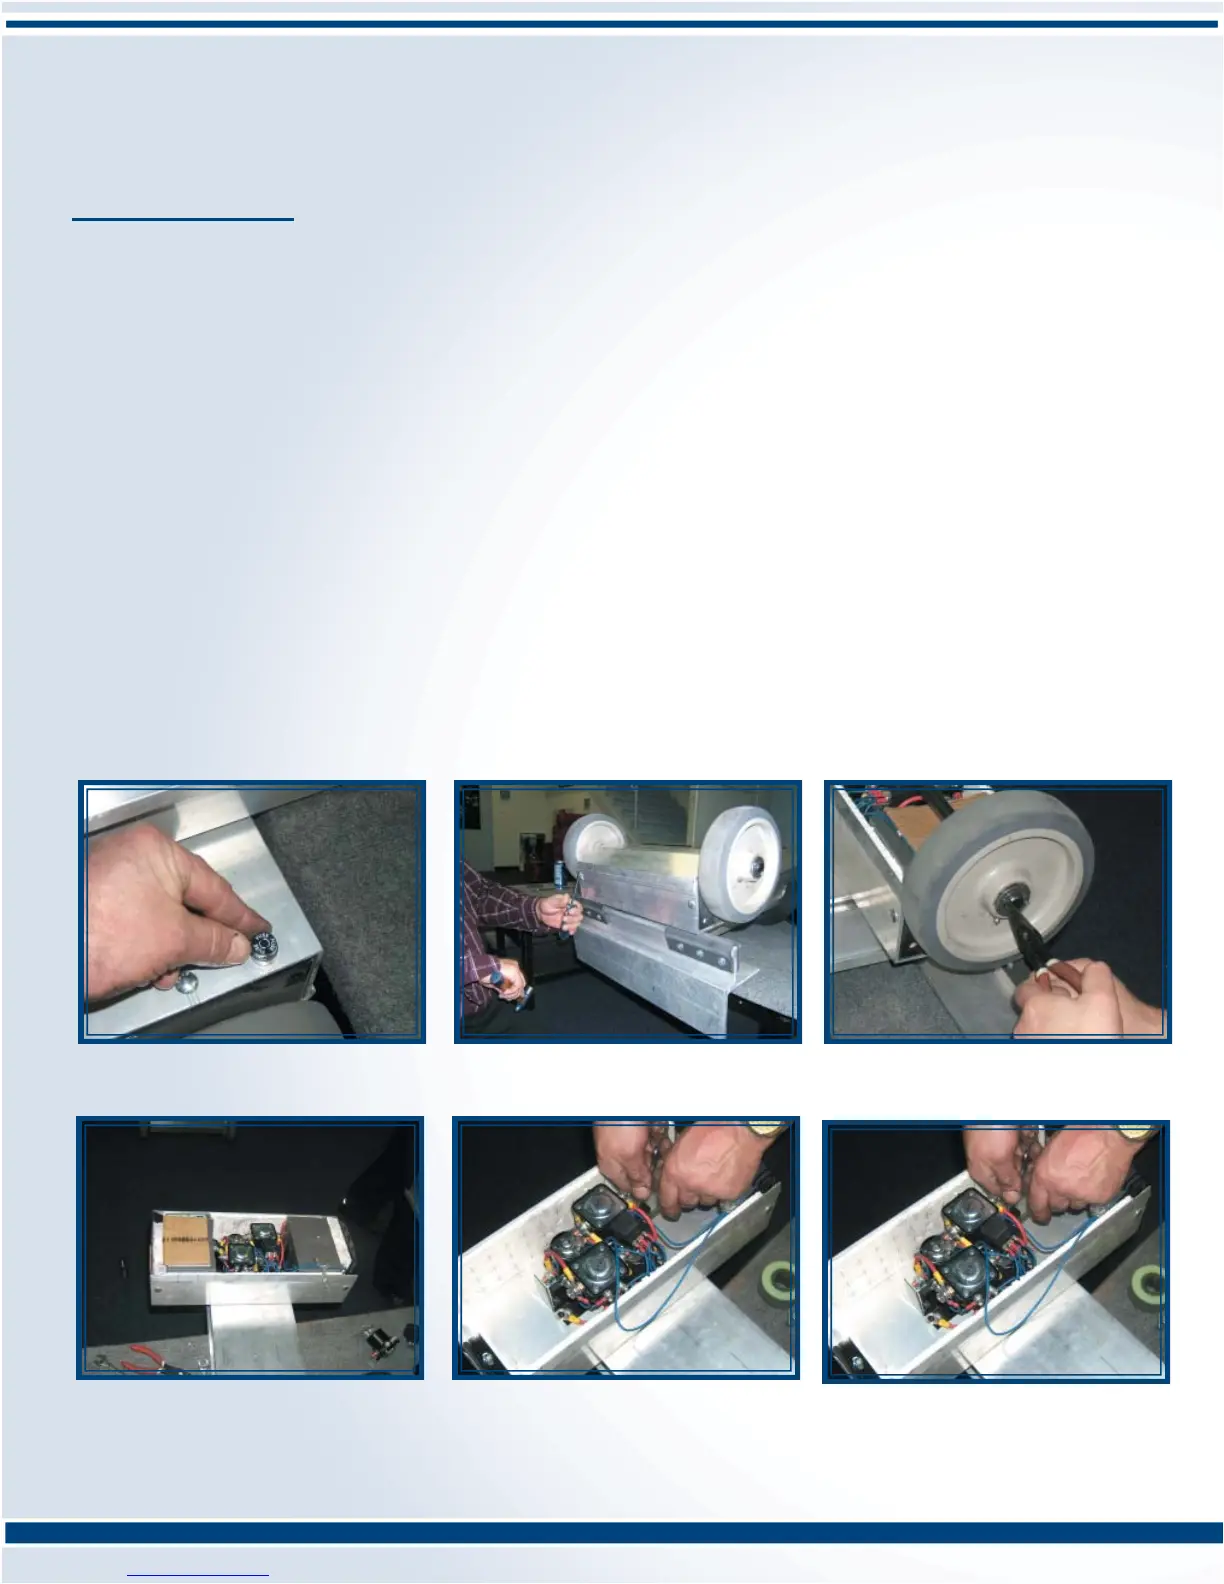
1. Place the machine on a suitable work bench with the machine resting on its face (toeplate down). Remove the fuse.
(See Pic E - A)
2. Remove the Battery Box Cover using a large fl at screw driver and hammer. (See Pic E - B)
3. Remove the wheels and axle. (See Pic E - C)
4. See Bypass Solenoid in the trouble-shooting guide to determine inoperative solenoid(s).
5. Remove styrofoam packing and both batteries. (See Pic E - D)
6. Remove the two bolts holding the suspect solenoid to the solenoid bracket. Remove wires from the suspect
solenoid, label if necessary. Discard suspect solenoid. (See Pic E - E)
7. Re-wire the new solenoid, referring to the wiring diagram if necessary.
8. Install the new solenoid to the solenoid bracket (two bolts). (See Pic E - F)
9. Install 3/8” styrofoam to top and bottom of the Battery Box.
10. Install Battery Packs.
11. Install 1” styrofoam packing between Batteries and Battery Box ends.
12. Connect positive (red wires) to the large post of the bottom left side solenoid. Install the negative (black wires) to
the large post of the upper right side solenoid.
13. Replace axle, wheels and Battery Box Cover.
Pic E - A: Remove the Fuse
Pic E - B: Remove Battery Box
Pic E - C: Remove the Wheels and axle.
Pic E - D: Remove Styrofoam Packing
and Both Batteries
Pic E - E: Remove Bolts Pic E - F: Install New Solenoid
 Loading...