page no. 26 of 40
VPx Range Users, Installation & Servicing Instructions Doc Ref M205 issue 1.2 Nov 2018.
2.6.6.1.1.2. Honeywell V4336
Adjustment
Maximum Setting
With the controls set to high fire, use an adjustable or
8mm spanner to turn the adjustment screw, clockwise
to increase and counter-clockwise to decrease, until the
required pressure is obtained
Turn the burner On and OFF several times to check the
pressure setting and then turn off.
Minimum Setting
Disconnect electrical connection to the regulator and turn
the burner back on and wait until the burner pressure has
stabilised.
Use a screwdriver to turn the slotted adjustment screw
clockwise to increase and counter-clockwise to decrease,
until the required pressure is obtained.
Reconnect high/low regulator and check high fire
pressure.
Repeat both steps if necessary and then replace cover
cap.
Cover
Lever point
Hexagonal
adjustment screw for
maximum pressure
setting
Internal slotted
adjustment screw for
minimum pressure
setting
5. Turn off the main burner, disconnect the pressure
gauge and replace the sealing screw.
2.6.6.1.2. Modulating Regulation
1. Set external controls to ensure that the main burner is
off. Open the side access panel. Connect a pressure gauge
to the burner pressure test point on the multifunctional
control.
2. Set external controls so as to turn on the main burner
and maintain high fire. Compare the measured burner
gas pressure to that stated on the data plate. In addition
it is advisable to check the gas rate using the gas meter
dial pointer ensuring that no other appliances supplied
through the meter are in operation.
dial pointer ensuring that no other appliances supplied
through the meter are in operation.
3. Repeat 2 above with external controls set to maintain
low fire.
4. If it is necessary to adjust either the high fire or low fire
pressures proceed as follows after levering off the plastic
cover from the High/Low regulator.
Note: High fire setting must be adjusted first
after which the low fire setting can be set. Any
adjustment of the high fire setting alters the
minimum setting.
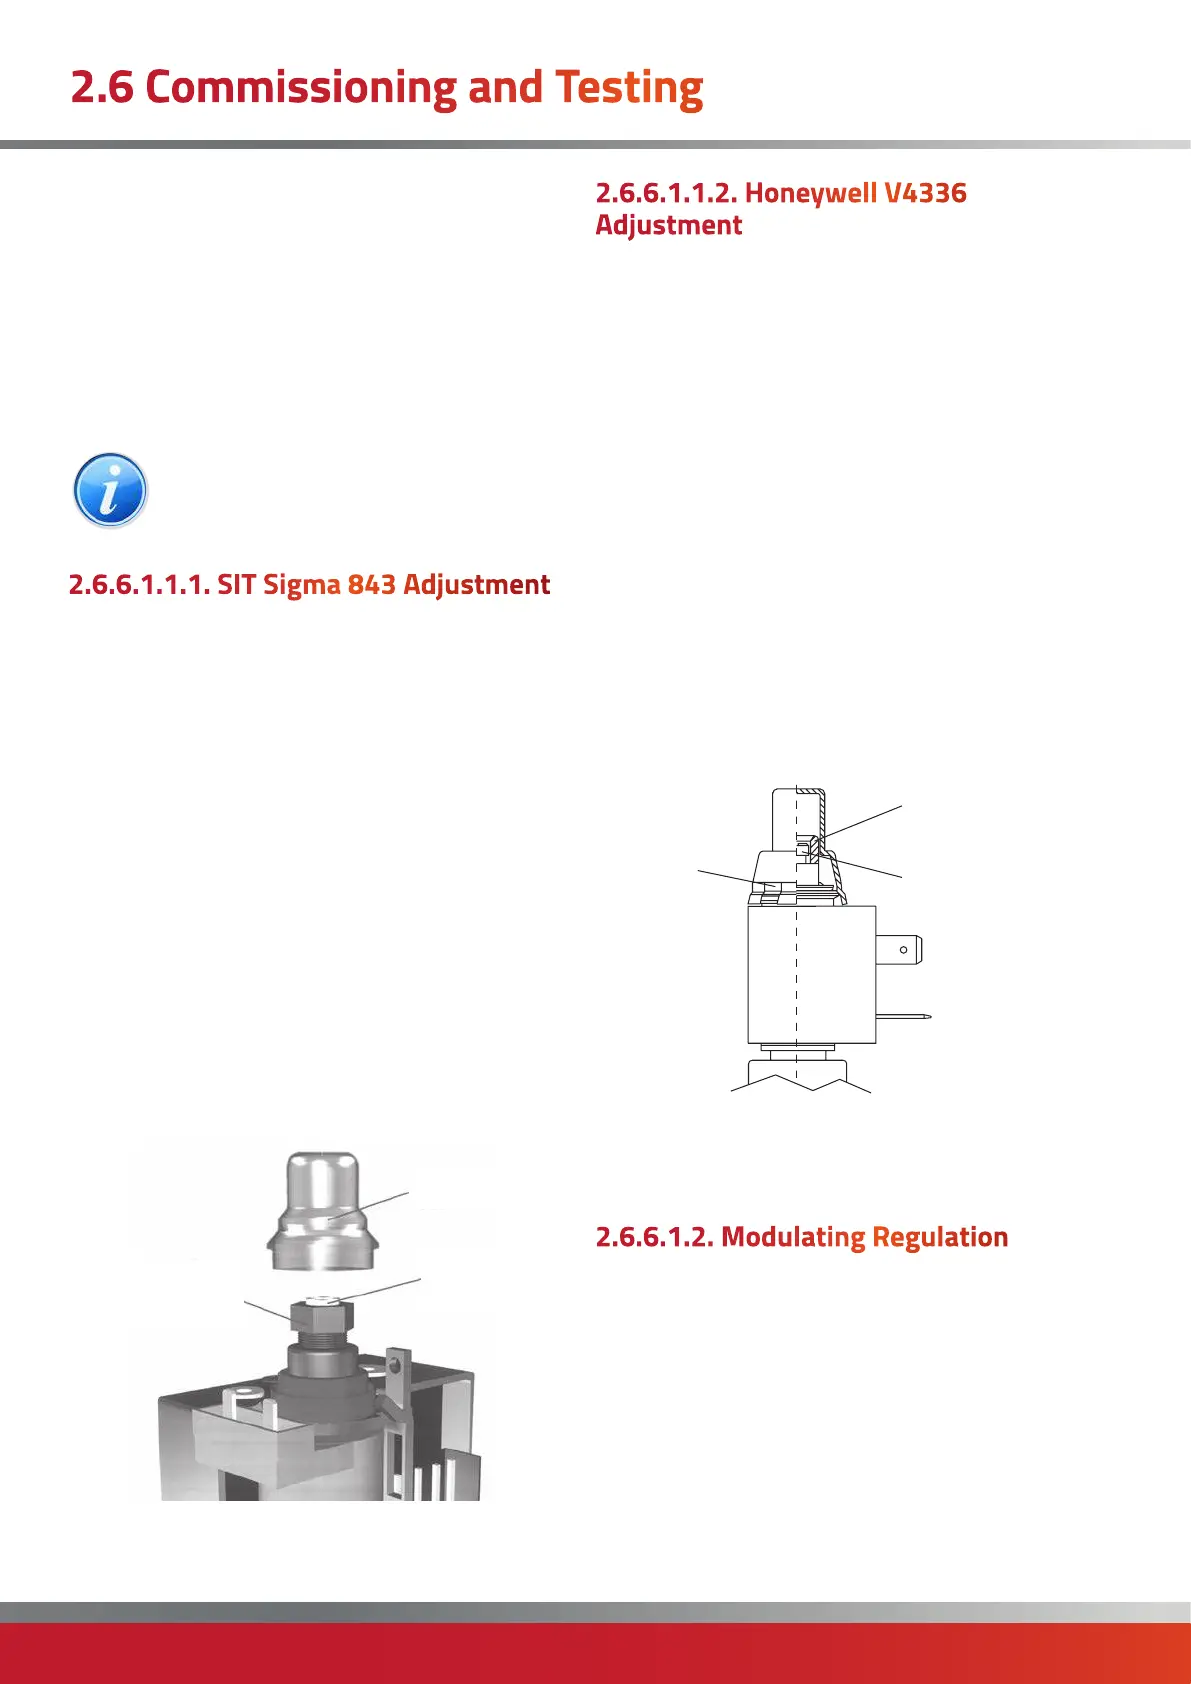
2.6.6.1.1.1. SIT Sigma 843 Adjustment
Maximum Setting.
With the controls set to high fire, use an adjustable
or 10mm spanner to screw the adjustment nut in to
increase and out to decrease, until the required pressure
is obtained.
Turn the burner On and OFF several times to check the
pressure setting and then turn off.
Minimum Setting.
Disconnect electrical connection to the regulator and turn
the burner back on and wait until the burner pressure has
stabilised.
Keeping the nut stationary, use a 6 x 1 screwdriver to turn
the slotted adjustment screw clockwise to increase and
counter-clockwise to decrease, until the required pressure
is obtained.
Reconnect high/low regulator and check high fire
pressure.
Repeat both steps if necessary and then replace cover cap
Adjustment nut (10mm)
for maximum pressure
setting
Cap
Adjustment screw
for minimum
pressure setting
5. Turn off the main burner, disconnect the pressure
gauge and replace the sealing screw.
2.6 Commissioning and Testing
 Loading...