26
Set Lancing Device
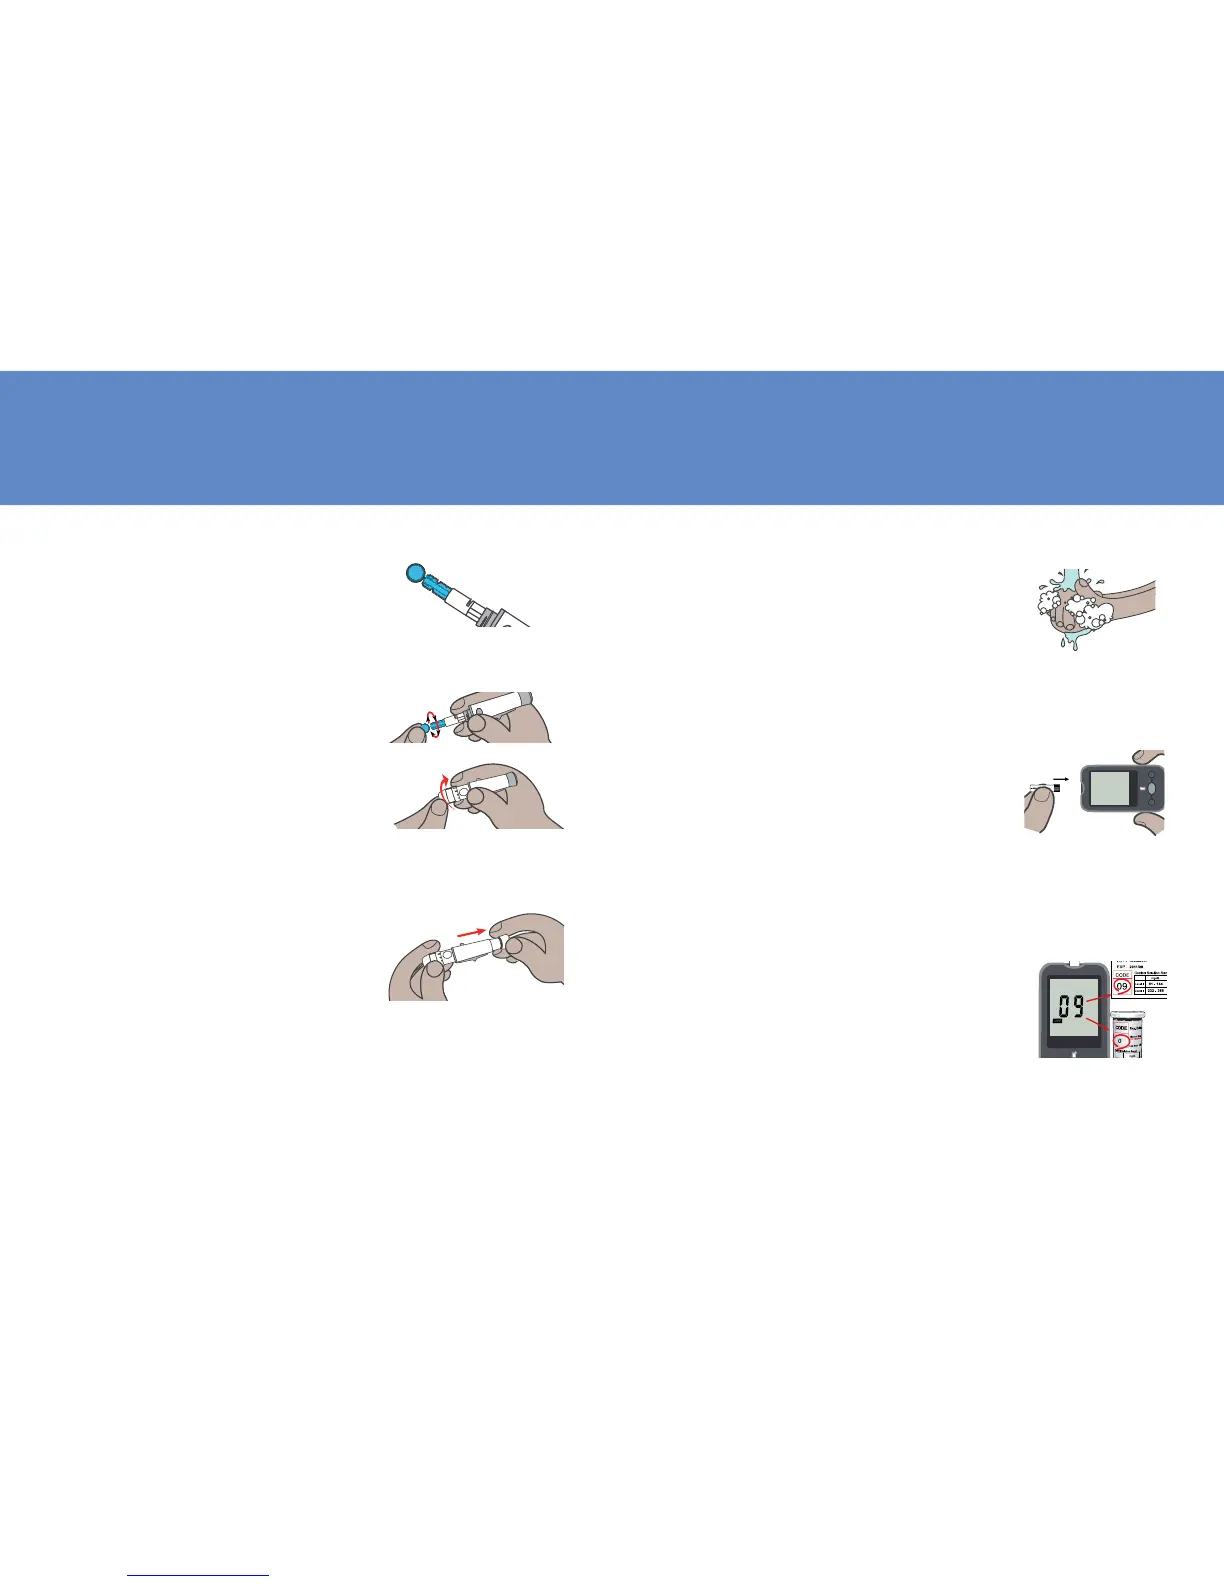
1. Remove the depth adjust-
ment cap. Insert a lancet into
the lancet holder and push
down until it is fully seated.
2. Twist off the protective cap un-
til it separates from the lancet.
3. Replace the depth adjust-
ment cap and set the puncture
depth to the desired number.
NOTE: THE SHORTER THE SCALE
THE SHALLOWER THE PUNCTURE.
4. Pull back the cocking control
until it makes a click, press
release button for penetra-
tion. If it does not click,
the device may have been
cocked when the lancet was
inserted. Please contact lo-
cal distributor.
27
Performing Blood Test
1. Wash your hands in warm,
soap water. Rinse and dry
completely. Warm your fin-
gers to increase blood ow.
2. Remove new test strip from
vial. Be sure to tightly re-
place vial cap after removing
test strips. Insert test strip
immediately into strip slot as
illustrated. The meter turns
on automatically.
Set
Mem
3. Check if the code number on
the meter matches the code
on the vial. If the 2 numbers
match, you may begin blood
testing. Otherwise insert an-
other new one. If the code
number still doesn’t match,
please contact your local dis-
tributor.
9