C956i, C966i (Gen 06) Treadmill
Page 1-14 Page 14
Procedure 4.1 - Calibrating the Incline Motor
1. Set the treadmill circuit breaker in the “off” position and unplug the line cord from the wall
outlet.
2. Remove the hood.
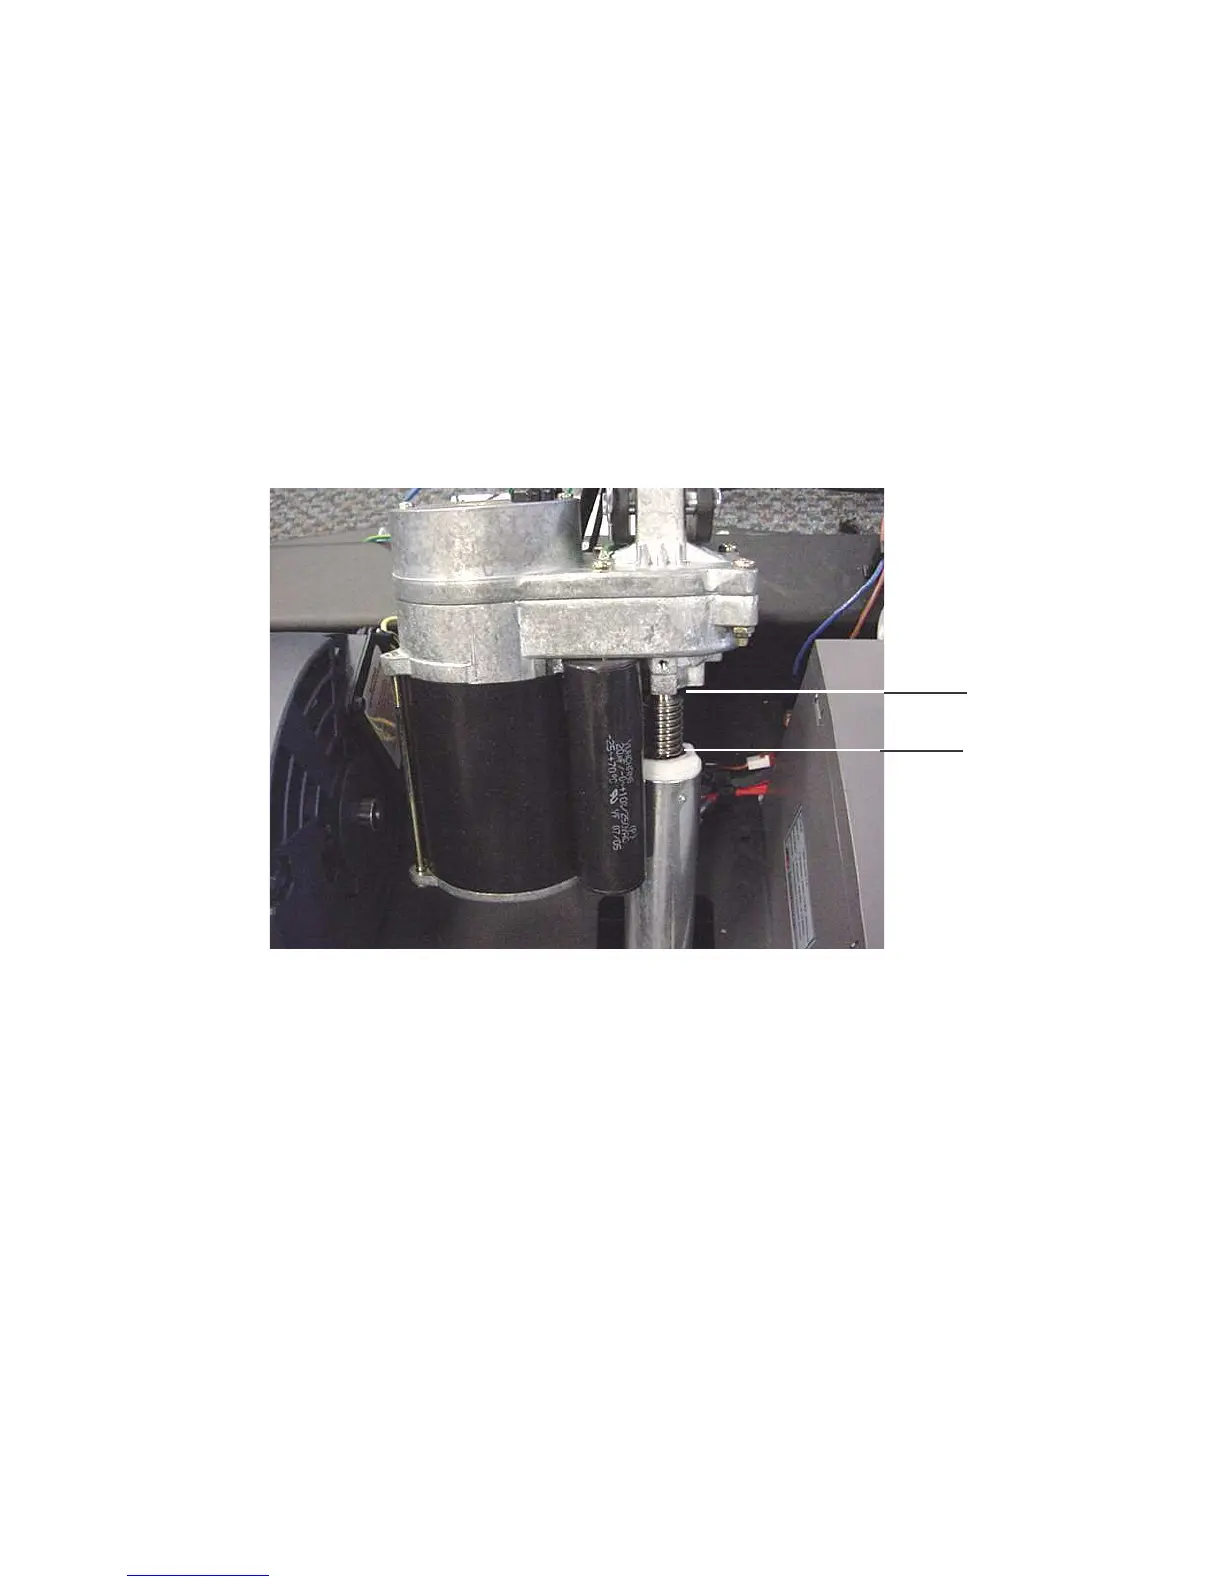
3. Place the treadmill on its right side. Remove hitch and clevis pins that secure the incline
tube to the incline platform. See Diagram 4.1.
Diagram 4.1 - incline Motor Mounting
4. Plug the power cord into the wall outlet, set the treadmill circuit breaker in the “on” position.
If the lift was not set at 0% incline the lift motor will immediately start to operate. The lift
motor will continue to operate until the system is at 0% incline.
5. With the system at 0% incline, rotate the incline tube until the distance from the top of the
incline tube to the incline motor is 1-1/4 inch. See Diagram 4.1. While rotating the incline
tube, be sure the incline motor drive screw does not rotate. If the drive screw is rotated,
return to step 4 and repeat steps 4 and 5.
6. Set the treadmill circuit breaker in the “off” position and remove the line cord from the wall
outlet.
7. Replace the clevis and hitch pins removed in step 3. Return the treadmill to an upright
position.
8. Plug the line cord into the wall outlet, set the treadmill circuit breaker in the “on” position.