Creating Discs on a Mac 37
4. Select the drive that contains your master as the source
drive.
5. Click the Burn… button. At this point, if you are using a
BravoPro or XRP for the first time on this computer, you
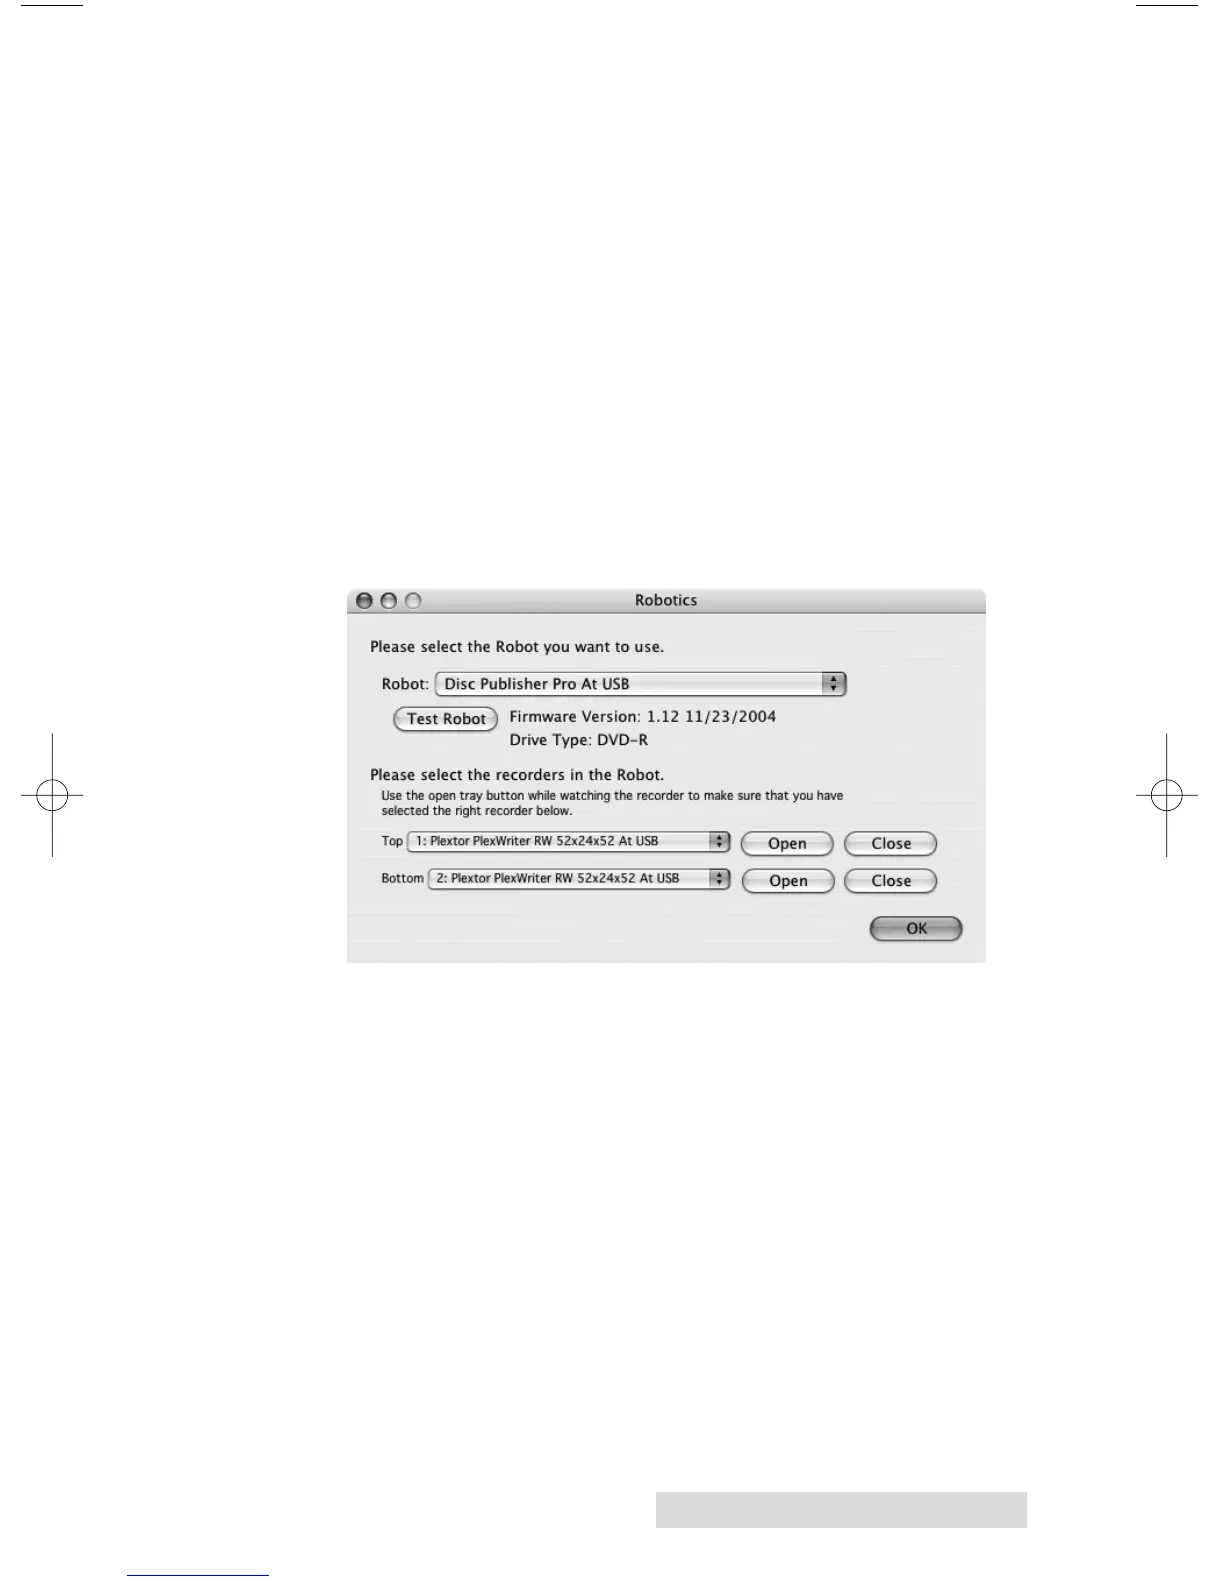
will be prompted, "You must choose a robot and a recorder
to write a disc." Click OK. The screen below will appear.
The robot should automatically be selected. You will need
to choose the top and bottom drives. After you make this
selection, Discribe will remember it for future jobs. You
will not have to select them again. (If you make a mistake
or would like to check your selection choose Test Robotics
from the Utilities menu.) Click Open for each of the drives
"1:" and "2:" to determine which drive is on the top and
which is on the bottom. Set the location appropriately.
Click OK. Click "Burn" again to proceed to the next step.
6. The Robot Write Options window will appear. This
window contains selections to help you control the
printing of the image, number of discs, recording options
and more.
7. Click the Print Image on Discs button to enable
printing. This will enable other buttons in this pane.
8. Press the Choose Image button to select an image to print.
This will allow you to select any file type Apple's Preview
supports including JPEG, TIFF, PICT, PDF, GIF, BMP and
more. Refer to Section 4-C for label format requirements.
Labels can be created in any graphics program.