5
ASSEMBLY
Assembly requires two persons. Place all parts of the exercise cycle in a cleared area and remove the pack
ing materials. Do not dispose of the packing materials until assembly is completed.
In addition to the included tool(s), assembly requires a Phillips screwdriver
and an adjust-
able wrench
.
Note: If a part is not in the hardware kit, check to see if it has been preattached.
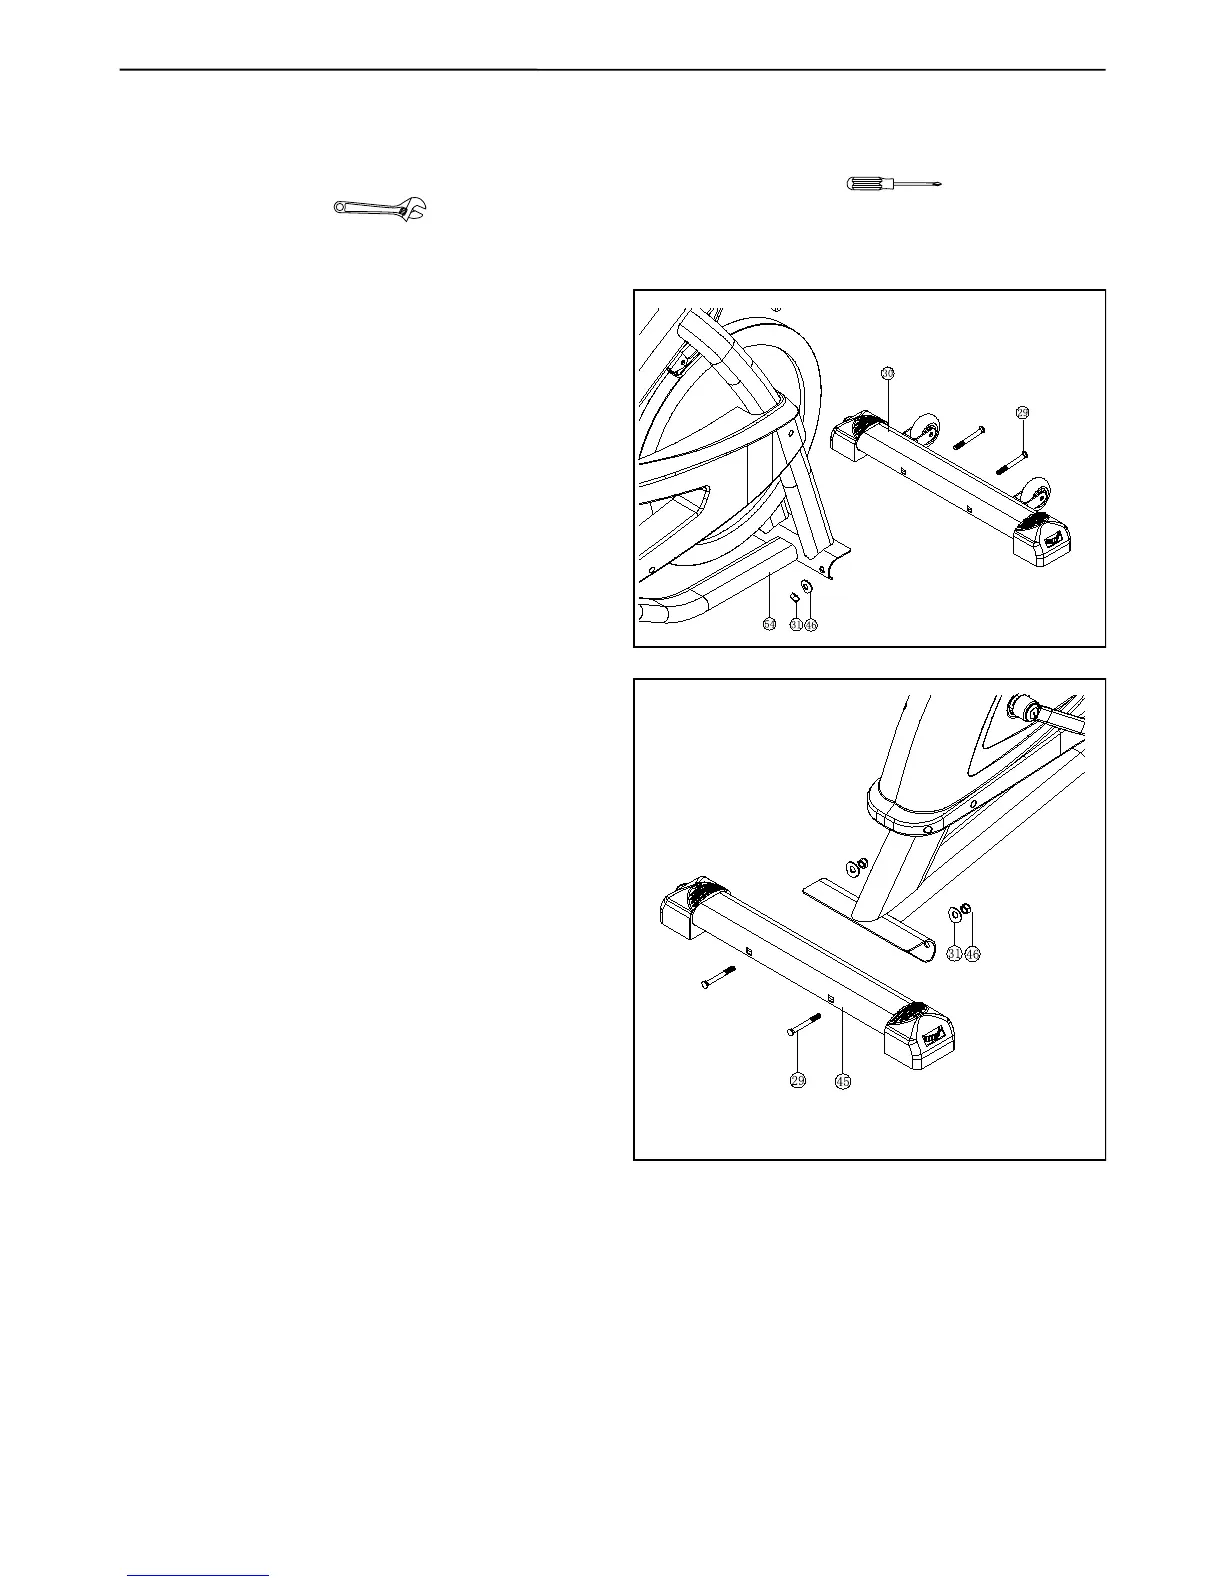
STEP 1
Take down the carriage screw M10*94(29), arc wash-
er OD20*ID10.5*1.5T(46)and M10*10T(subtence14)
nylon nut(31)which are installed onto the front stabi-
lizer set.
Attach the front stabilizer tube (30)onto the front stabi-
lizer tube xed piece of the main frame(54).Make the
carriage screw M10*94(29) transx the front stabilizer
tube, main frame set, then fasten them with arc wash-
er OD20*ID10.5*1.5T(46) and M10*10T(subtence 14)
nylon nut(31).
STEP 2
Take down the carriage screw M10*94(29), arc wash-
er OD20*ID10.5*1.5T(46)and M10*10T(subtence14)
nylon nut(31)which are installed onto the front stabi-
lizer set.
Attach the rear stabilizer tube (45)onto the rear stabi-
lizer tube xed piece of the main frame(54).Make the
carriage screw M10*94(29) transx the rear stabilizer
tube, main frame set, then fasten them with arc wash-
er OD20*ID10.5*1.5T (46) and M10*10T(subtence
14) nylon nut(31).
.