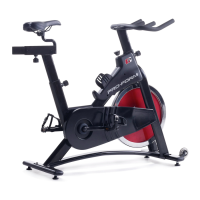
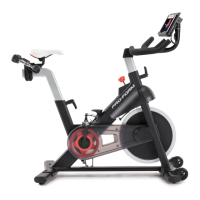
The PRO-FORM 500 SPX is an exercise bike designed for home use, offering an effective way to improve cardiovascular fitness, build endurance, and tone the body. This manual provides comprehensive instructions for assembly, operation, and maintenance, ensuring users can maximize their workouts and enjoy a safe, effective exercise experience.
Function Description
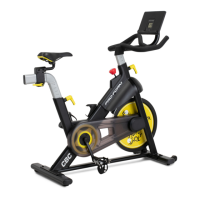
The PRO-FORM 500 SPX exercise bike is a stationary cycling machine that allows users to engage in cardiovascular workouts indoors. It features a flywheel-based resistance system, adjustable components for personalized fit, and a console to track workout metrics. The primary function is to simulate outdoor cycling, providing a low-impact exercise option suitable for various fitness levels.
Usage Features
The exercise bike offers several usage features designed to enhance the workout experience and accommodate different users:
- Adjustable Resistance: The bike is equipped with a resistance knob (E) that allows users to easily increase or decrease pedaling resistance. Turning the knob clockwise increases resistance, while turning it counterclockwise decreases it. For quick stopping, the resistance knob can be pushed downward, bringing the flywheel to a complete stop. It is important to tighten the resistance knob completely when the bike is not in use to prevent the flywheel from moving.
- Console with Workout Feedback: The console (58) provides instant exercise feedback through six different modes:
- Scan (SCAN): Displays time, speed, distance, calories, and odometer in a repeating cycle.
- Time (TIME): Shows elapsed workout time or time remaining if a time goal is set.
- Speed (SPEED): Displays pedaling speed in miles per hour.
- Distance (DIS): Shows distance pedaled in miles or distance remaining if a distance goal is set.
- Calories (CAL): Estimates calories burned or calories yet to be burned if a calorie goal is set.
- Odometer (ODO): Displays the total distance pedaled since the odometer was last reset.
The console can be turned on by pressing any button or simply by beginning to pedal. Users can set workout goals for time, distance, or calories by pressing the Mode button repeatedly until the desired mode appears, then using the Set button to adjust the goal. The console also features an auto-off function to save battery power when not in use.
- Adjustable Saddle: The saddle (31) can be adjusted for angle, forward/backward position, and height to ensure optimal comfort and proper exercise posture.
- Saddle Angle: Loosen the nuts (C) on the saddle clamp, tilt the saddle upward or downward, and then retighten the nuts.
- Horizontal Position: Loosen the adjustment knob (B) on the saddle post (6), pull it downward, slide the saddle carriage (32) to the desired position, release the knob into an adjustment hole, and then tighten it.
- Saddle Post Height: Loosen the adjustment knob (A) on the frame (1), pull it outward, move the saddle post (6) upward or downward to the desired height, release the knob into an adjustment hole, and then tighten it. A slight bend in the knees when pedals are in the lowest position indicates proper saddle height.
- Adjustable Handlebar Post: The handlebar post (72) height can be adjusted to suit the user's preference. Loosen the adjustment knob (D) on the frame (1), pull it outward, move the handlebar post upward or downward, release the knob into an adjustment hole, and then tighten it.
- Tablet Holder: The integrated tablet holder (73) is designed to securely hold most full-size tablets, allowing users to enjoy entertainment or follow guided workouts during their exercise sessions. It can be rotated forward or backward for optimal viewing.
- Pedal Straps: The pedals (11, 12) are equipped with straps to secure the user's feet, ensuring stability and preventing slippage during intense workouts.
- Leveling Feet: The exercise bike includes leveling feet on the front and rear stabilizers (4, 5) to ensure stability on uneven surfaces. Users can turn these feet to eliminate any rocking motion.
- No Freewheel Mechanism: The PRO-FORM 500 SPX does not have a freewheel. This means the pedals will continue to move as long as the flywheel is spinning. Users must reduce pedaling speed in a controlled manner or press the resistance knob downward to stop the flywheel quickly.
Maintenance Features
Regular maintenance is crucial for the optimal performance and longevity of the PRO-FORM 500 SPX exercise bike. The manual outlines several key maintenance practices:
- Regular Inspection and Tightening: Users should inspect and properly tighten all parts of the exercise bike each time it is used. Any worn parts should be replaced immediately to ensure safety and functionality.
- Cleaning: To clean the exercise bike, a damp cloth and a small amount of mild detergent should be used. It is important to keep liquids away from the console and to keep the console out of direct sunlight to prevent damage.
- Battery Replacement: If the console display becomes dim, the AAA batteries (not included) should be replaced. Alkaline batteries are recommended. It is important to allow the console to warm to room temperature before inserting new batteries if it has been exposed to cold temperatures, to avoid damaging electronic components. If the bike will not be used for an extended period, the batteries should be removed from the console.
- Reed Switch Adjustment: If the console does not display correct feedback, the reed switch (59) may need adjustment. This involves sliding the reed switch slightly closer to or away from the magnet (20) on the flywheel (37) until the console displays accurate feedback.
- Brake Pad Care: To avoid damaging the brake pads, they should not be lubricated.
- Storage: When not in use, the exercise bike should be stored indoors, away from moisture and dust. It should not be placed in a garage, covered patio, or near water. The resistance knob should be tightened completely to prevent the flywheel from moving during storage.
The PRO-FORM 500 SPX is designed to be a durable and user-friendly piece of fitness equipment, providing a comprehensive cycling experience in the comfort of one's home. Adhering to the usage and maintenance guidelines will ensure a safe, effective, and long-lasting exercise solution.