8
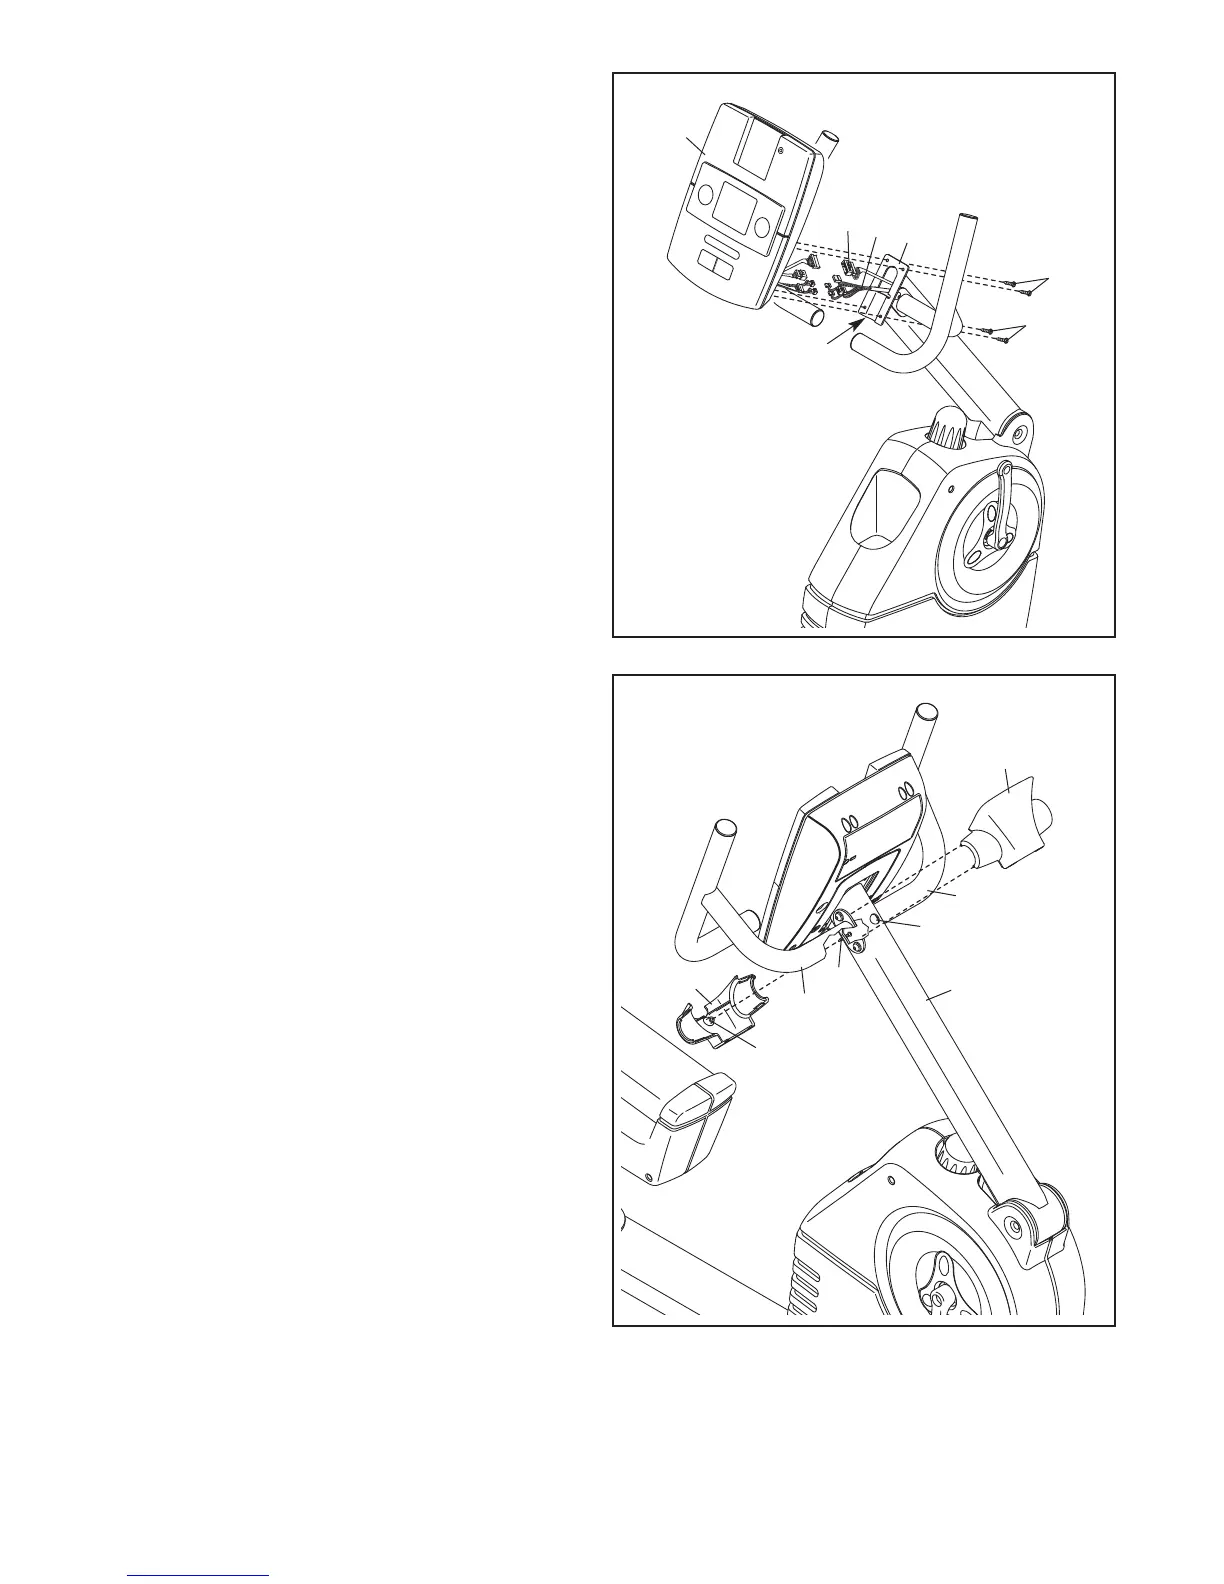
5. While another person holds the Console (4)
near the Upright (2), connect the wire har-
nesses on the Console to the Wire Harnesses
(
42, 43); make sure to connect the console
wire that has a tag to the game wire that has
a
tag. Insert the excess wire downward into the
Upright.
Tip: Do not pinch the Wire Harnesses (42,
43). Set the Console (4) on the Upright (2).
Press the Console upward so that the lower
edge of the indicated bracket is inserted into the
back of the Console. Make sure that the holes
in the Console and the holes in the Upright
are aligned.
Attach the Console (4) to the Upright (2) with
four M4 x 16mm Flange Screws (80).
2
5
4
42
80
80
A
void pinching the
Wire Harnesses
(42, 43)
43
6. Note: The drawing at the right shows the
exercise bike from the front.
Locate the access hole and the M4 x 8mm
Screw (92) in the Upright (2). Note: If the Screw
is missing, use the extra M4 x 8mm Screw (92)
in the hardware kit.
Hold the Rear Upright Cover (90) against the
Upright (2) and the Handlebars (59, 60).
Tip: Do not damage the Wire Harnesses (not
shown) inside the Upright (2). Insert a Phillips
screwdriver into the access hole, and tighten
the M4 x 8mm Screw (92) into the plastic post
on the Rear Upright Cover (90).
Then, hold the Front Upright Cover (91) against
the Upright (2) and the Handlebars (59, 60).
Press the tabs on the Front Upright Cover into
the Rear Upright Cover (90).
6
92
2
91
Access
Hole
Bracket
Plastic
Post
60
59
90