MAINTENANCE
PERFORMER 980060 07/01/02
4-5
DRIVE BELTS, PULLEYS & HUBS
1. Check pulley set screws and/or hub cap screws
after the first 25 hours and then again at 100
hours. Re-torque these screws with a torque
wrench, using the values on the following chart.
Check pulley set screws and/or hub cap screws
every 500 hours thereafter.
Make certain that when you re-torque these
screws, that you use a clockwise pattern and
continue until proper torque is achieved.
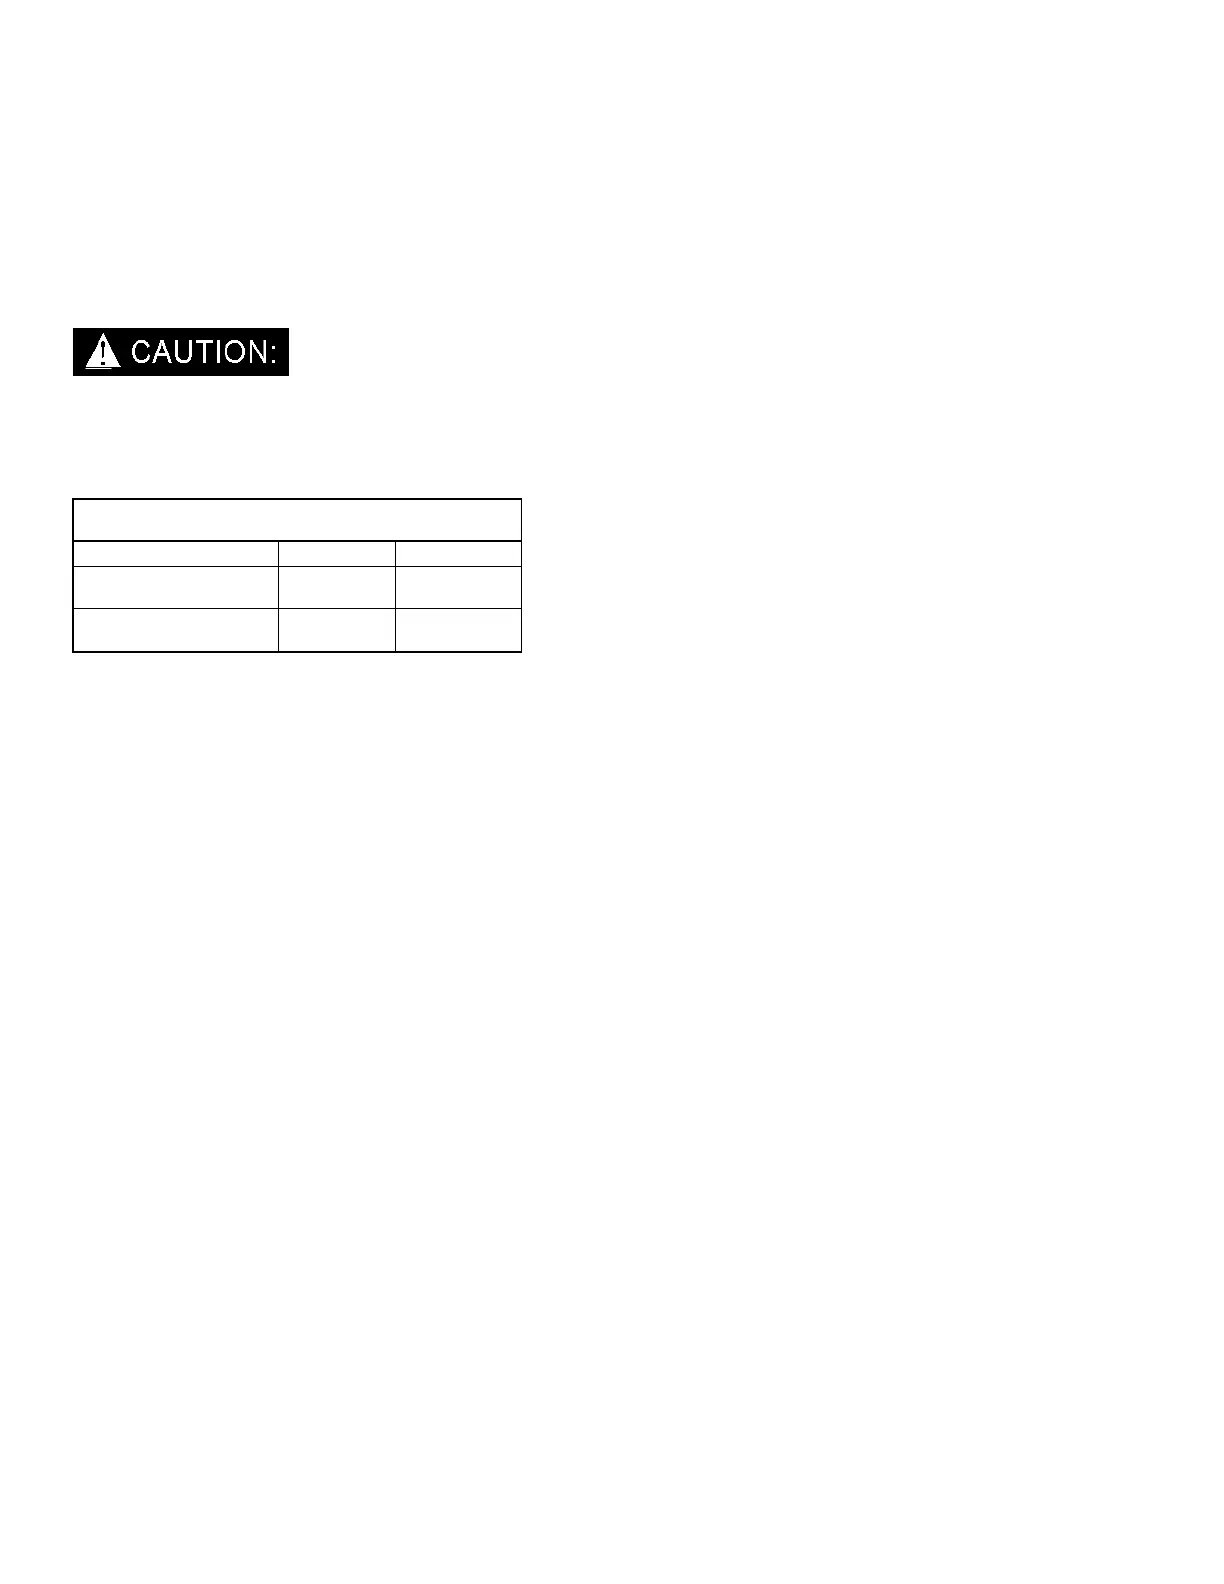
TORQUE VALUES
COMPONENT INCH/LBS FOOT/LBS
Engine hub 720 60
Vacuum pump hub 192 16
2. Check for pulley groove wear, clean belts and
pulley grooves, check for worn belts, proper belt
tension, and pulley alignment after the first 25
hours and then again at 100 hours.
Check for belt ride in the groove. In multiple
groove drives, belt ride should be uniform, not
more than 1/16" above or below top of pulley
groove.
Check groove wear area for wear. Side wall of
groove should be straight, not dished out.
Bottom of groove should show no signs of belt
contact.
Inspect belts for contaminants, such as oil or
grease. Wipe belts clean with detergent and
water. Inspect pulley grooves for buildup of such
material and remove, if necessary.
Check wear surfaces of belt for excessive wear.
If they have a slick, glazed look, belts are
slipping. Check belt tension. Never replace one
belt in a used set, as used belts will elongate.
Replace entire set if replacement is necessary.
Place a straight-edge across the top of belt. There
should be no more than 1/2" deflection in the center
of the belt, halfway between the pulleys. If there is
too much slack, tighten belt, making sure that it
stays properly aligned.
See the "General Service Adjustments” section
in this manual for details.
Check alignment with straight-edge, string, or
machinist level. Correct alignment to as near perfect
as possible.
FLOAT VALVE (WATER BOX)
Check the float valve at least once a month for
proper operation. If overfilling is a problem, check
the plunger for a proper seat. Replace tip on plunger
if needed or damaged. Water level in the water box
should be about 5-1/2" to 6”.
For the procedure, see the “General Service
Adjustments” section in this manual for details.
INLET FILTER (TO WATER PUMP)
The filter inside and on the bottom of the water box
is rubber with a stainless steel screen. This should
be inspected and cleaned on a weekly basis.
Replace, if damaged.
NOTE: Vacuum all excess water and debris from
water box prior to removing strainer.