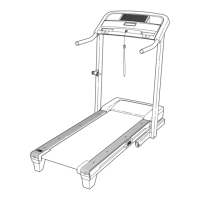
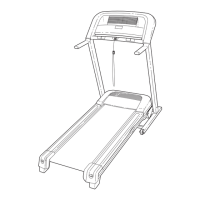
13
15. Tighten the four 3/8" x 2 3/4" Screws (8), and
then tighten the four 3/8" x 1 1/4" Screws (9)
(only one side is shown).
Press the Left and Right Base Covers (96, 97)
onto the Base (105) until they snap into place.
15
97
9
96
105
8
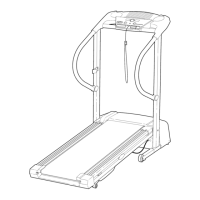
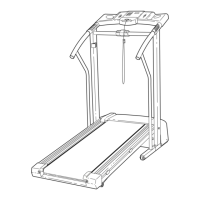
14. Attach a Tray Bracket (91) to the side of the
Right Upright (99) with two #8 x 3/4" Screws (2).
Make sure to use the two holes shown. Start
both Screws, and then tighten them.
Attach the other Tray Bracket (not shown) to
the Left Upright (not shown) in the same way.
Attach the Tray (87) to the Tray Brackets (91)
with four #8 x 3/4" Screws (2) (only one side
is shown). Start all four Screws, and then
tighten them.
91
2
14
87
99
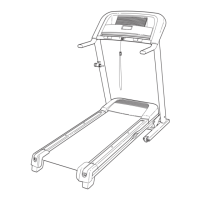
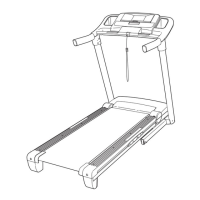
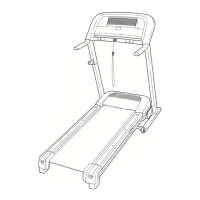
16. Raise the Frame (64) to the position shown.
Have a second person hold the Frame until
this step is completed.
Orient the Storage Latch (65) so that the large
barrel and the latch knob are in the positions
shown.
Attach the lower end of the Storage Latch (65) to
the Base (105) with a 3/8" x 2" Bolt (5) and a 3/8"
Nut (13).
16
65
Large
Barrel
64
Latch
Knob
13
5
105