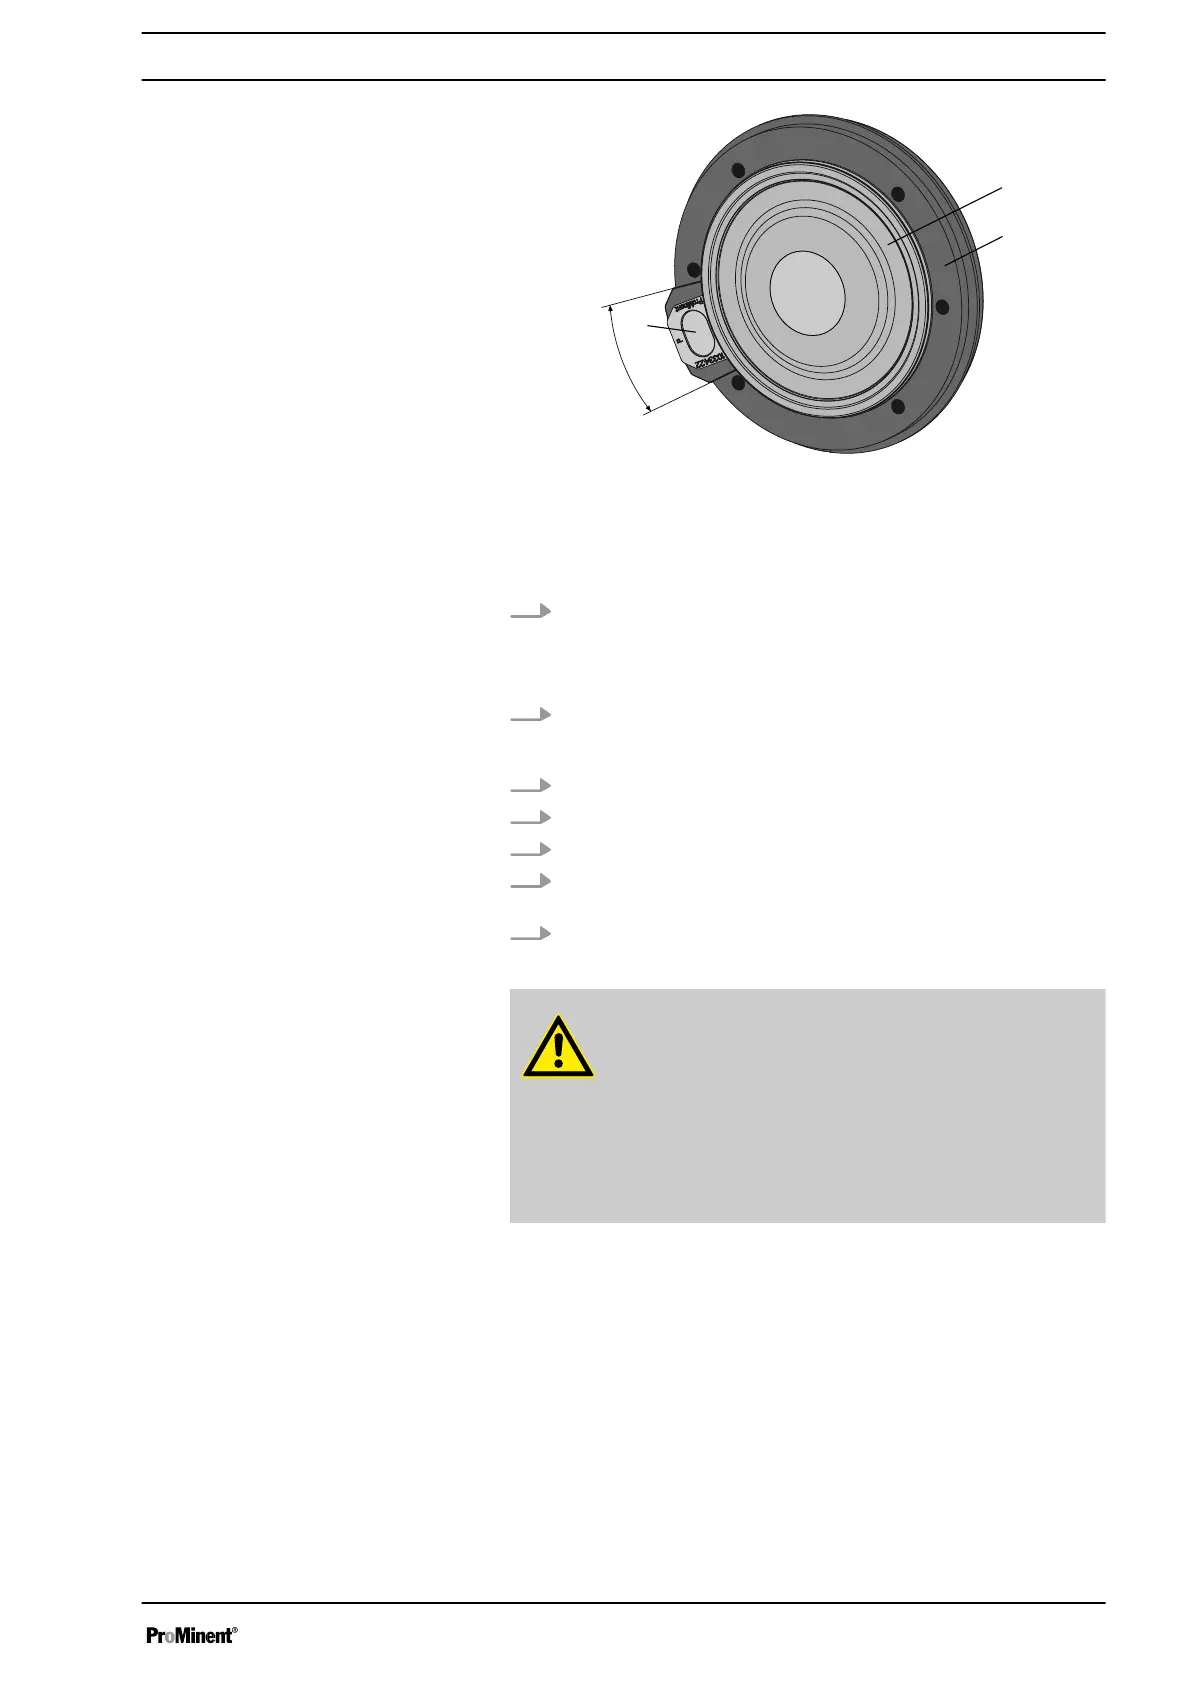
Fig. 22: Tolerance range of the flap on the backplate
1 Diaphragm
2 Backplate
3 Flap
A Tolerance range
12. Should this not work, remove dirt or swarf out of the thread and
screw the diaphragm correctly onto the drive axle this time.
ð
If this is still unsuccessful, contact ProMinent-ProMaqua cus‐
tomer service.
13. Place the dosing head with the screws onto the diaphragm - the
suction connector must be pointing downwards in the pump's fitting
position.
14. Tighten the screws gently to start with.
15. Screw the diaphragm rupture sensor into the dosing head.
16. Start up the pump and adjust the stroke length to 100 %.
17. Stop the pump and tighten the screws crosswise. Tightening torque
- see
Ä ‘Tightening torques’ on page 33
.
18. Start the pump and at maximum pressure, check for leaks.
CAUTION!
Warning of escaping feed chemical
The liquid end may leak should it not be possible to check
the tightening torque of the screws.
– Check the tightening torque of the screws after 24 hours
of operation!
– With PP, PC and TT dosing heads also re-check the
tightening torques quarterly!
Repairs
37