27
Assembly
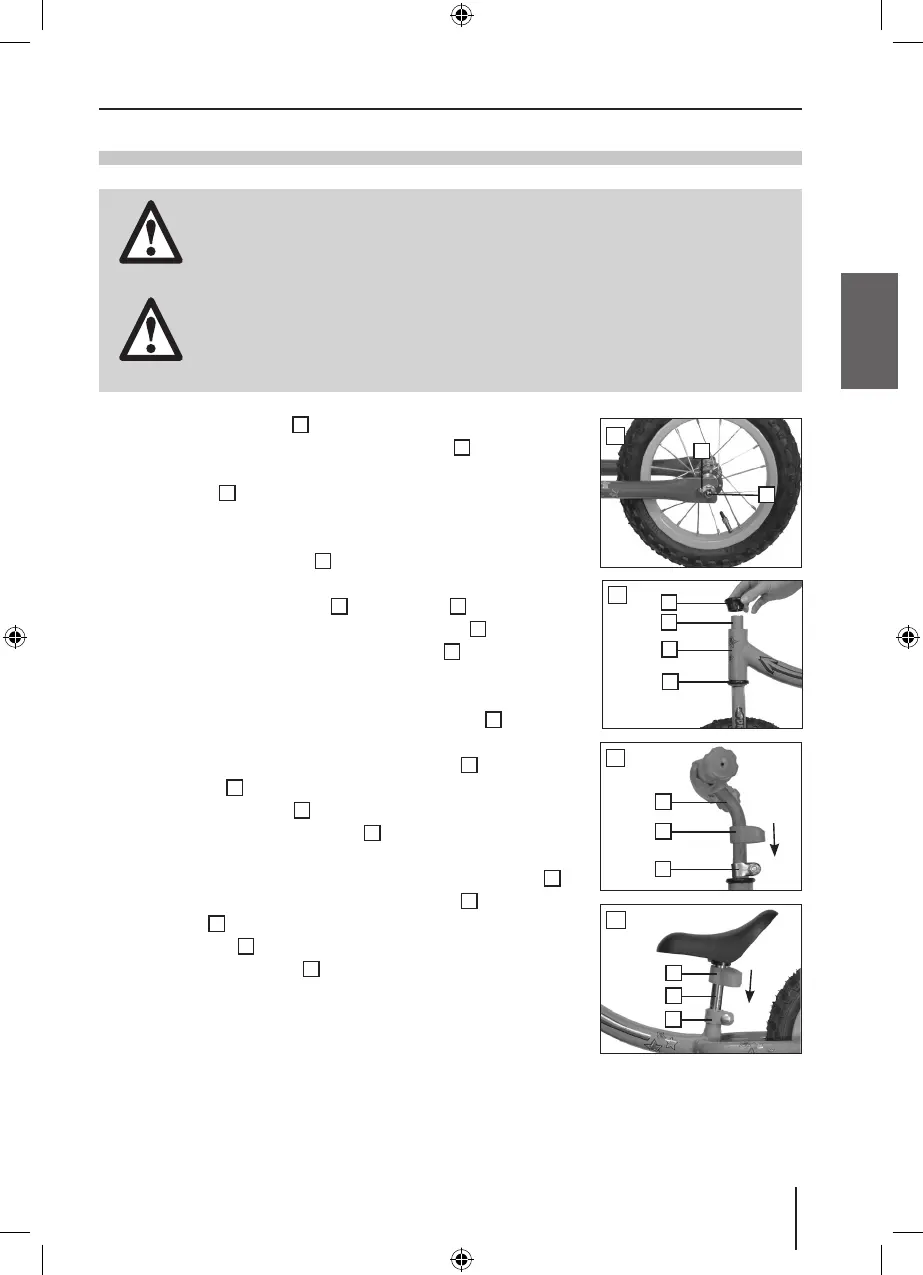
1. Loosen the cap nut
2
on both sides of the wheel in
order to move the drop out protection
1
.
2. Place the wheel in the frame and hook the drop out
protection
1
into the designated hole (Fig. B).
3. Mount the other wheel into the fork as previously de-
scribed.
4. Tighten all wheel nuts
2
according to the torque
specication (see Torque specication chapter).
5. Place a bearing bushing
1
on the fork
2
rst before
guiding it from below through the frame
3
. Fix the
fork with the second bearing bushing
1
(Fig. C). The
frame can be used the other way around for taller
children. This gives the child a higher seat position.
6. Loosen the screw connection of the clamp
3
and
place it on the fork (Fig. D).
7. Push the cover of the screw connection
2
over the
handlebars
1
, guide it into the fork tube and tighten
the clamping screw
3
according to the torque speci-
cation. Then push the cover
2
over the screw tting
(Fig. D).
8. Release the screw connection of the frame clamp
3
.
Push the cover of the screw connection
1
over the
seat post
2
, guide it into the frame and tighten the
frame clamp
3
according to the torque specication.
Then push the cover
1
over the screw tting (Fig. E).
ASSEMBLY
• The handlebars and seat post may only be pulled out to the maximum
mark! The marking of the minimum insertion depth should not be seen!
Danger of damage and accident! - If disregarded, no warranty!
B
1
2
C
1
1
2
3
D
1
2
3
E
1
2
3
BDA_2026_2048_DE_GB_F_I_NL_PL_HU_RO.indd 27 17.03.2015 10:09:40
 Loading...