8.10 By Devices with Android OS
Software Installation
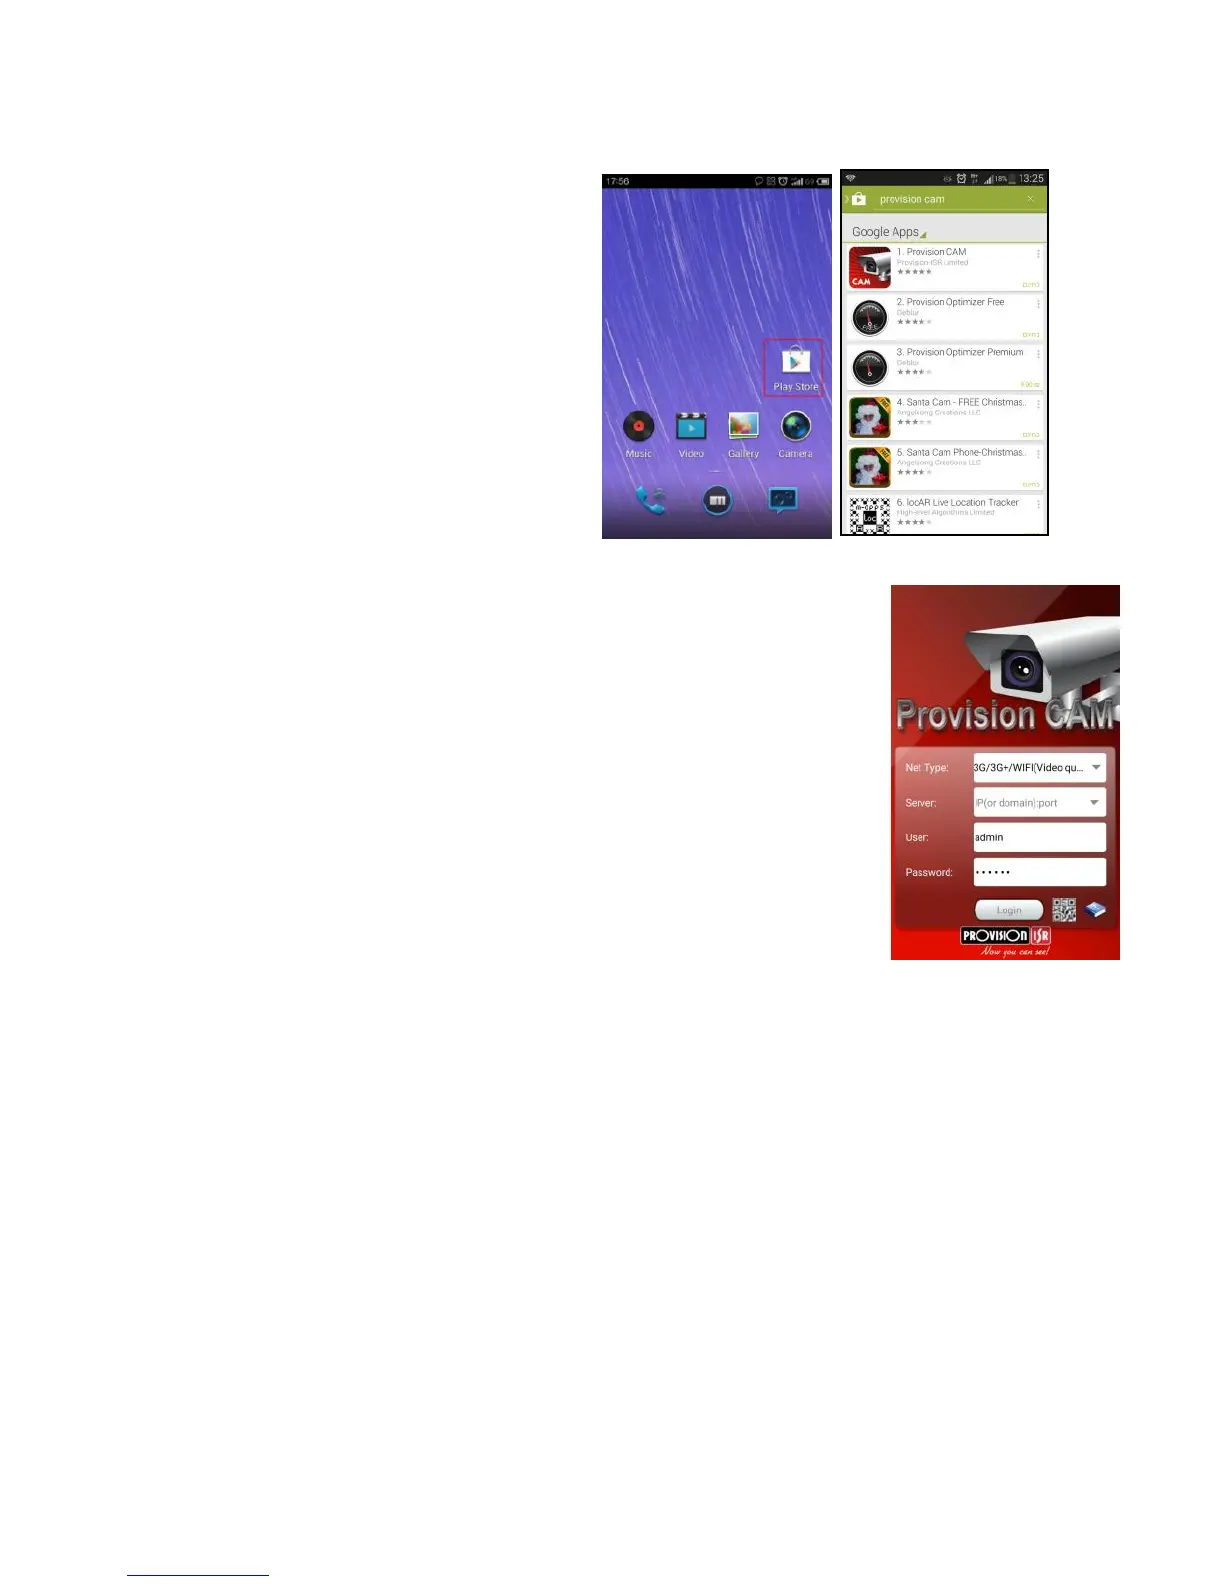
Step 1: Run “Play Store” (or Google market)
program.
Step 2: Search “Provision Cam”.
Step 3: Press “Install” button.
Step 4: Install the software subject to the
notes. Once the downloading is done, the
software will install automatically
Login Menu
Step 1: Choose network type. There are two network connection ways:
3G/3G +WIFI, well video quality. This network supports main stream and sub
stream. The real-time image will be displayed by using sub stream.
3G-, poor video quality contrast to the above mentioned network.
Step 2: Input server, account and password.
Server: Option 1 (available only if NAT P2P server is enabled, please refer to
section 5.6.4): Click on the small QR code icon in the bottom of the login screen
then Snap the QR code from the sticker on the DVR or from the DVR interface
(Menu Information QRCODE).
Server, Option 2: WAN IP address (or domain name) plus HTTP port of the
device. For example: 210.21.183:89 or 123.dvrdydns.com:89. Note: The default
http port of the device is 80. If this port is modified, please use the modified port.
Account and Password: The login account and password of the device. The default account is admin and
the default password is 123456.
Step 3: Click【Login】button to access the device.