5.2.5 Replacing the drive wheel, indoor/outdoor Puma 20
Preparation
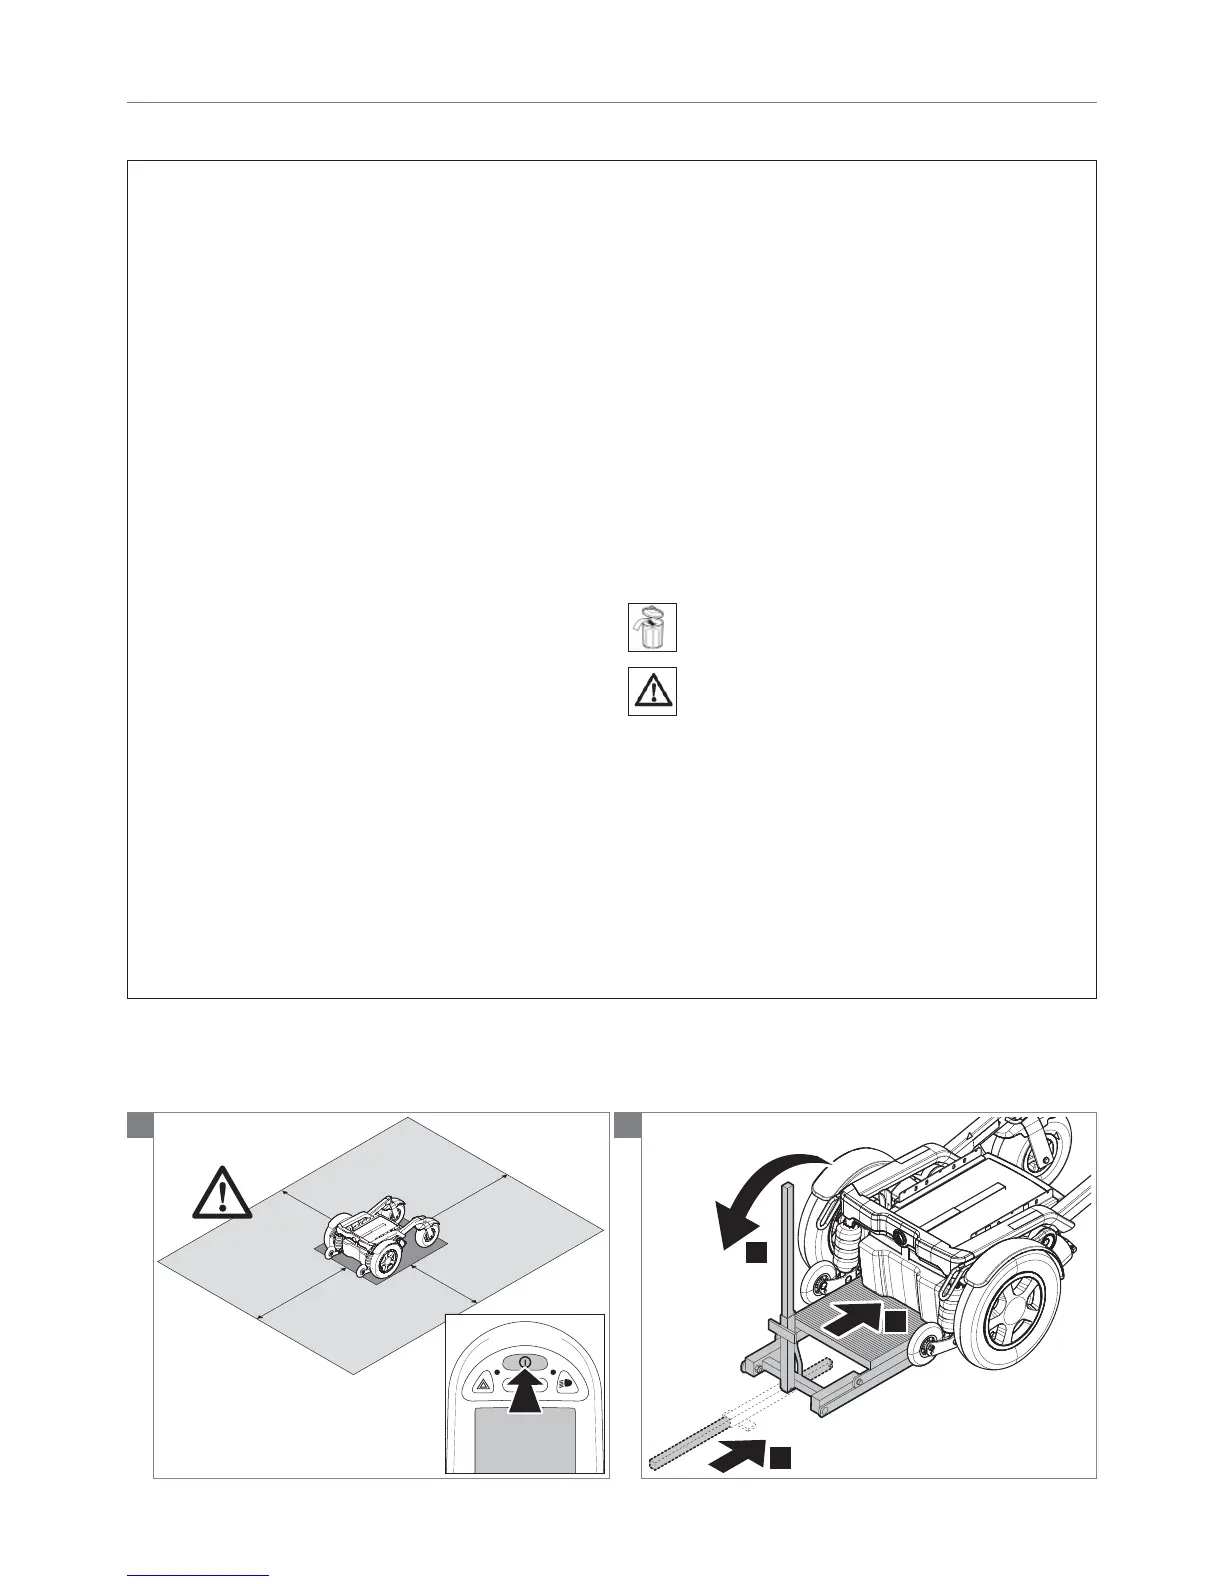
• Switch off the wheelchair via the remote control.
• Be sure that the freewheel switch is in ‘drive’ mode. If
the freewheel switch is in ‘push’ mode this will make
loosening the nuts impossible.
• Use a lifting device to raise the drive wheels clear of the
ground.
Instructions
• Remove the nut and the locking washer.
• Replace the (new) drive wheel.
• Apply Loctite 270 to motor shaft
• Screw the nut with washer on to the shaft.
• Check the tyre pressures.
Notice
Infl ate the tube to the correct pressure! (See ‘Technical
specifi cations’)
Relevant article numbers
9006792 Drive wheel mounting set, Puma 20
1017314 Drive wheel Indoor 12 1/2 x 2 1/4 (13"), grey air
1017958 Drive wheel Indoor 12 1/2 x 2 1/4 (13"), grey air, set
1017315 Drive wheel Indoor 12 1/2 x 2 1/4 (13"), grey
punctureproof
1017959 Drive wheel Indoor 12 1/2 x 2 1/4 (13"), grey
punctureproof, set
1017312 Drive wheel outdoor 3.00x8 (14"), grey air
1017956 Drive wheel outdoor 3.00x8 (14"), grey air, set
1017313 Drive wheel outdoor 3.00x8 (14"), grey
punctureproof
1017957 Drive wheel outdoor 3.00x8 (14"), grey
punctureproof, set
Tools used
• Lifting device
• Torque wrench, socket, 17 mm
• Loctite 270
Icons
Parts need to be replaced. Dispose of waste parts in
accordance with local regulations
Note! Be aware of the issue!
1
min.
100 cm
min.
100 cm
min.
75 cm
min.
75 cm
OFF
Note! Suitable work area required!
2
3
1
2
Service instructions | 65
Puma 20/40/60
Service instructions | 65