18 19
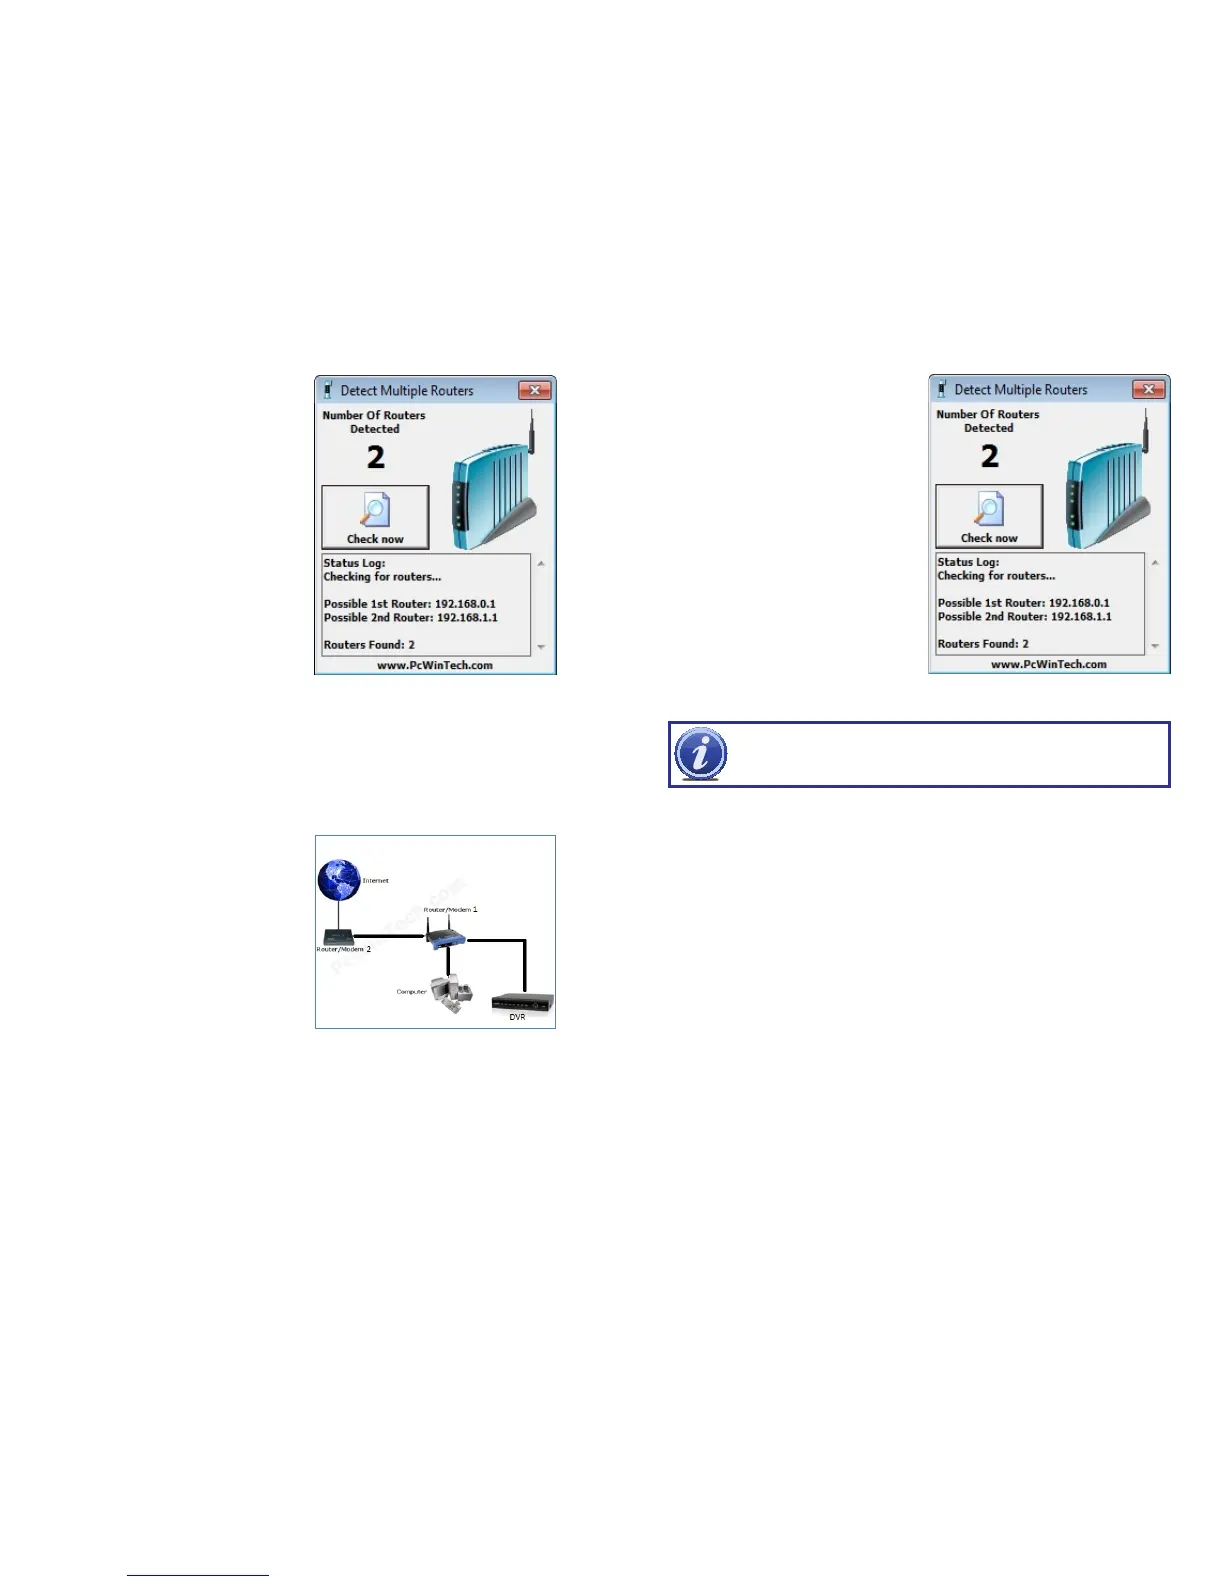
STEP 5. Click on CHECK NOW to
detect how many Routers are in the
network.
PICTURE 1-19
PICTURE 1-20
STEP 6. If there is only one router detected, and you are using UPnP, then you will need
to turn off UPnP in the DVR by opening the COMM menu in the Advance window
and disable it in the UPnP tab. Attempt to connect using DMZ as described in
Section 1.2 Opening Ports.
If you are using DMZ, check to make sure that the UPnP option is turned off.
If Multiple Routers are Detected
If there are multiple routers, you will see a
display similar to Picture 1-20.
If so, it may be preferable to connect your
DVR and computer to the router that
connects directly to the Internet. However,
this is not always possible depending upon
your particular situation.
In this case, you will need to proceed with the next section and set up DMZ in the second
router to allow communications to pass through it from the first. If only one router is detected
you will need to consult your router’s manual.
SETTING UP DMZ IN ROUTER 2
STEP 1. Login into Router 1 by putting
the IP of Router 1 into the Internet
Explorer browser, as in the example
shown in Picture 1-21 where the IP
address of Router 1 is 192.168.0.1
STEP 2. Find the status page on the
router settings that shows the WAN/
Internet IP address and write it down
this WAN IP address.
STEP 3. Log into the Router 2 by putting
the IP of Router 2 into the Internet
Explorer browser, as in example
shown in Picture 1-21 where the IP
address of Router 2 is 192.168.1.1
STEP 4. Find the DMZ page in the
router settings.
STEP 5. Enter the WAN IP for Router 1
into the DMZ page and enable DMZ.
NOTE! If you do not have a DMZ setting in the router, check to see if there
is a Bridge setting. If so, then use the Bridge setting instead of DMZ.
PICTURE 1-21
STEP 6. Save your changes.
You have forwarded the ports on the router to which the DVR is connected, to the IP address
of the DVR, and set the primary router to pass the connection to this router.
 Loading...